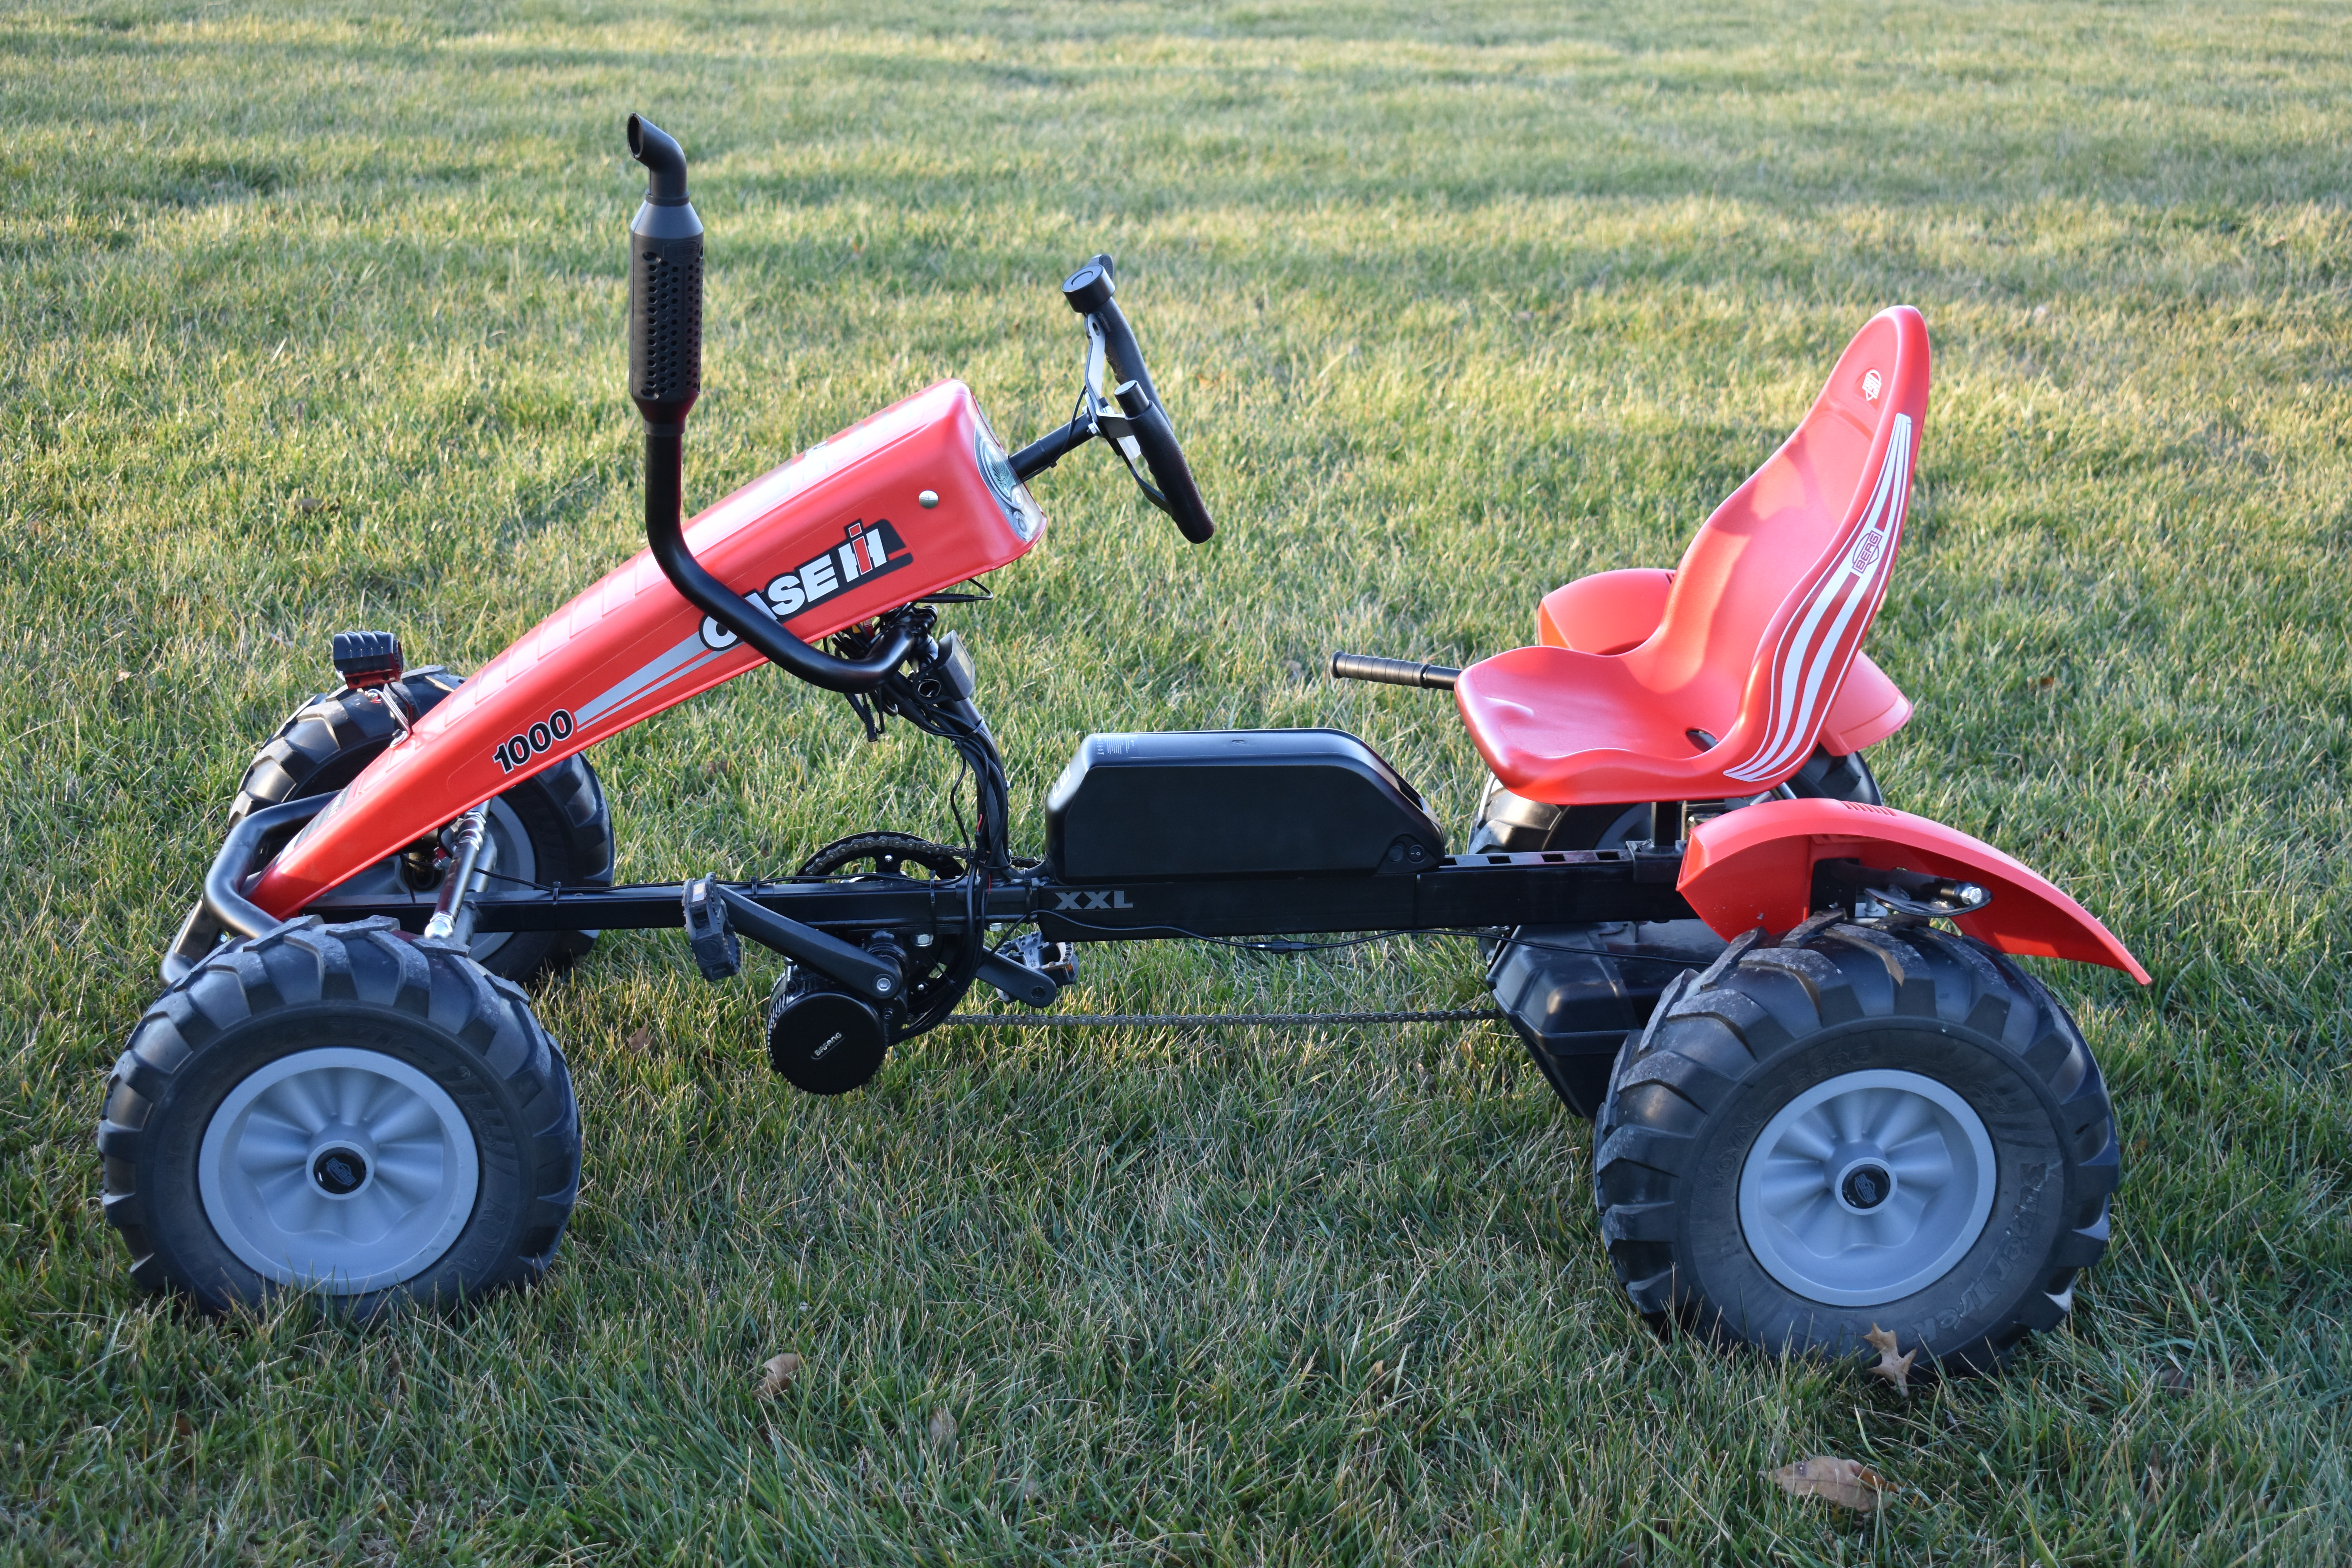
A little over a year ago, I was looking into options for modifying an existing Berg pedal tractor to have an electric motor as a Christmas gift to our kids. We had previously purchased these large pedal tractors (that even adults can use), but wanted to renew the interest with the kids by making it a powered go-kart. These pedal tractors are fun, but take a significant amount of energy pedaling uphills or anywhere off-road. The manufacturer offers similar models now that have an electric powertrain, so I was hoping I could just buy parts and swap them into these existing tractors. To find out, I submitted the following question to their customer support:
I would like to modify our existing Berg Case IH (XXL) and our Berg New Holland pedal tractors to have electric power train (E-BFR). Is it possible to order the parts to update existing pedal tractors? If so, what options are there?
Here was their response:
Thanks for contacting us regarding changing your XXL to an E-BFR. Unfortunately, due to several differences in frames, including holes for wires and integrated parts, we do not offer this conversion as an option. I have heard from customers that there are several third party options for powering pedal karts via various online marketplaces. This may be an option if you intend to add power to your kart.
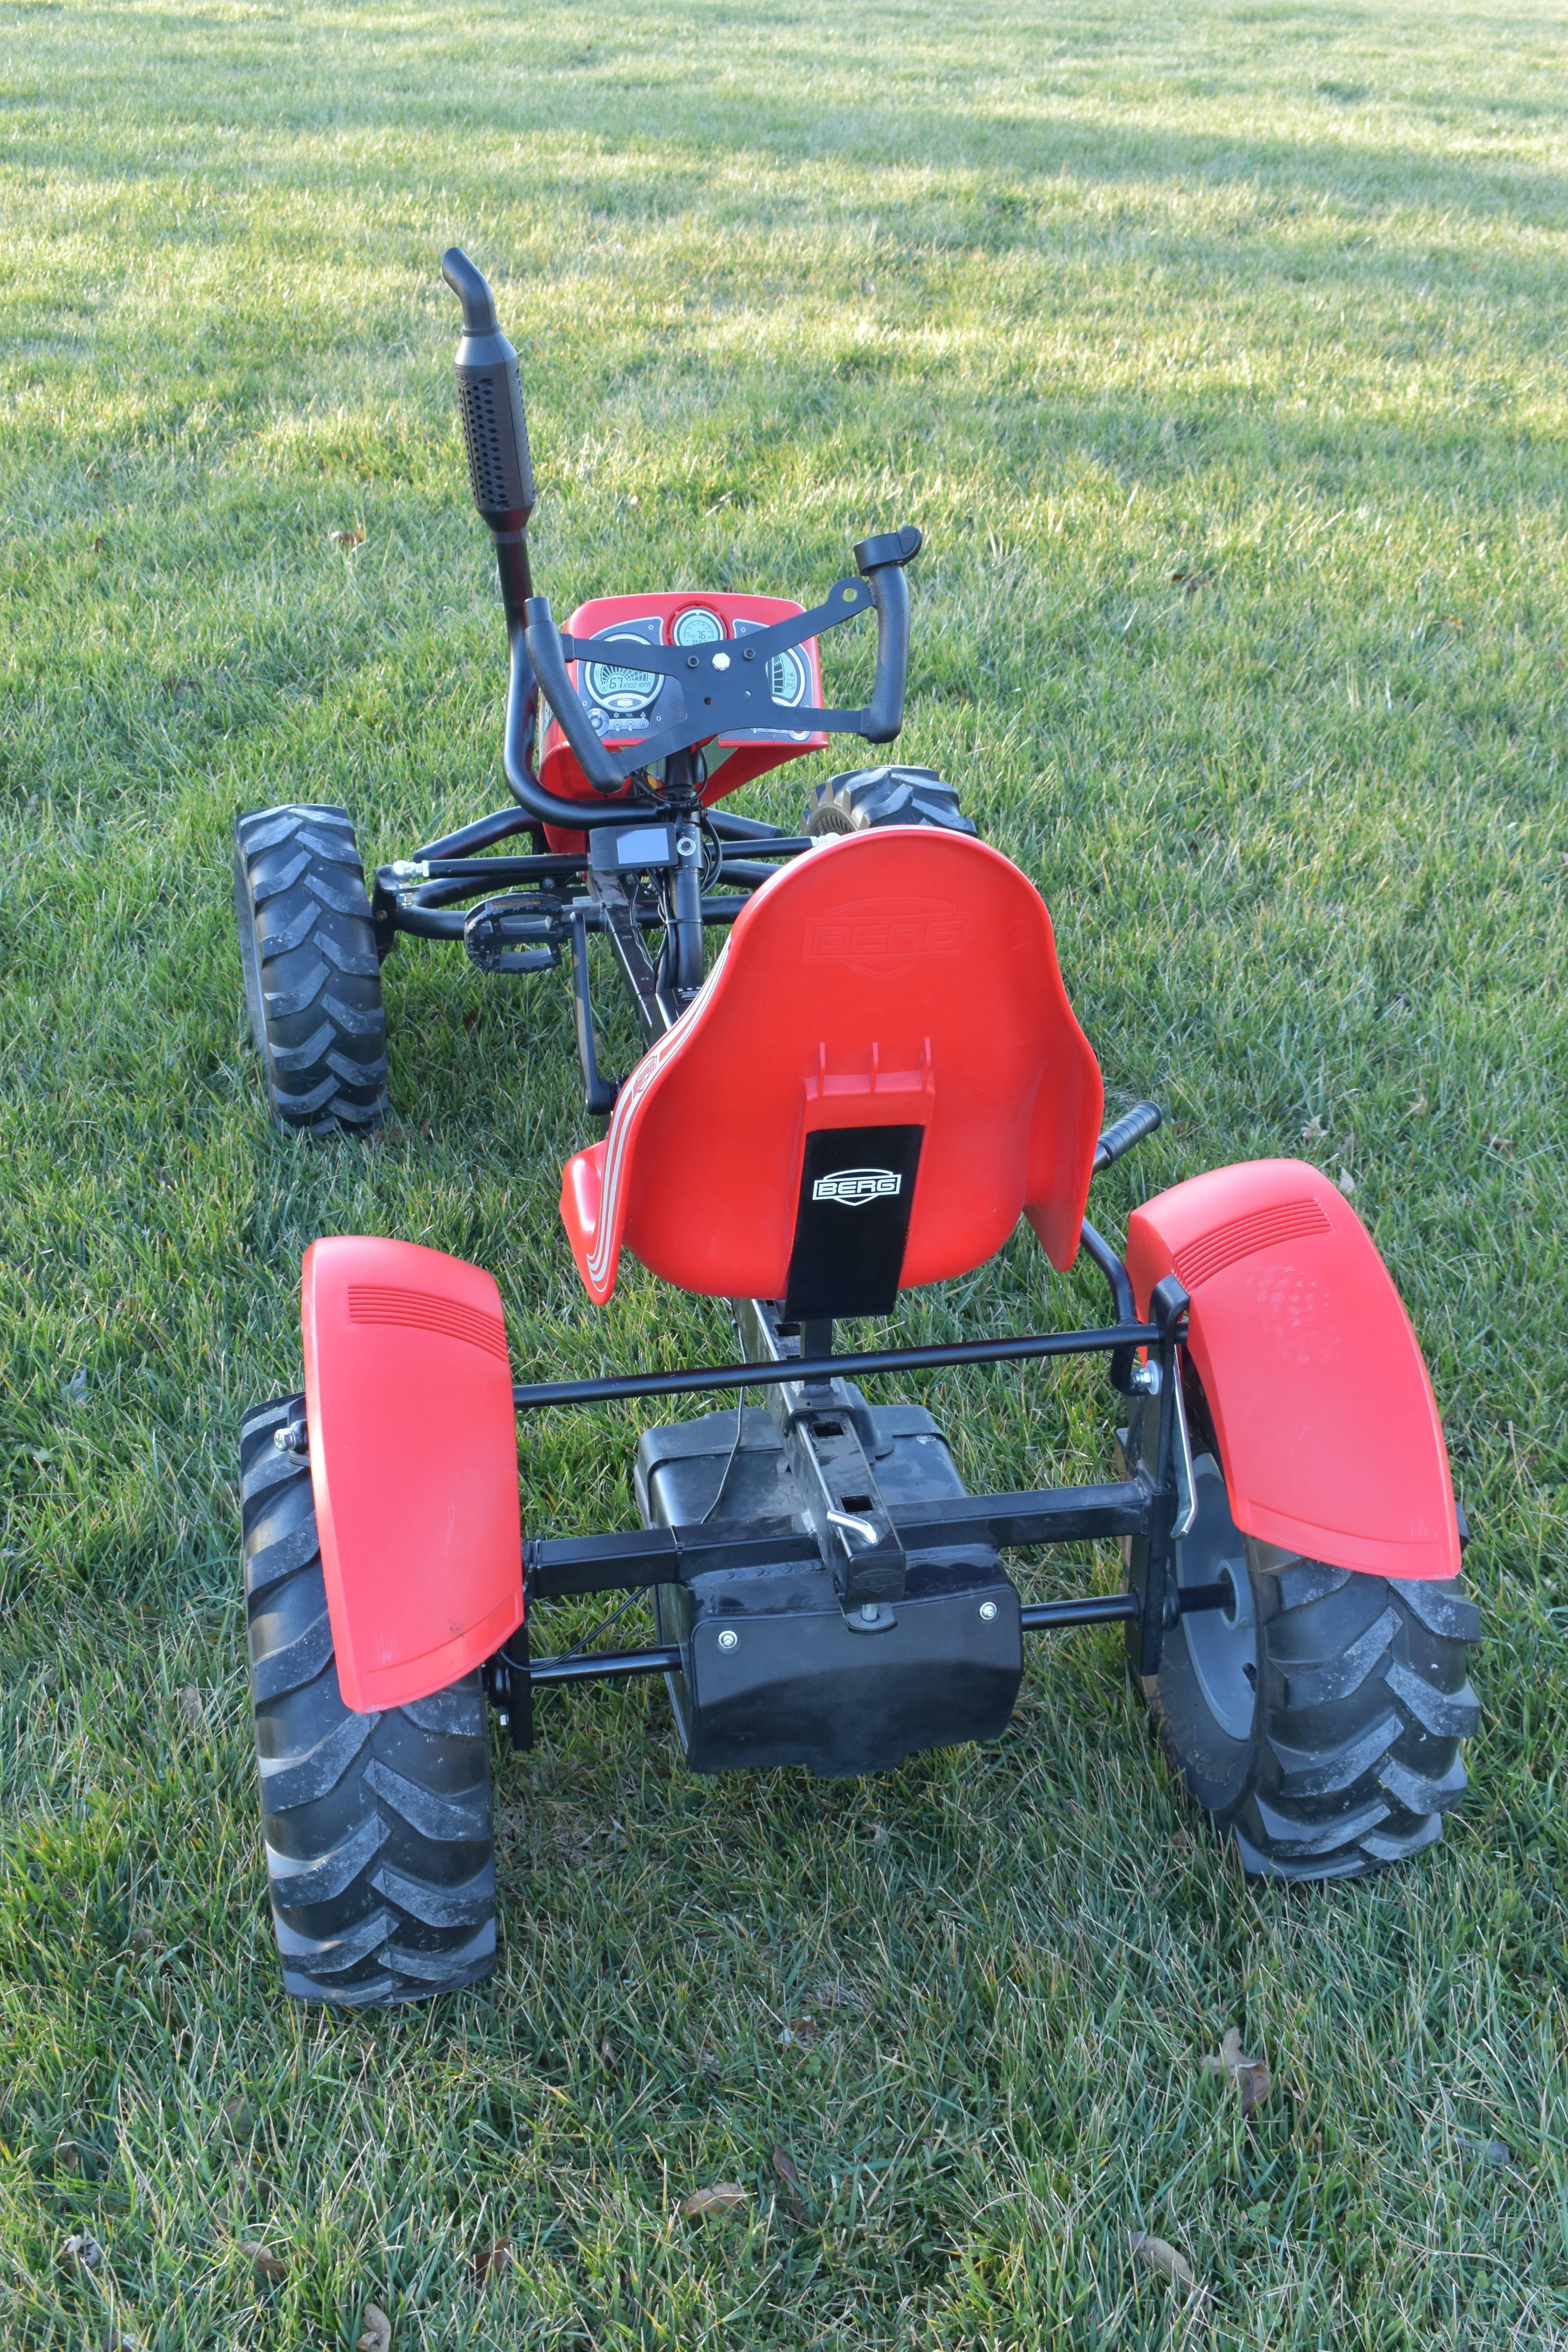
I followed up to see what specific examples they found of existing Berg tractor owners doing these modifications; however, I couldn’t find a simple clean example of it being done (specifically for a Berg tractor model I was looking at). Some of what I found were more invasive, and didn’t really list out what all changes they made to feel like I had a proven plan before getting into it. Therefore, I decided to start working through it, designing it as I went with the thought it wouldn’t be too complex. I took photos while I stepped through it with the hope that I could document how I did it, thinking I may do more than one (as we had two tractors of this size to try). After working through all the changes and doing a few early tests, it seemed like it would work well and hold up to some heavy usage. This thought was reinforced after a year of using it, where it has held up well to some rough driving. We live out in a rural area, and have routinely driven it off-road, through snow, and up and down hills on our gravel lane. It handles it all - though snow has some unique challenges with a single powered, rear-wheel drive, which is fun for donuts! :)
If you are a Berg tractor owner and are looking for a fun upgrade, I highly suggest this. This makes a unique go-kart that adults and kids can use. With the motor that I used, it has a ton of power, and I haven’t had any issues with breaking chains or other components as a result. By it being electric, it greatly simplifies the experience of others starting it on their own. I had briefly thought about building a gas powered go-kart, and quickly thought of all the common issues of an engine not starting easily (e.g. old gas, moisture in the tank), where it would just hinder the kids from starting and going on their own.
Below are the notes on how I did this project. If you are a Berg pedal tractor owner that is looking for a fun way to change a pedal tractor, this is for you.
The Powertrain#
At first glance of a Berg pedal tractor, it appears to be standard bike components. This made me think the easiest option would be to use a mid-drive bicycle electric motor that mounts right into the bottom bracket for the crank. I wanted to make sure I got a motor that could put out some torque, so I got a Bafang BBS02 48V 750W eBike motor. Looks like you can still get this motor online, but has since been replaced by the manufacturer with their M615 model (or with slightly smaller M315 model).
Removing the Chainguard#
The Berg tractors have chain guards that totally enclose the chain and crank. While this can be nice to keep it clean and safer for use, this does have to be removed to do this work. There are just a couple of bolts you have to remove to take this off (top and bottom on the guard).
While you could customize this guard and still make it work, I didn’t bother. You need to build a new bracket to hold the guard, and with the motor installed on the underbody, you have to trim out the plastic guard. I would hold onto these, but you more than likely these won’t be used again.
Pulling the Crank#
Removing the crank is the same with a bicycle. If you bought the Bafang eBike motor, it comes with a crank puller that you can use to take out the crank. This step wasn’t difficult and you get directions as well with the Bafang on to remove it.
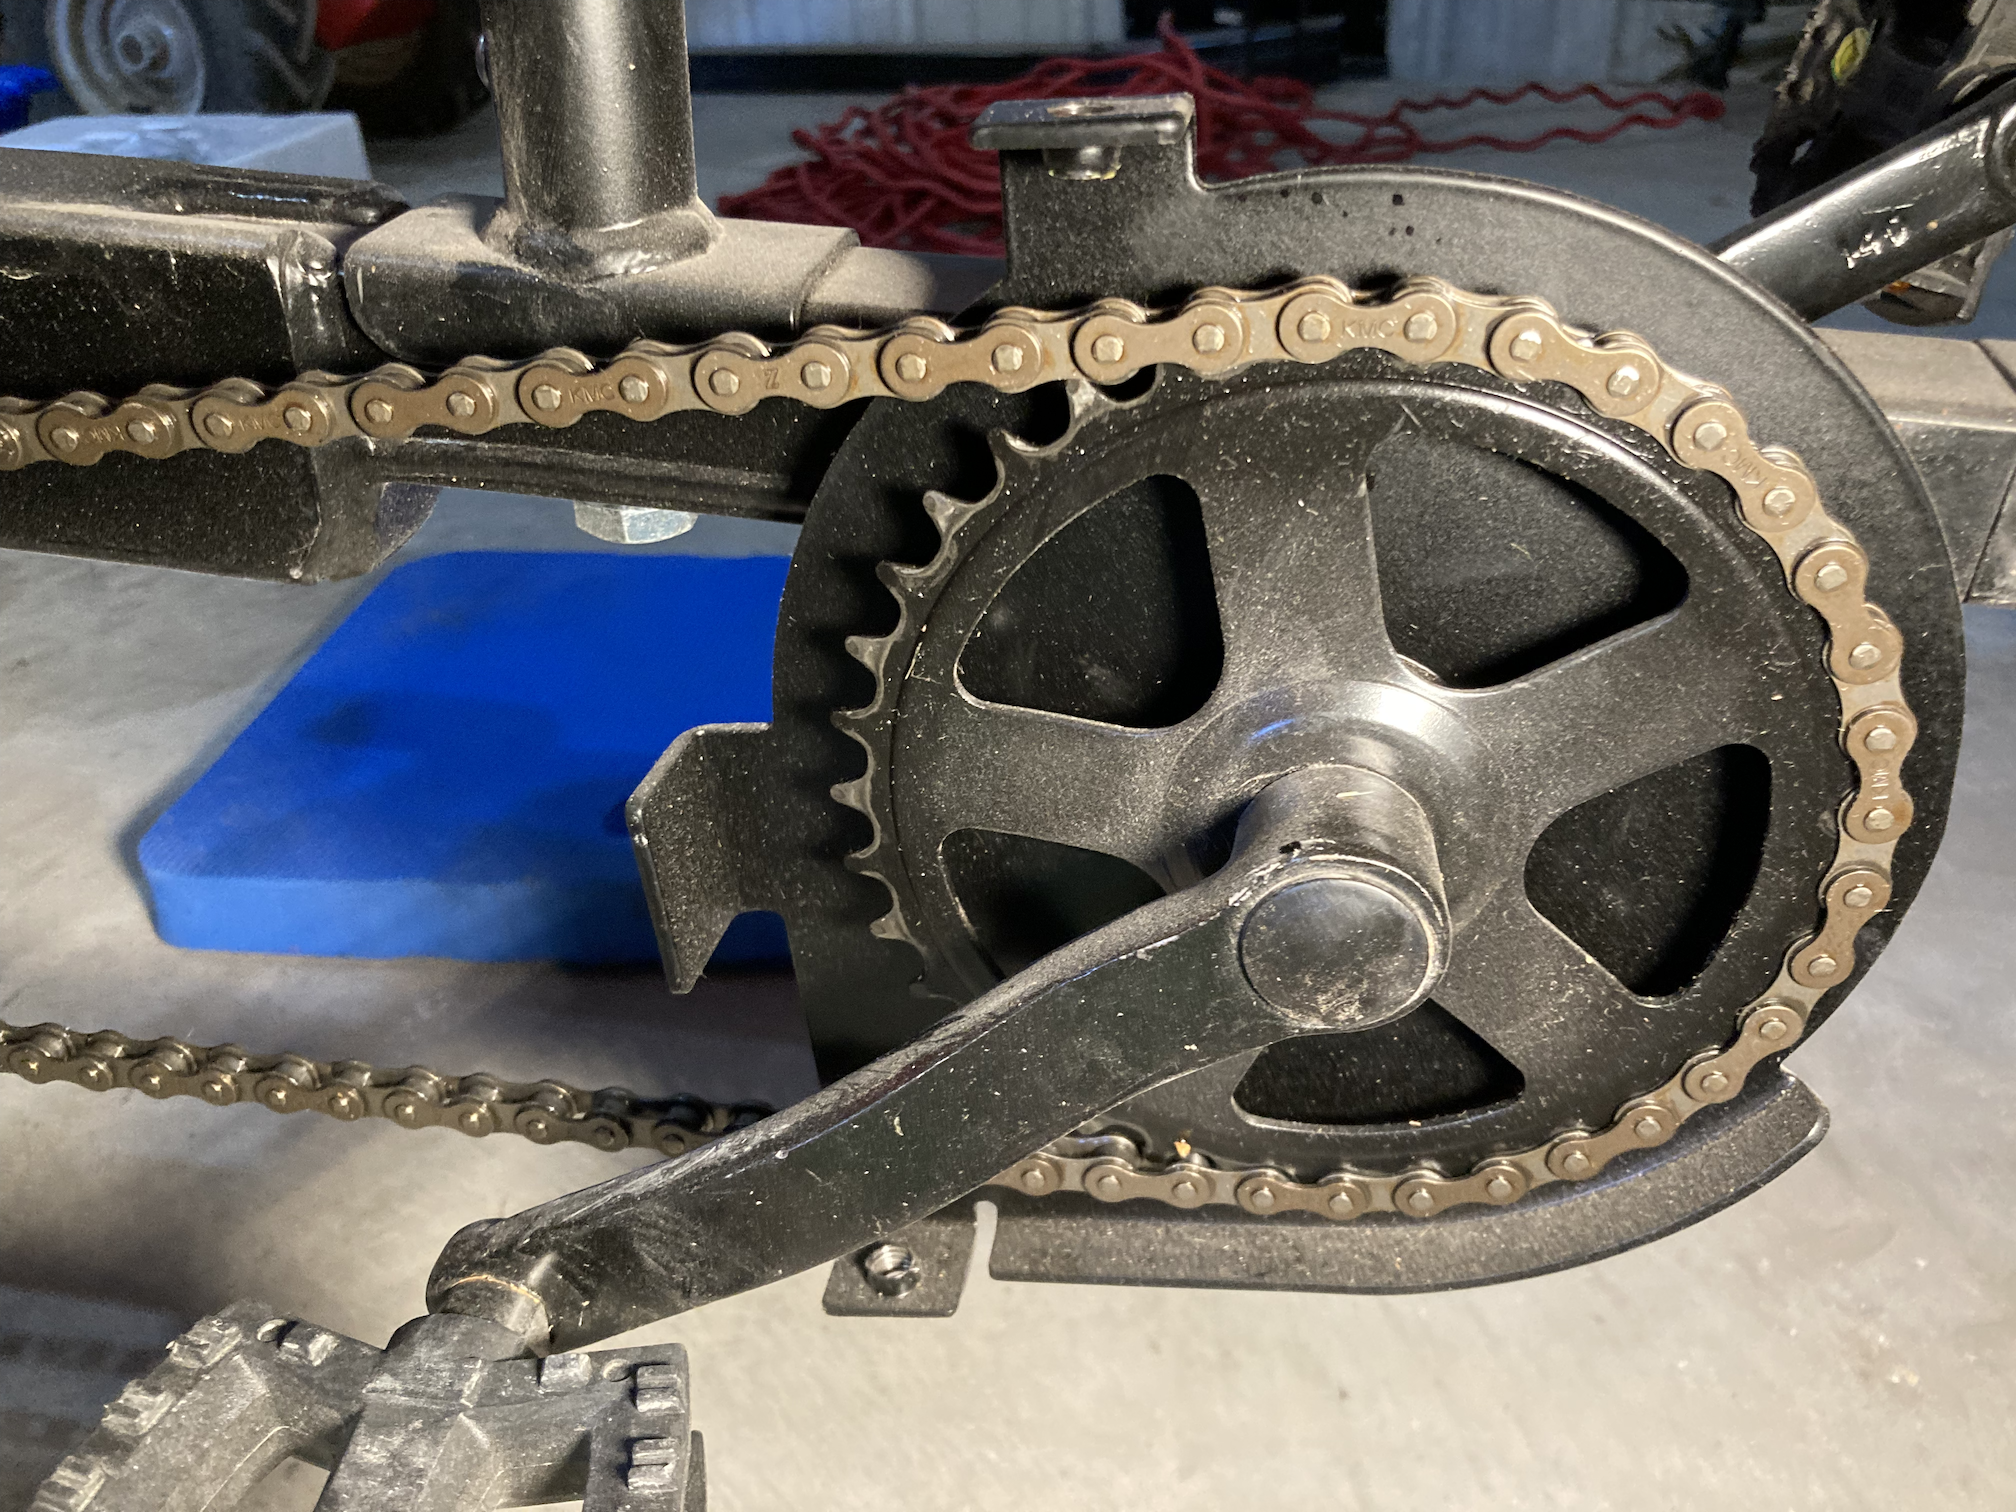
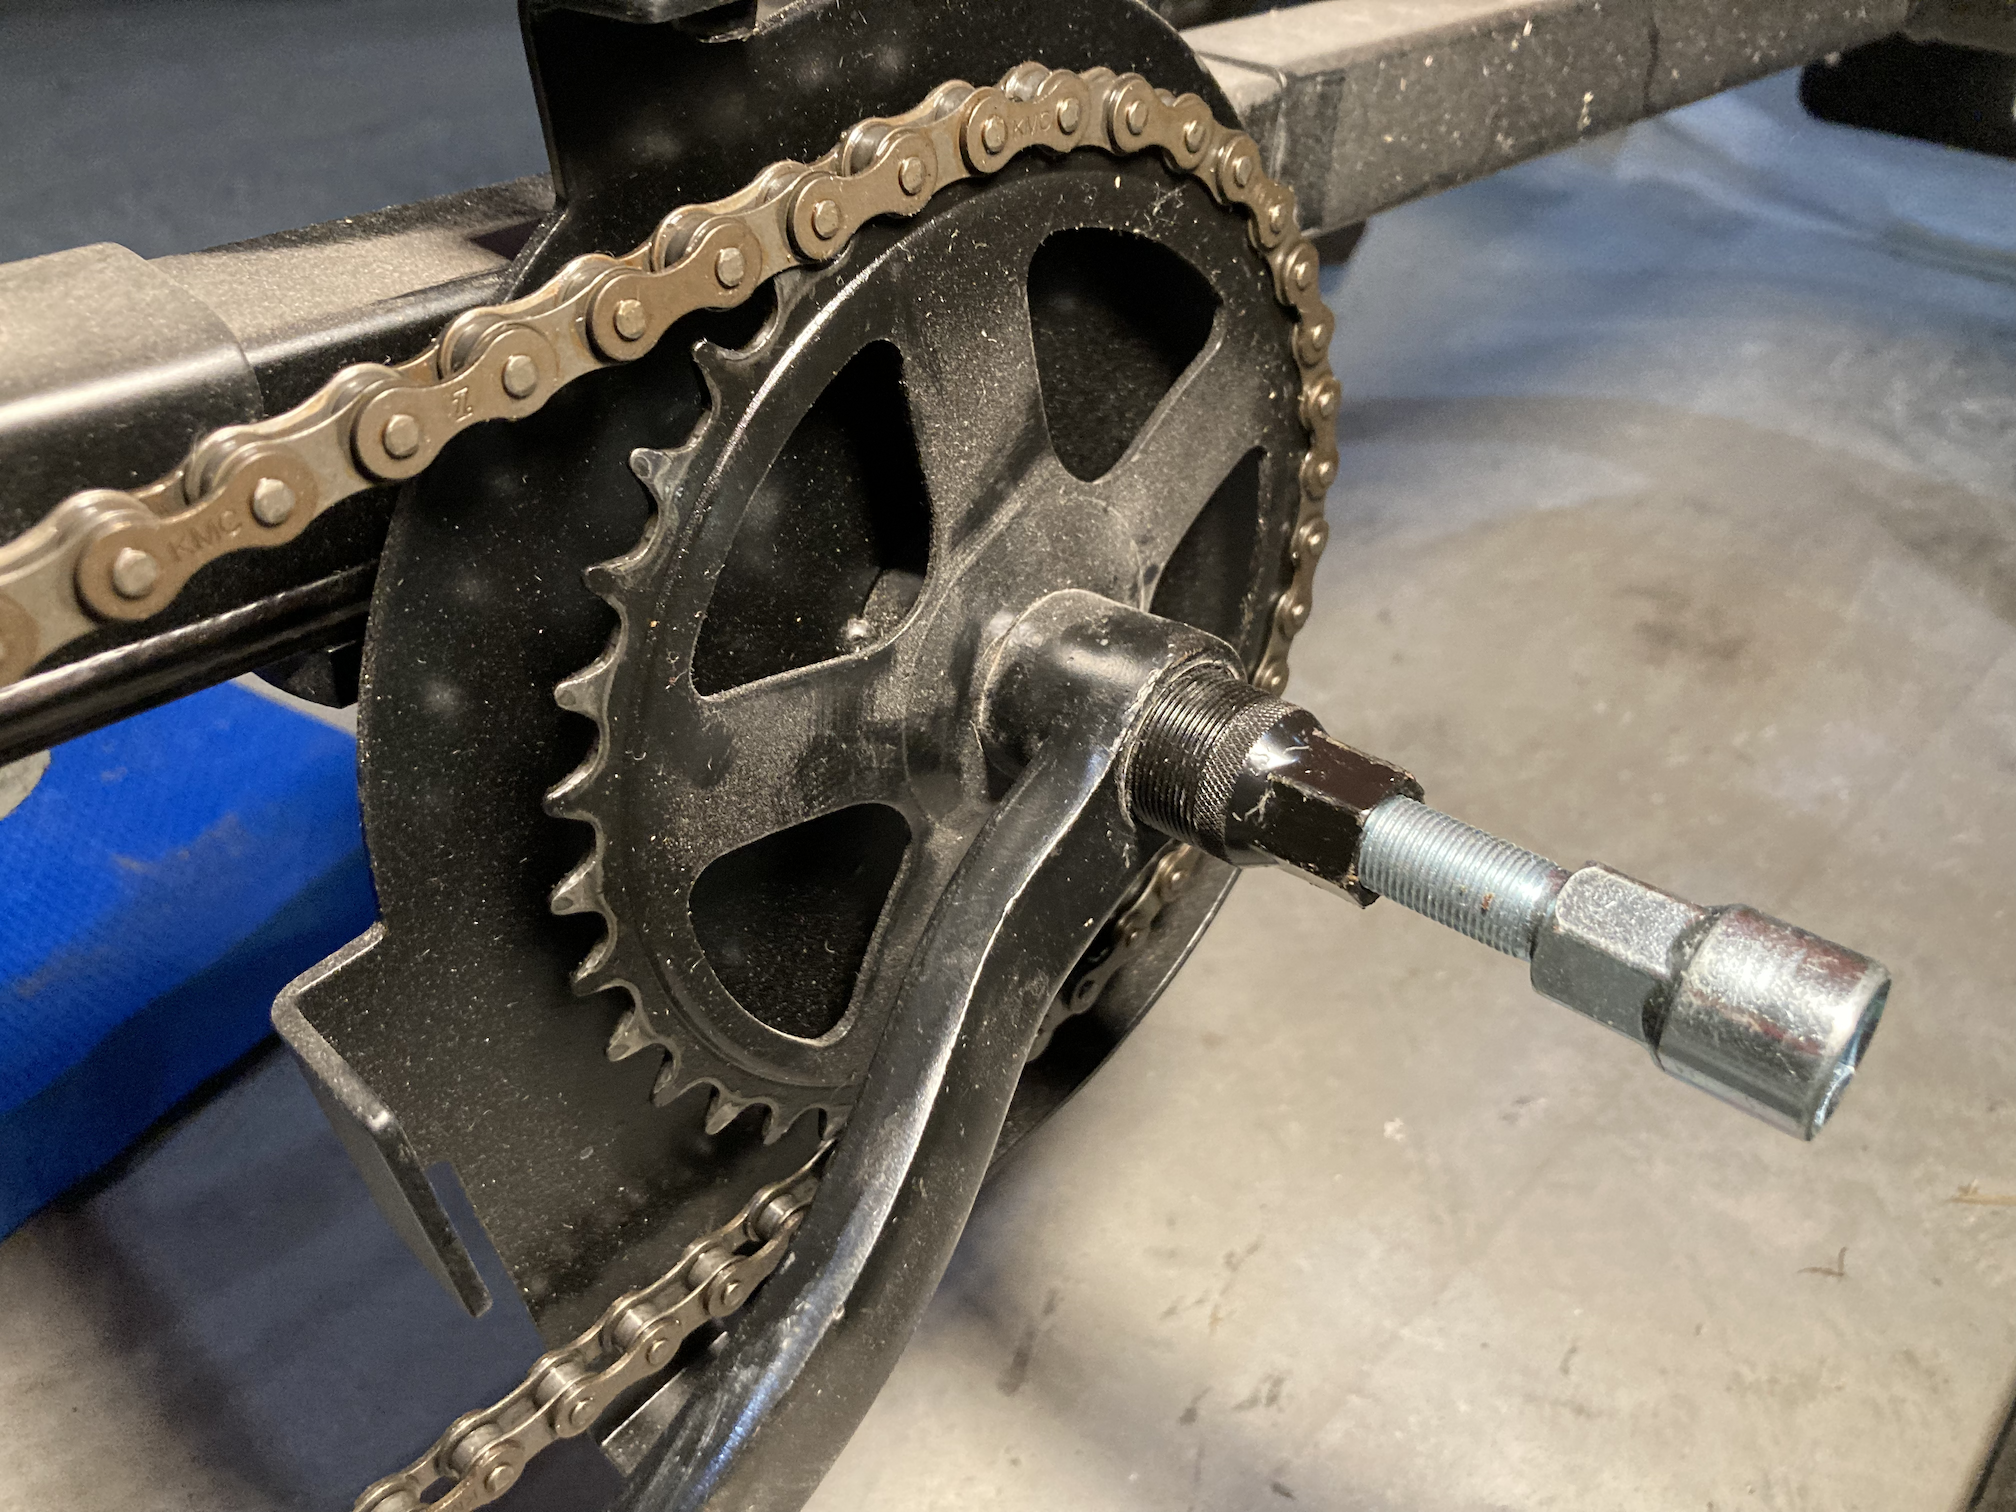
After I removed the crank and looked closer to the bottom bracket size, I noticed how this wasn’t a standard size (at least not what I was expecting). The Bafang eBike motor was sized for a typical bottom bracket size with an inner diameter of 33.5 - 36 mm, and length range of 68 - 73 mm. I wanted to use the motor that I had, and also realized that if I standardized the components, it could provide future options if I wanted to change it.
Building a Bottom Bracket Mount#
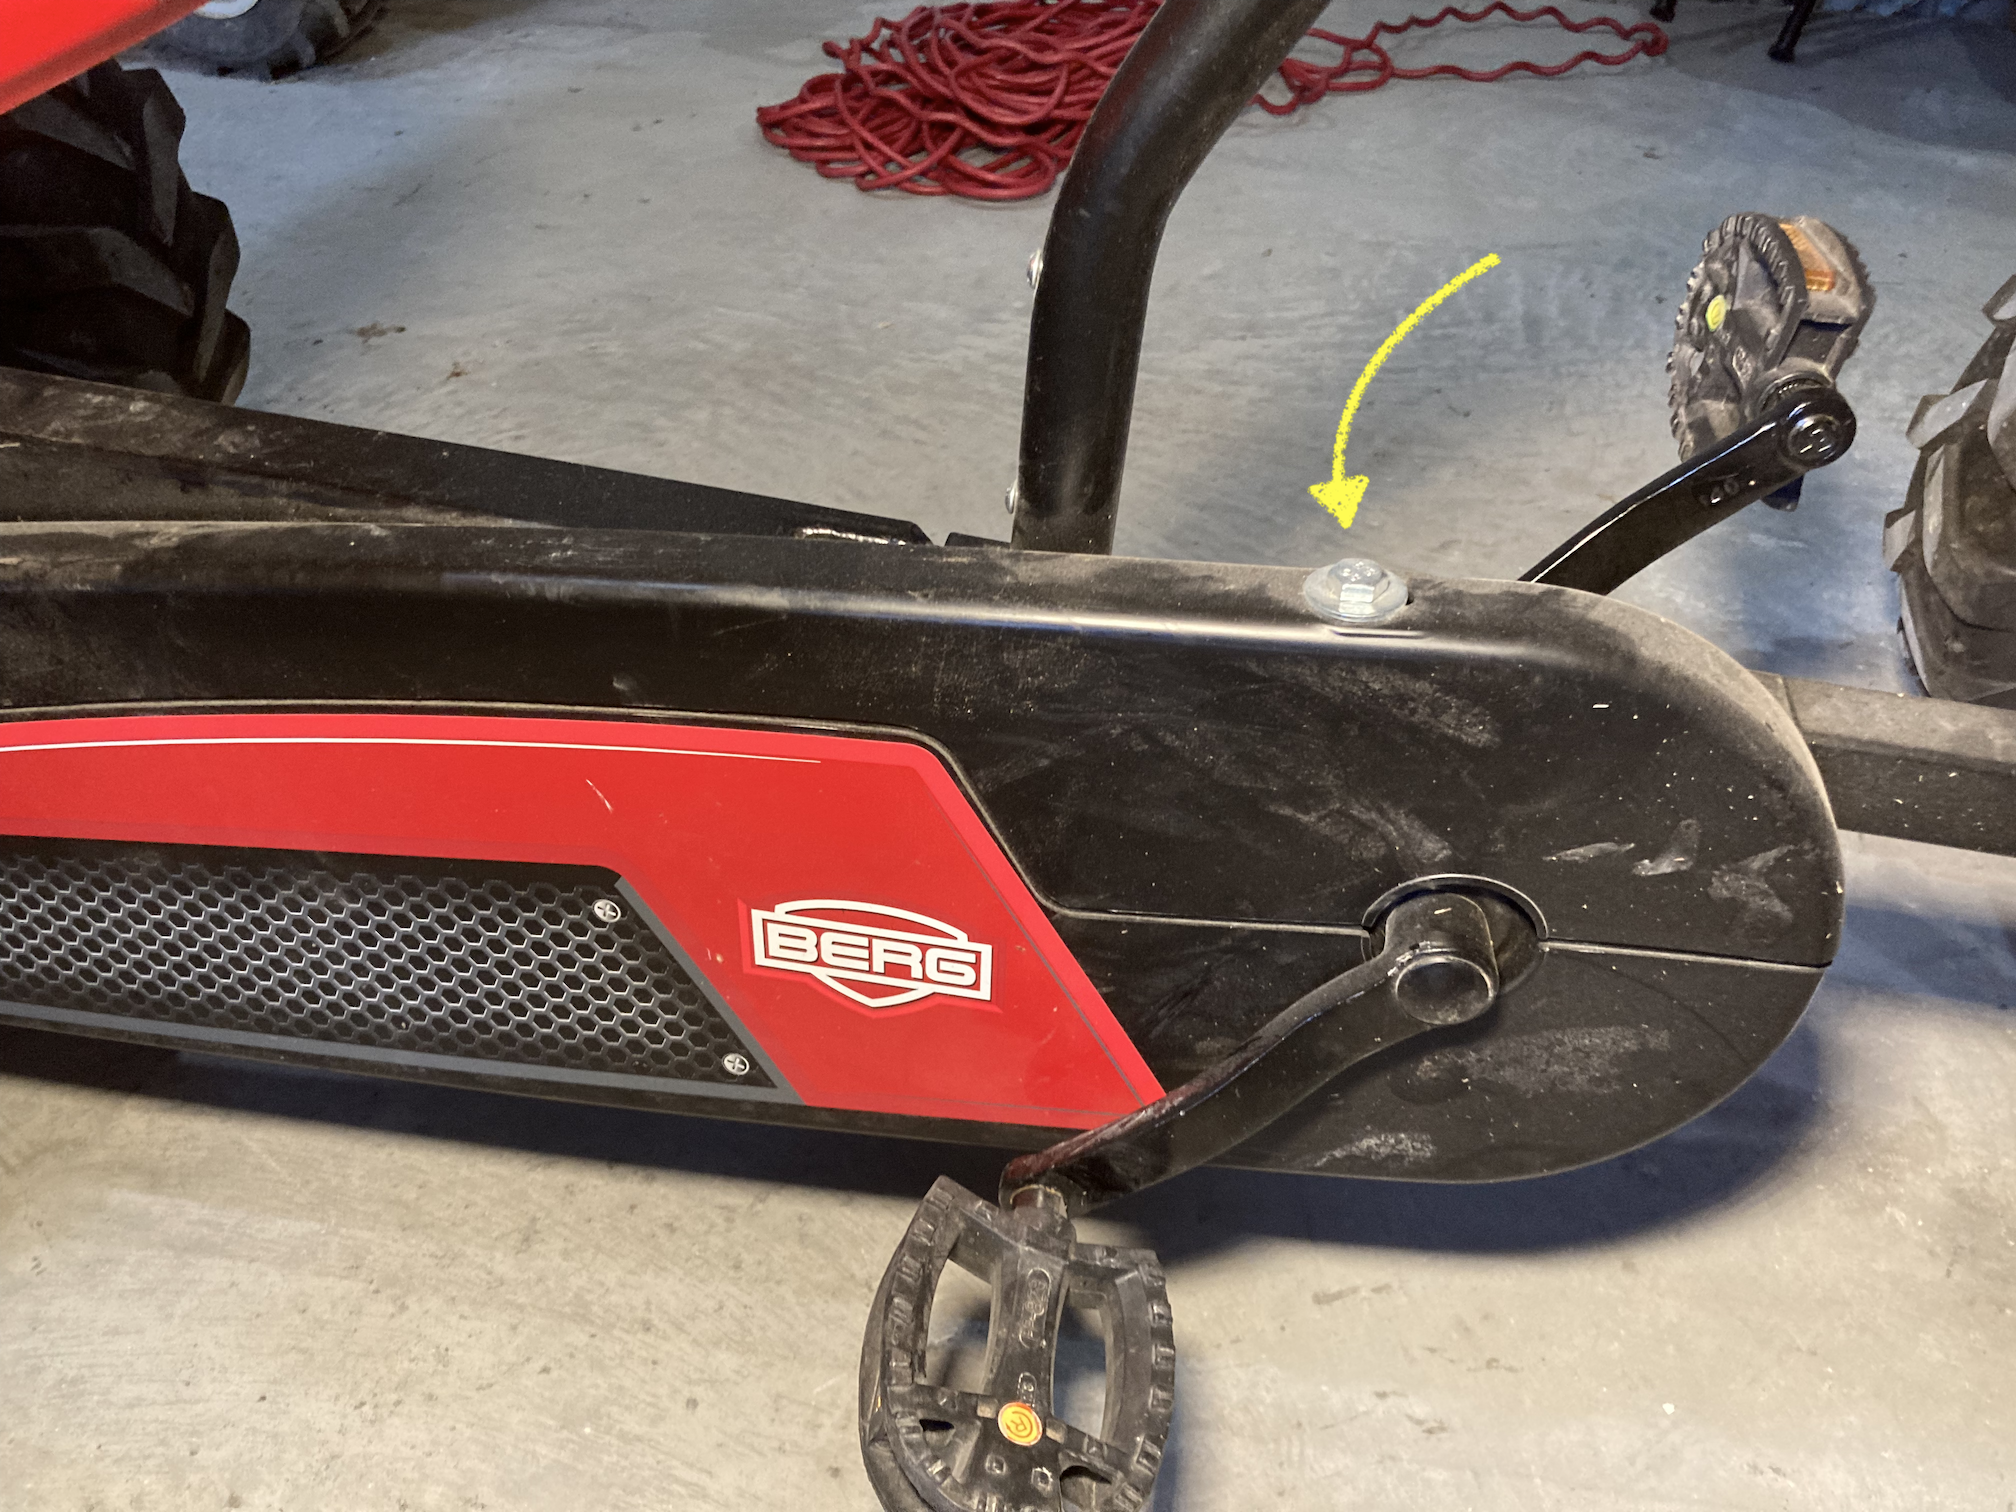
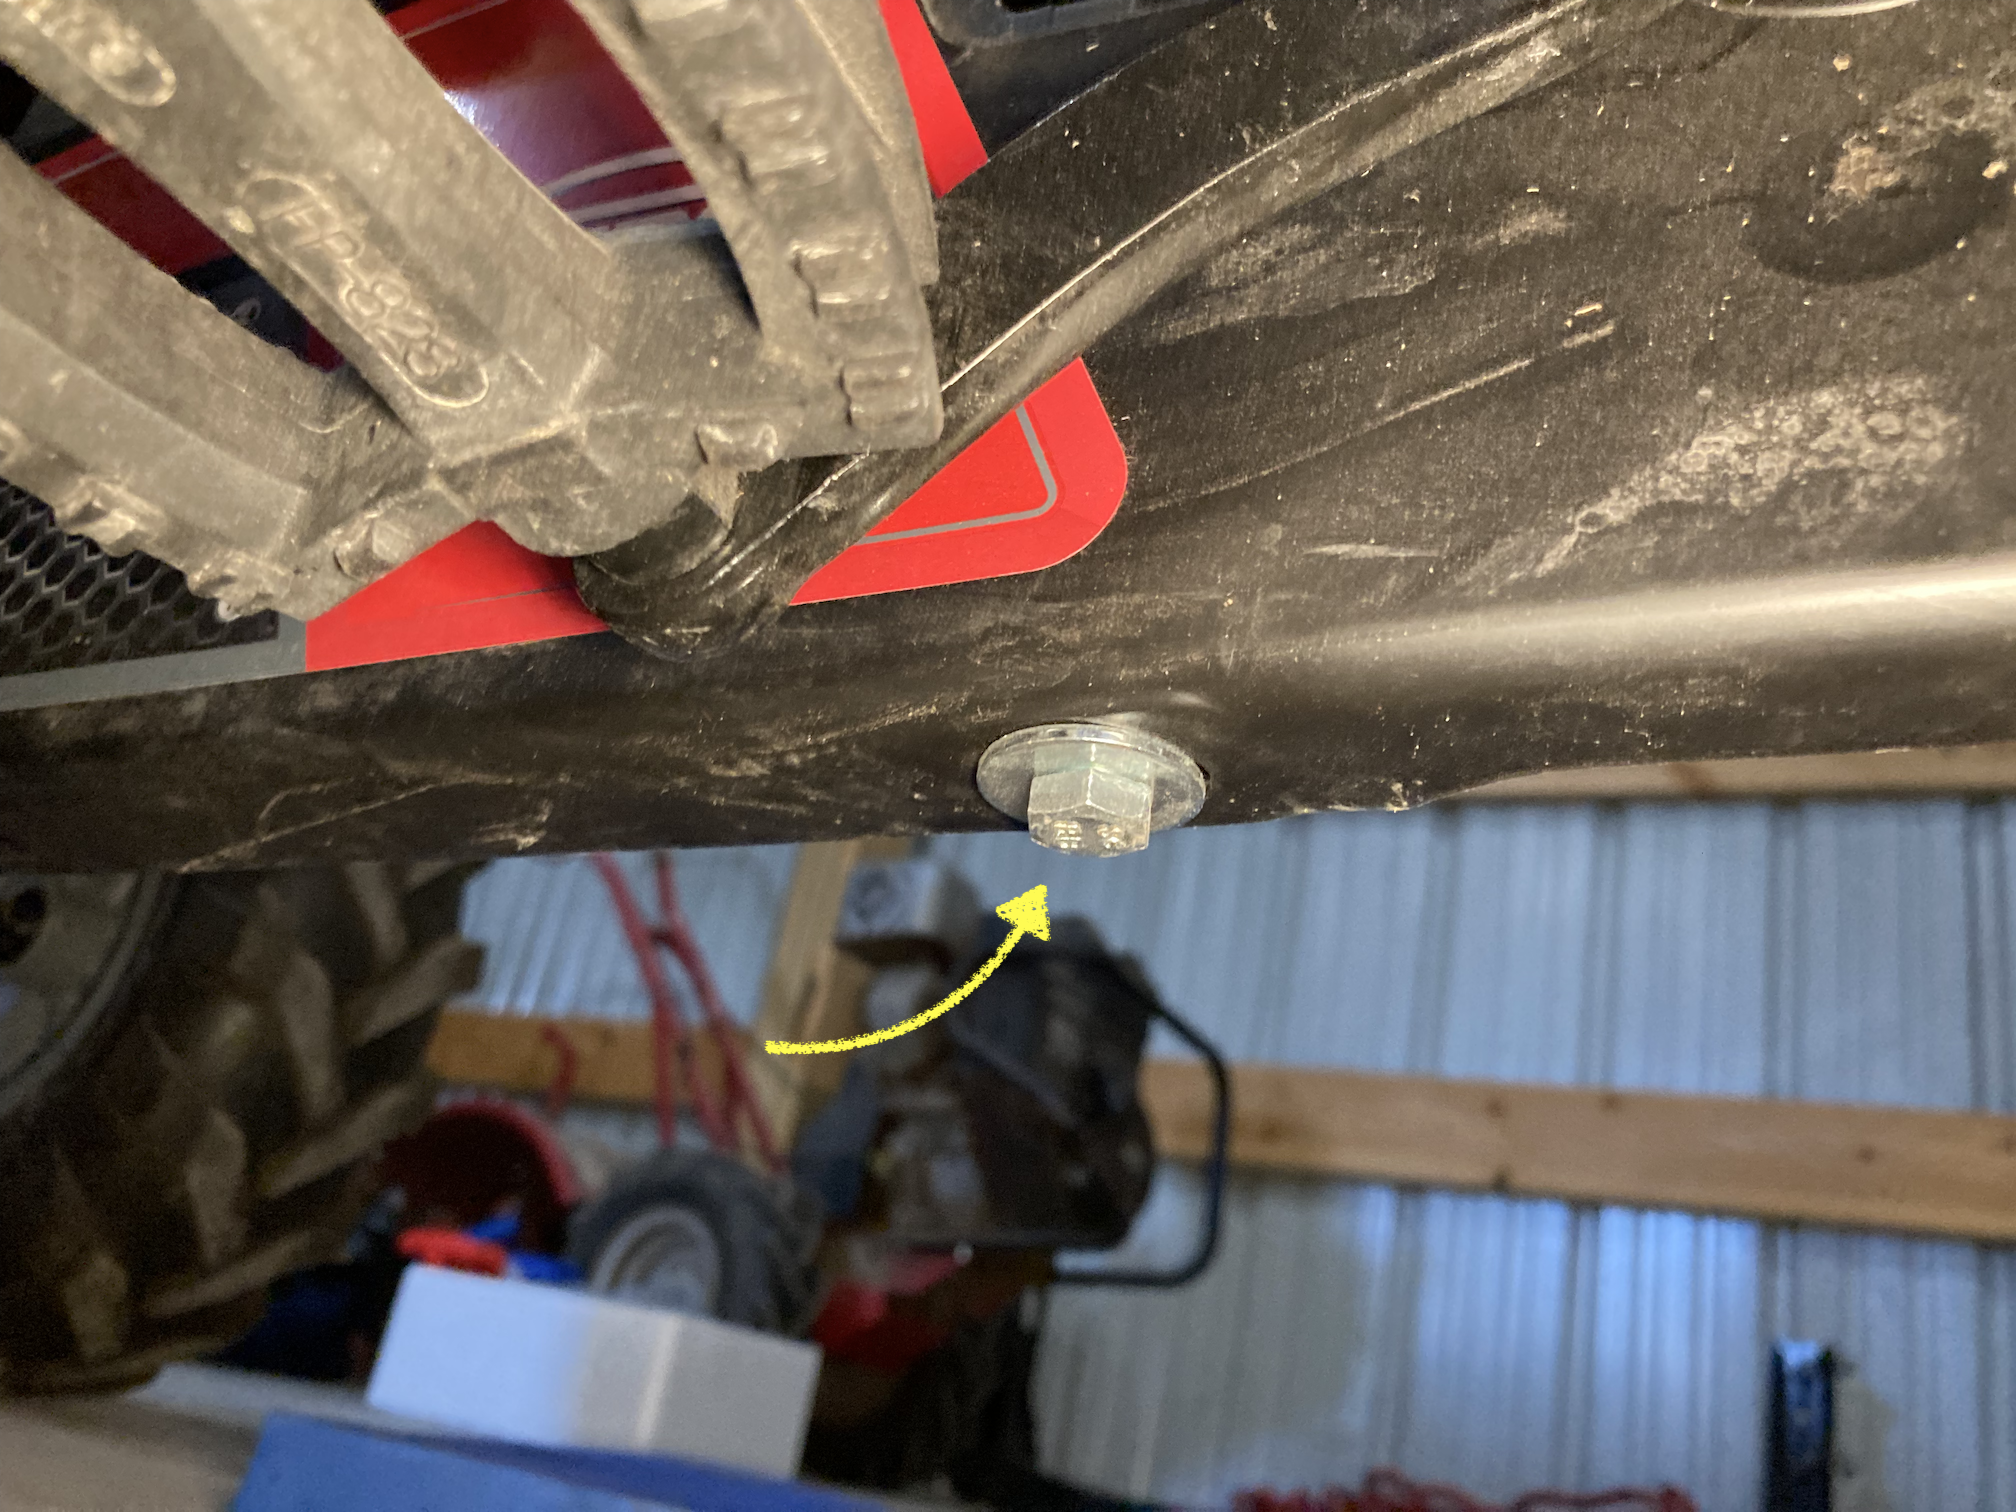
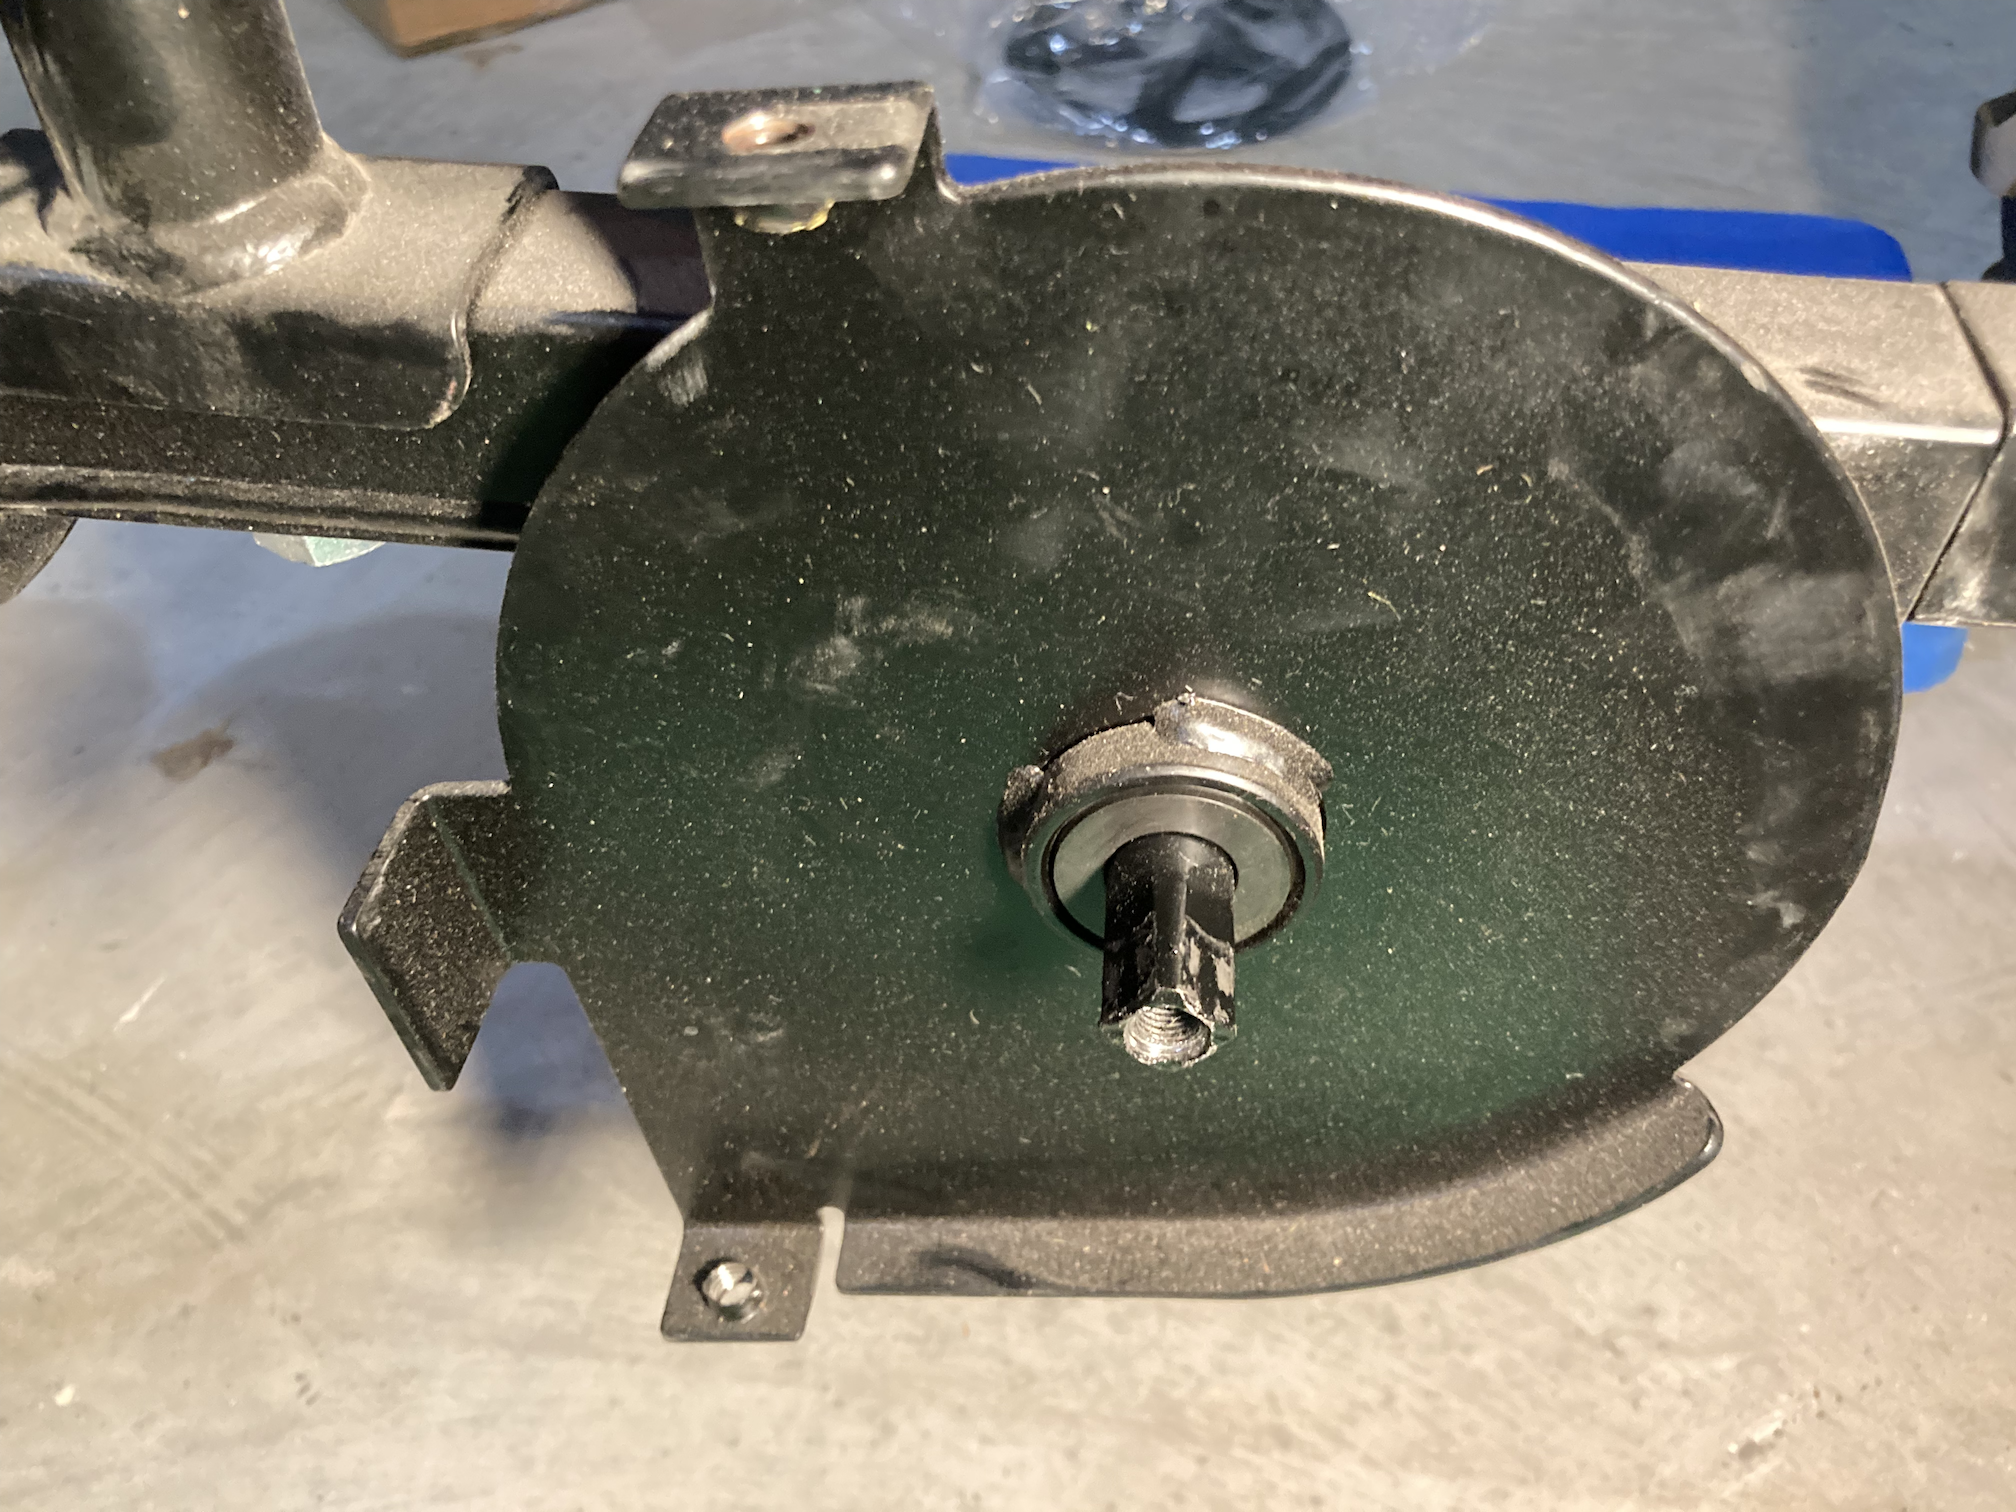
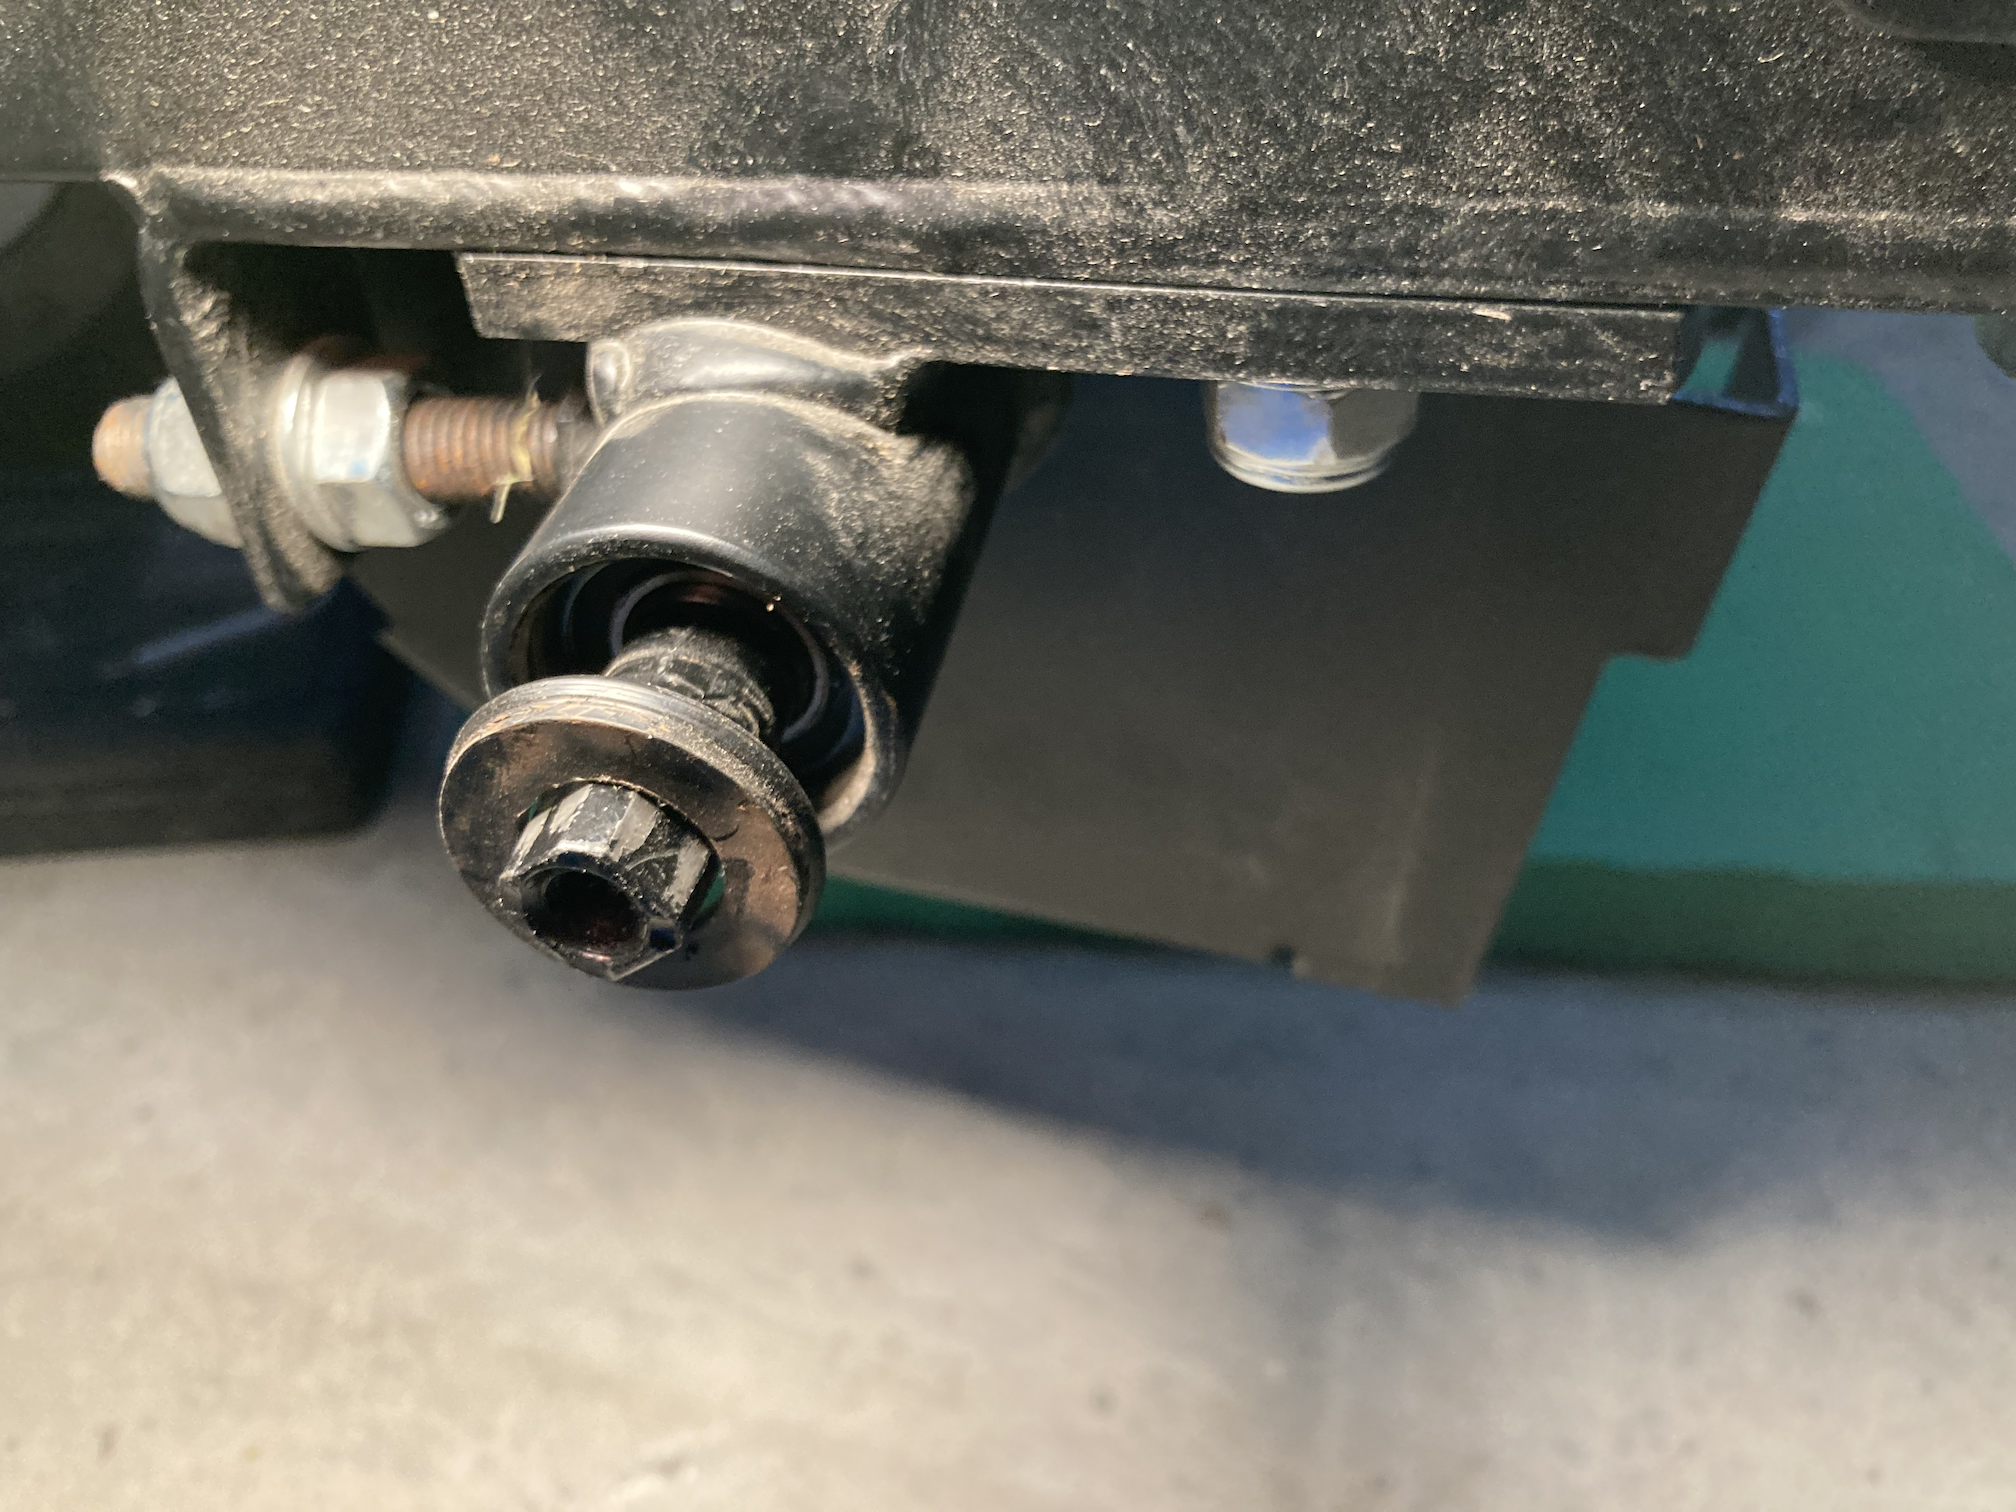
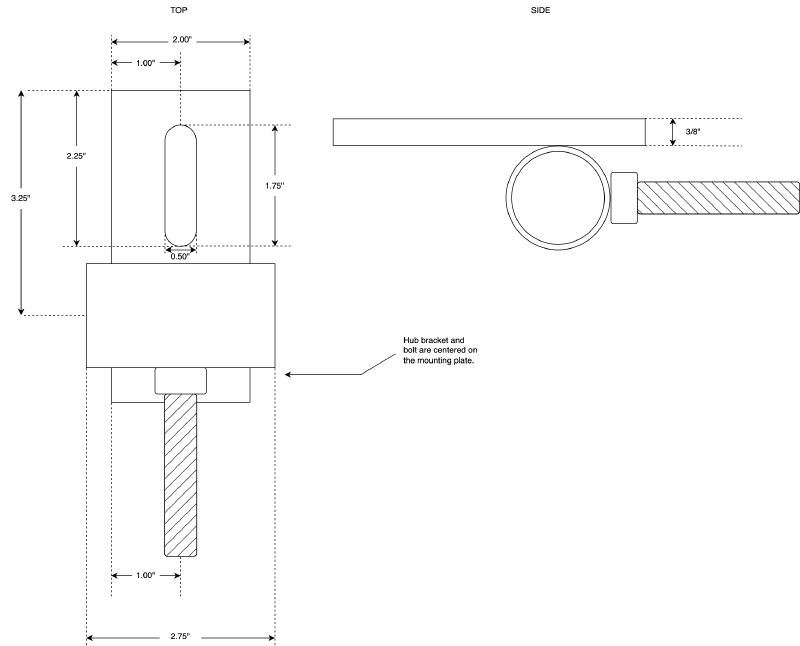
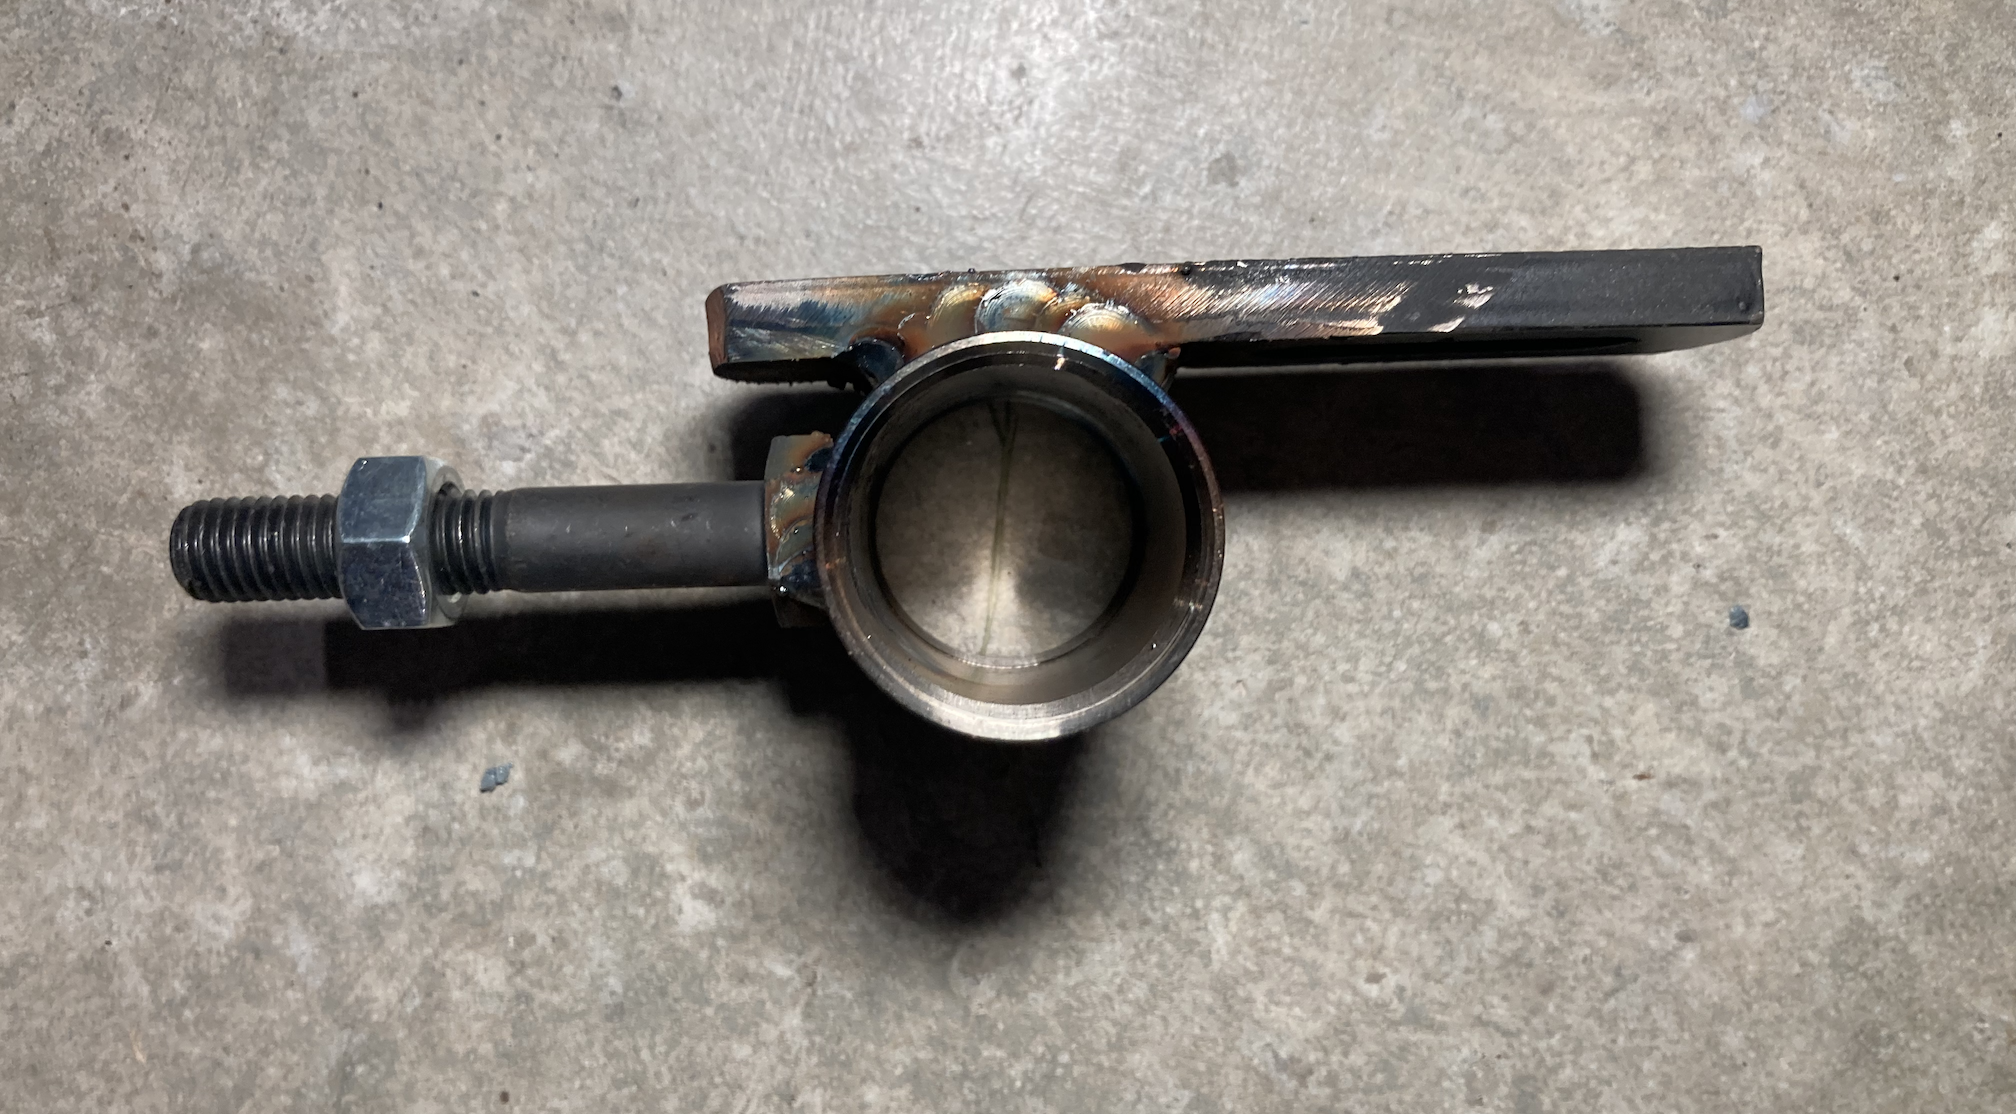
I went ahead and ordered a steel bottom bracket shell (from Framebuilders Supply) with the thought that I would make a new bracket mount. The current bottom bracket shell was just mounted on a steel plate, that had a slot to adjust the crank with the tension on the chain, and a bolt welded to it perpendicular to the bottom bracket shell so it can be fastened to the frame to keep it straight when your are pedaling hard on the crank. I went ahead and built a diagram on the bottom bracket mount, with the thought that I could machine another steel plate with a slot, to weld the bottom bracket shell that I ordered. I could then have a bolt welded on to secure the bracket from twisting left or right once it is positioned.
When I took the components to get welded together at a local shop, he suggested just using an acetylene torch to remove the mounting plate from the original bottom bracket, so I could then weld that on. This worked well, and avoided having to get the plate machined for the 1/2” slot.
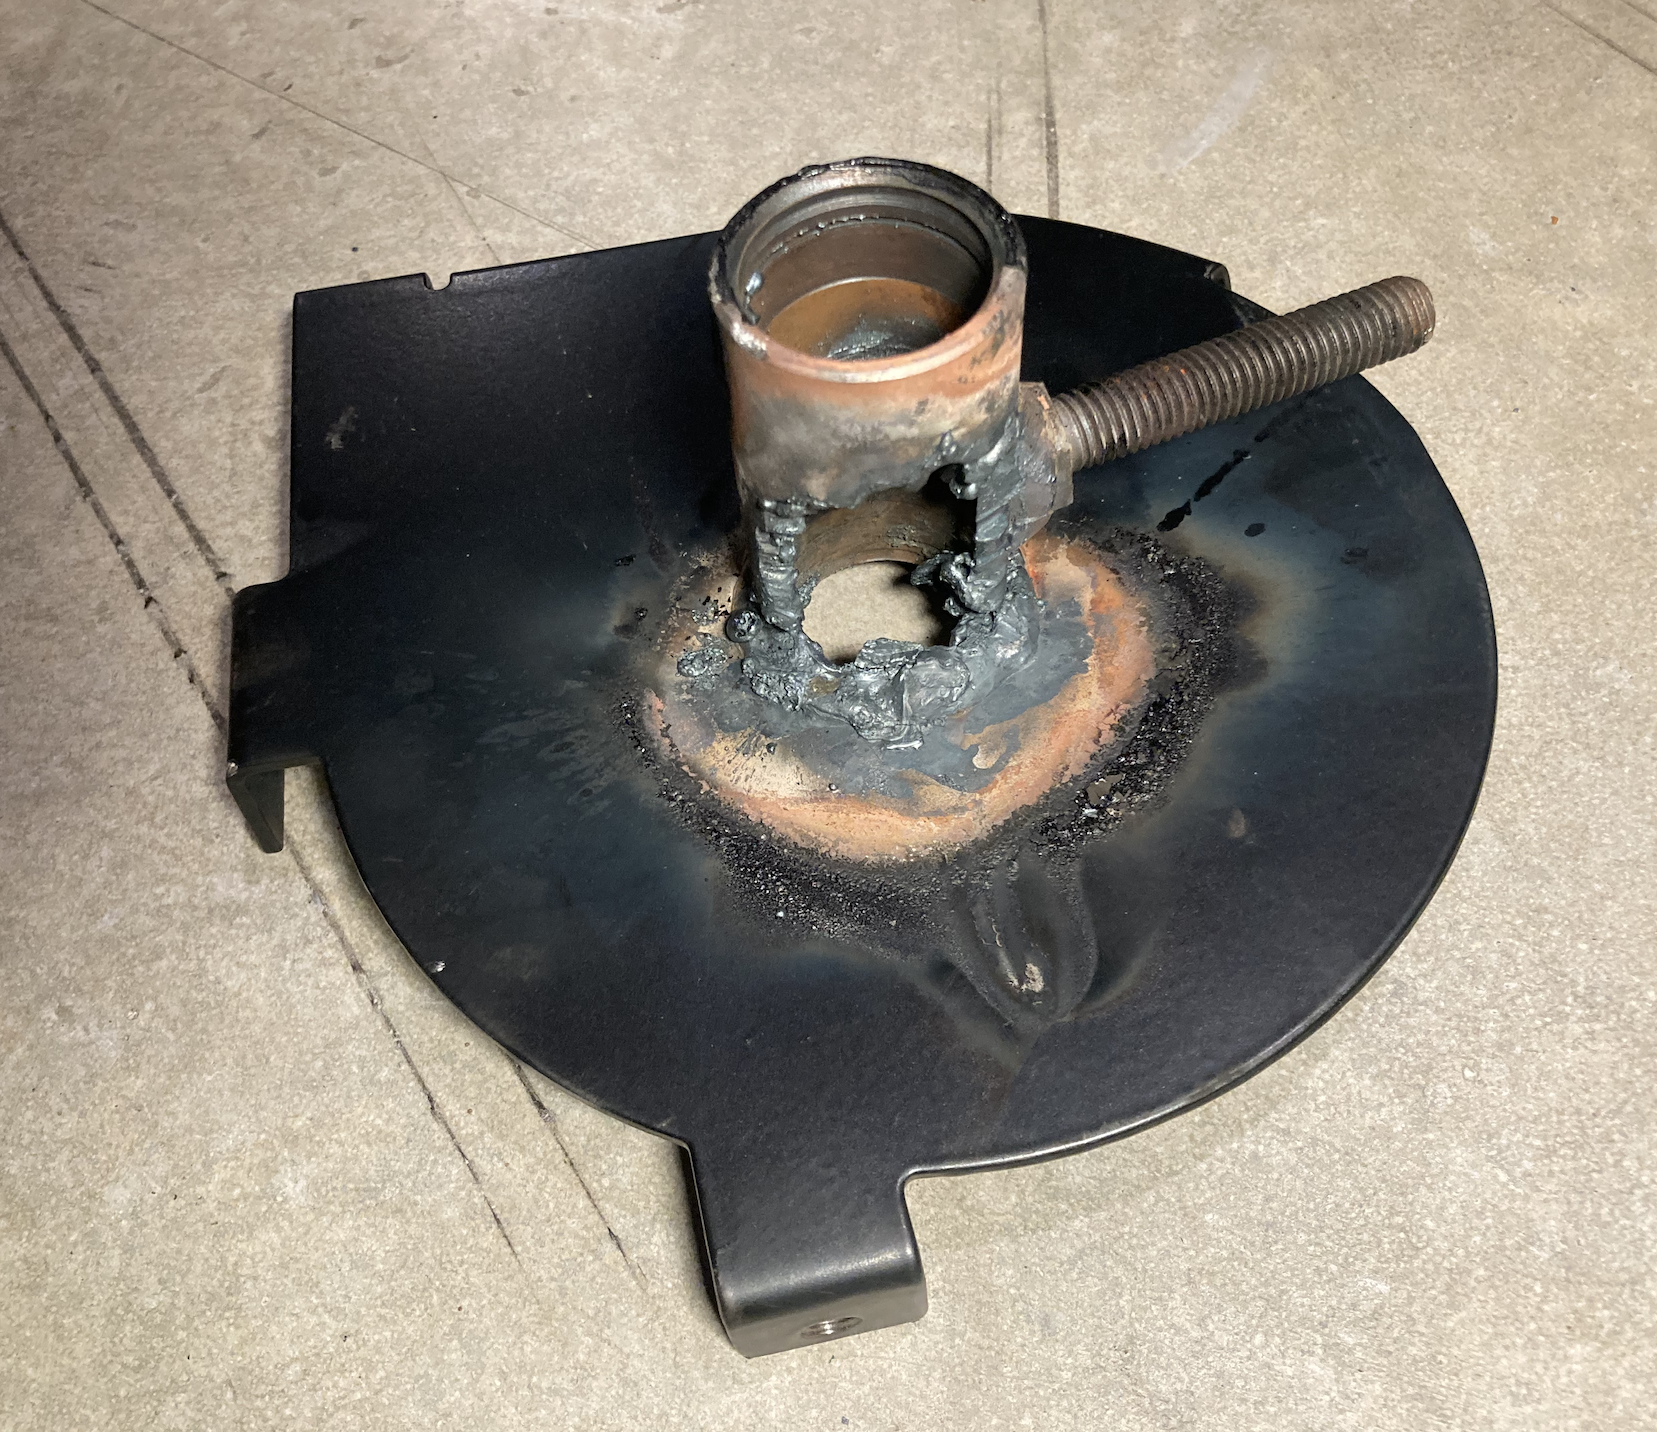
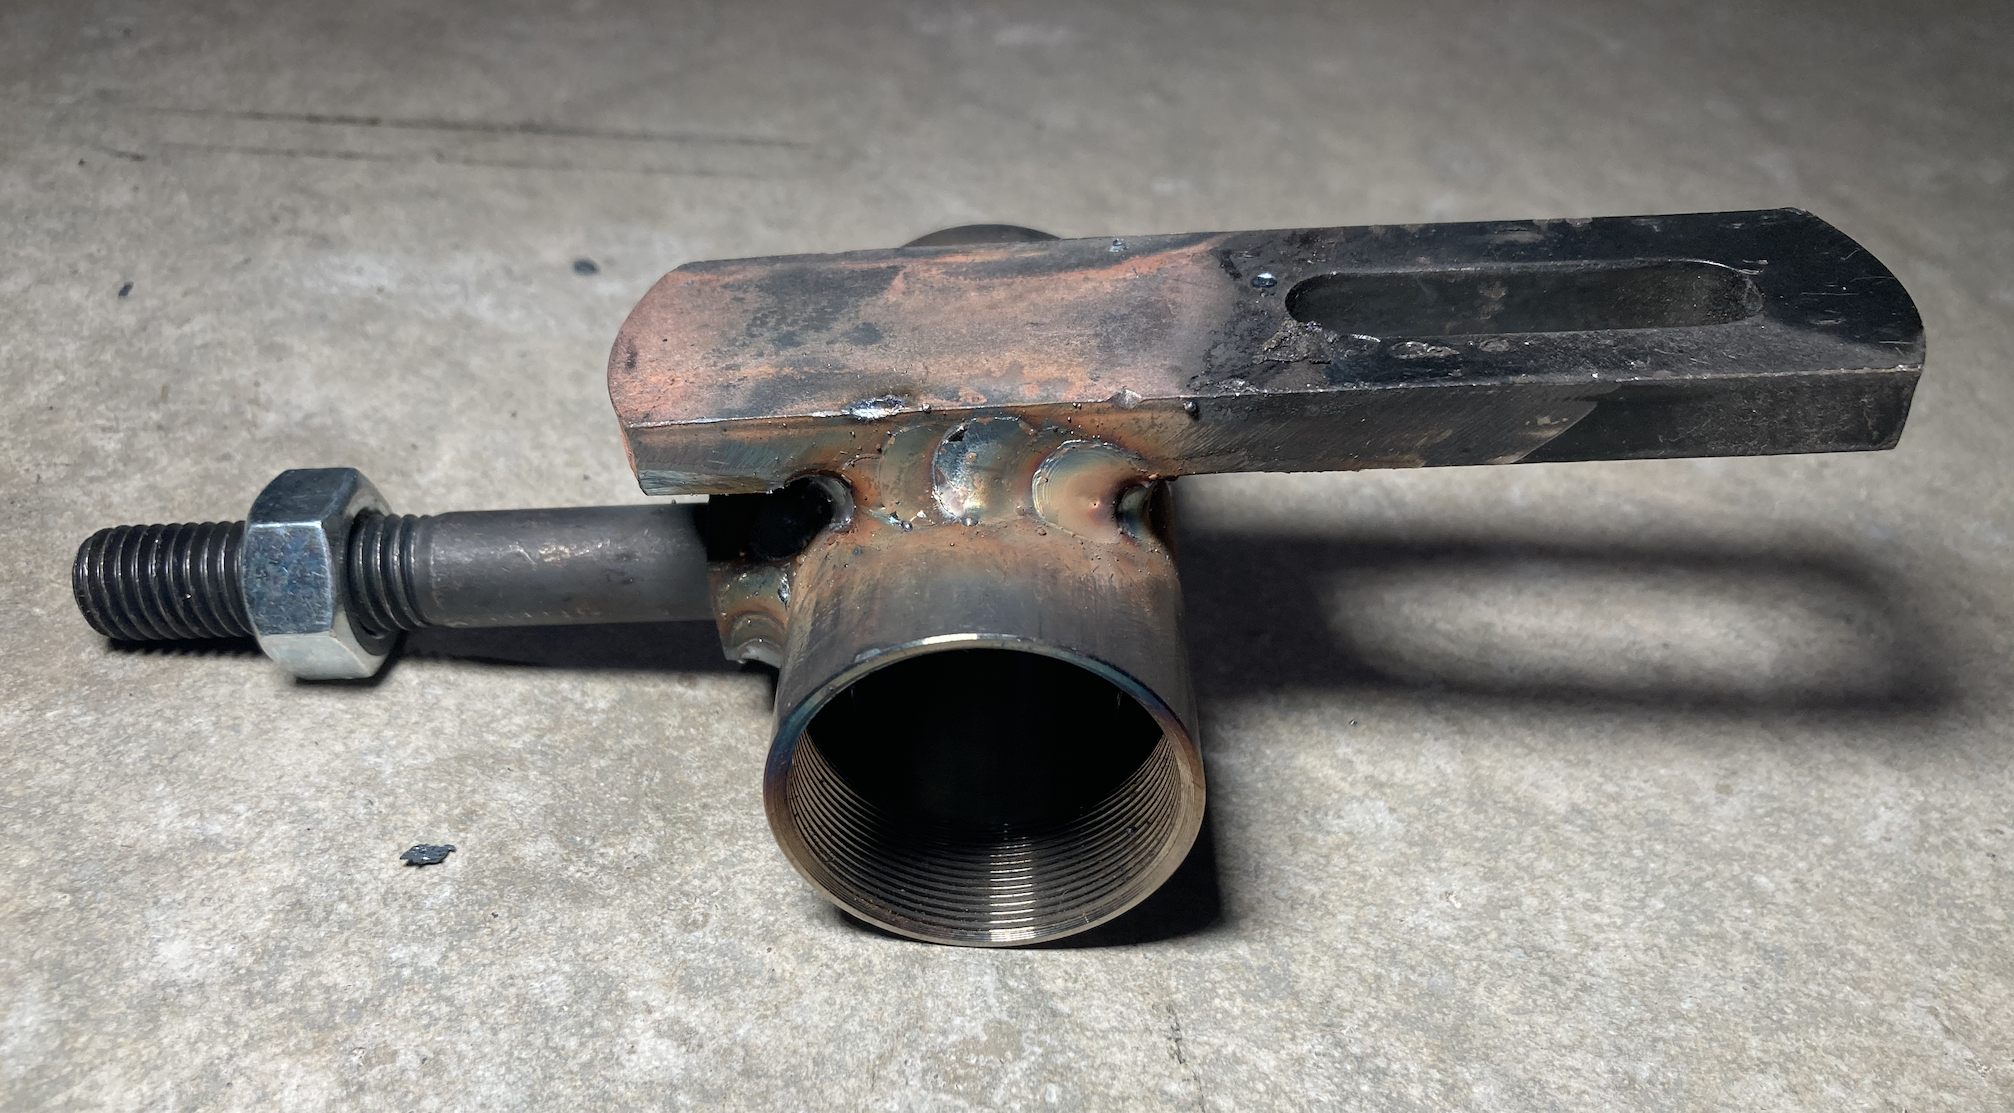
The welded mount now just needed some touching up. I went ahead and touched it up on the grinder and then put a couple coats of paint on it.
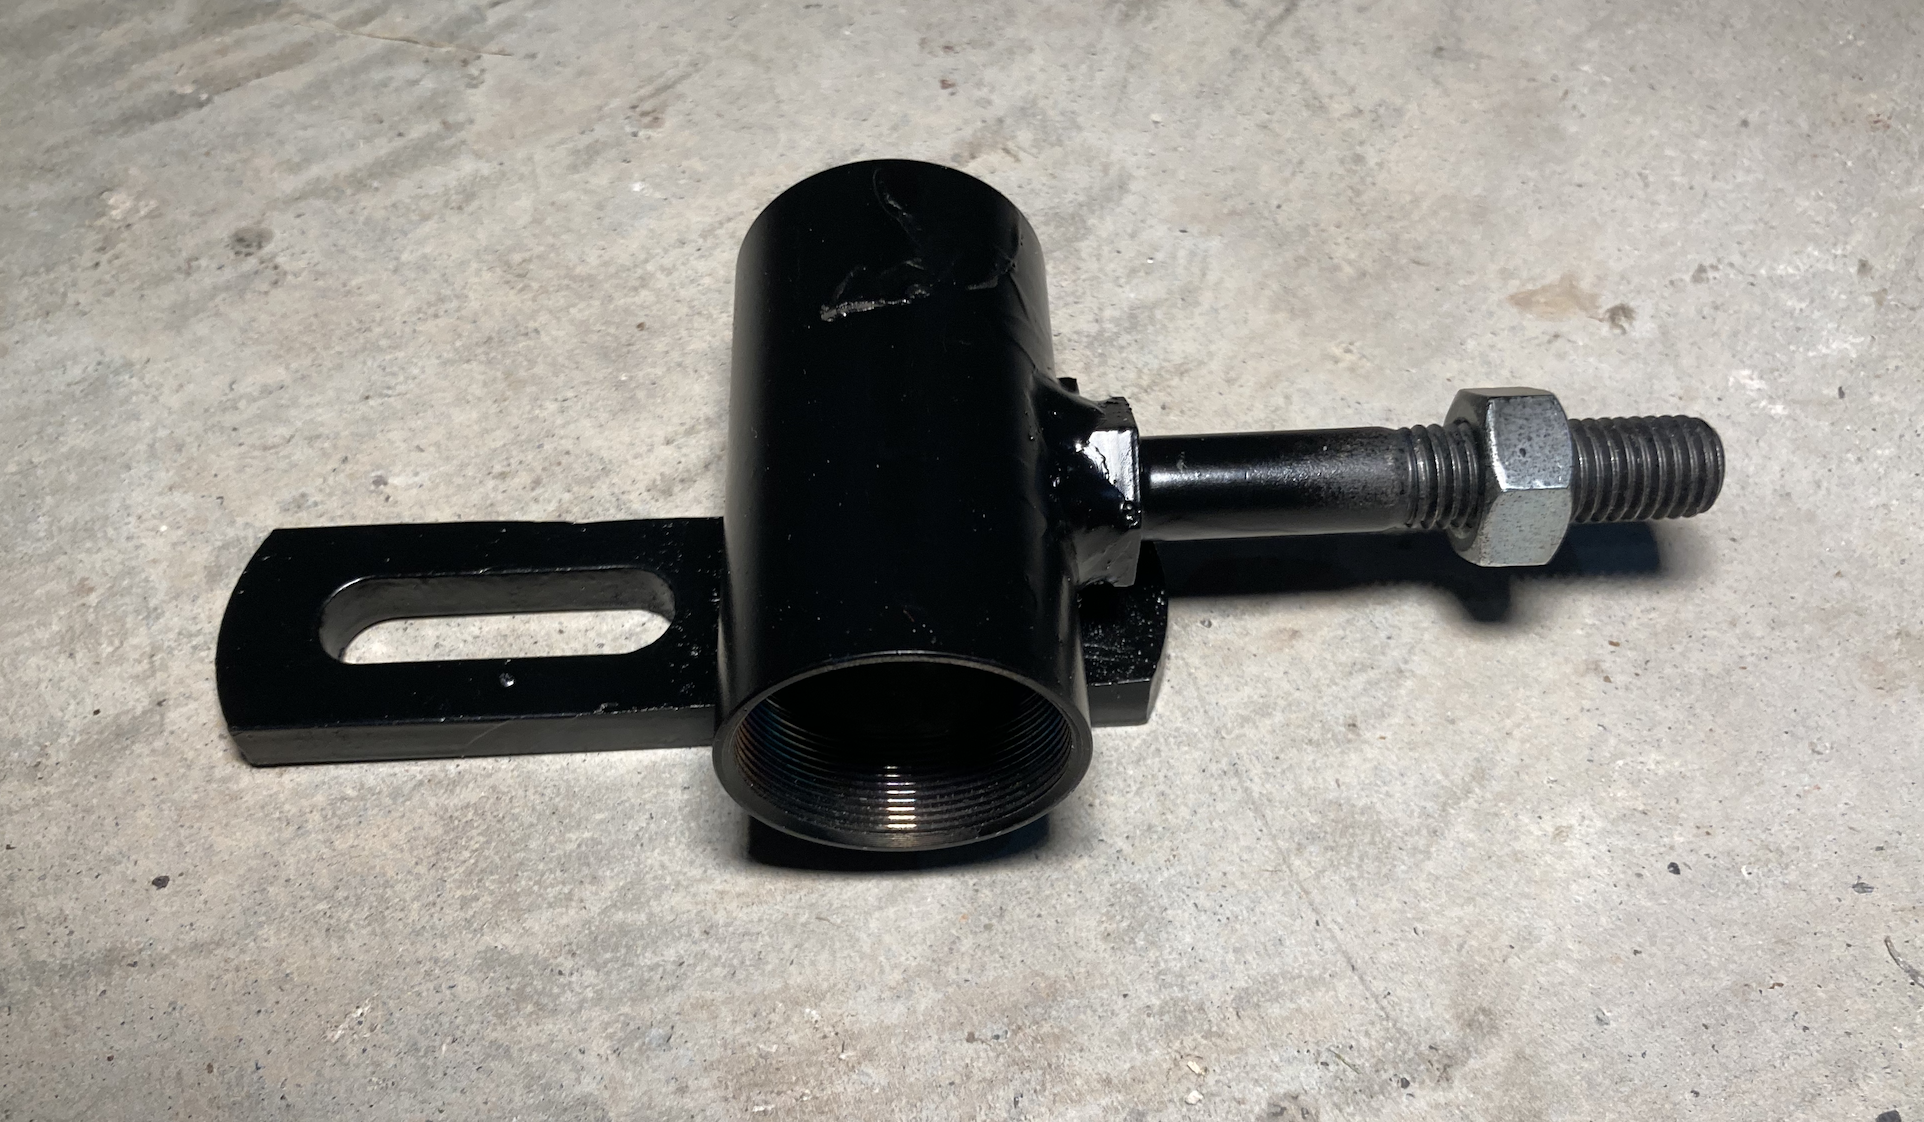
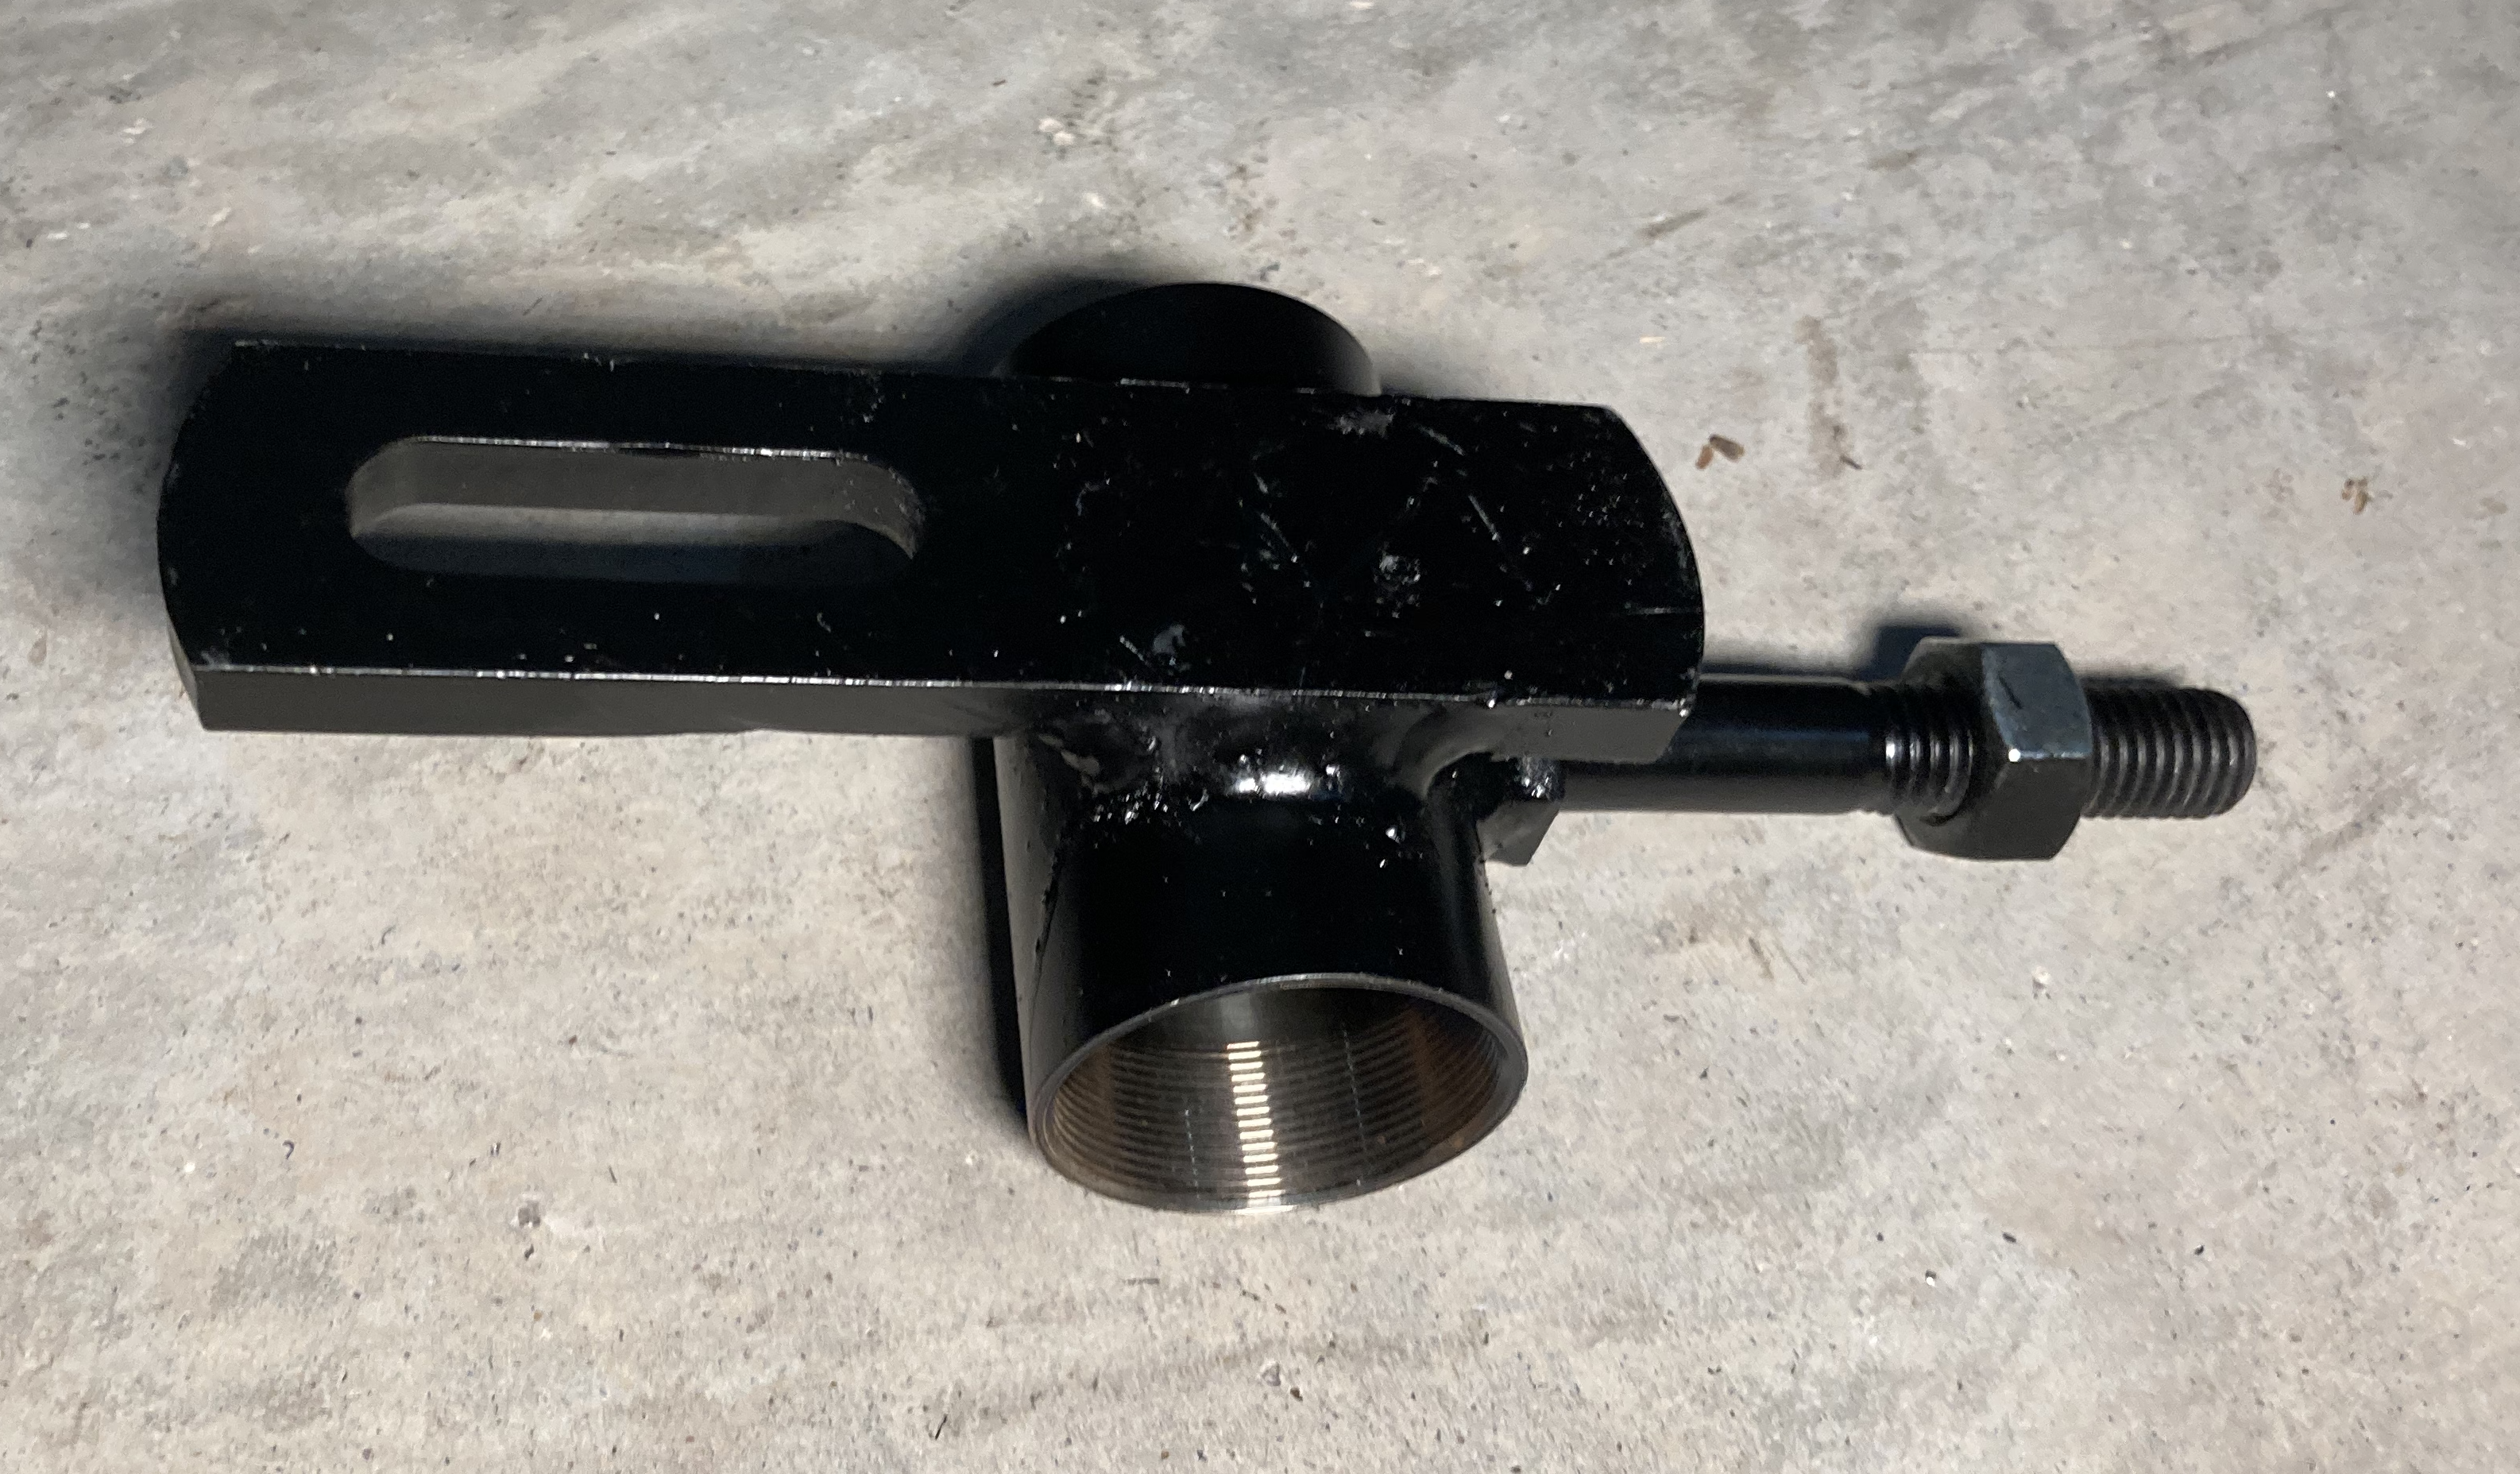
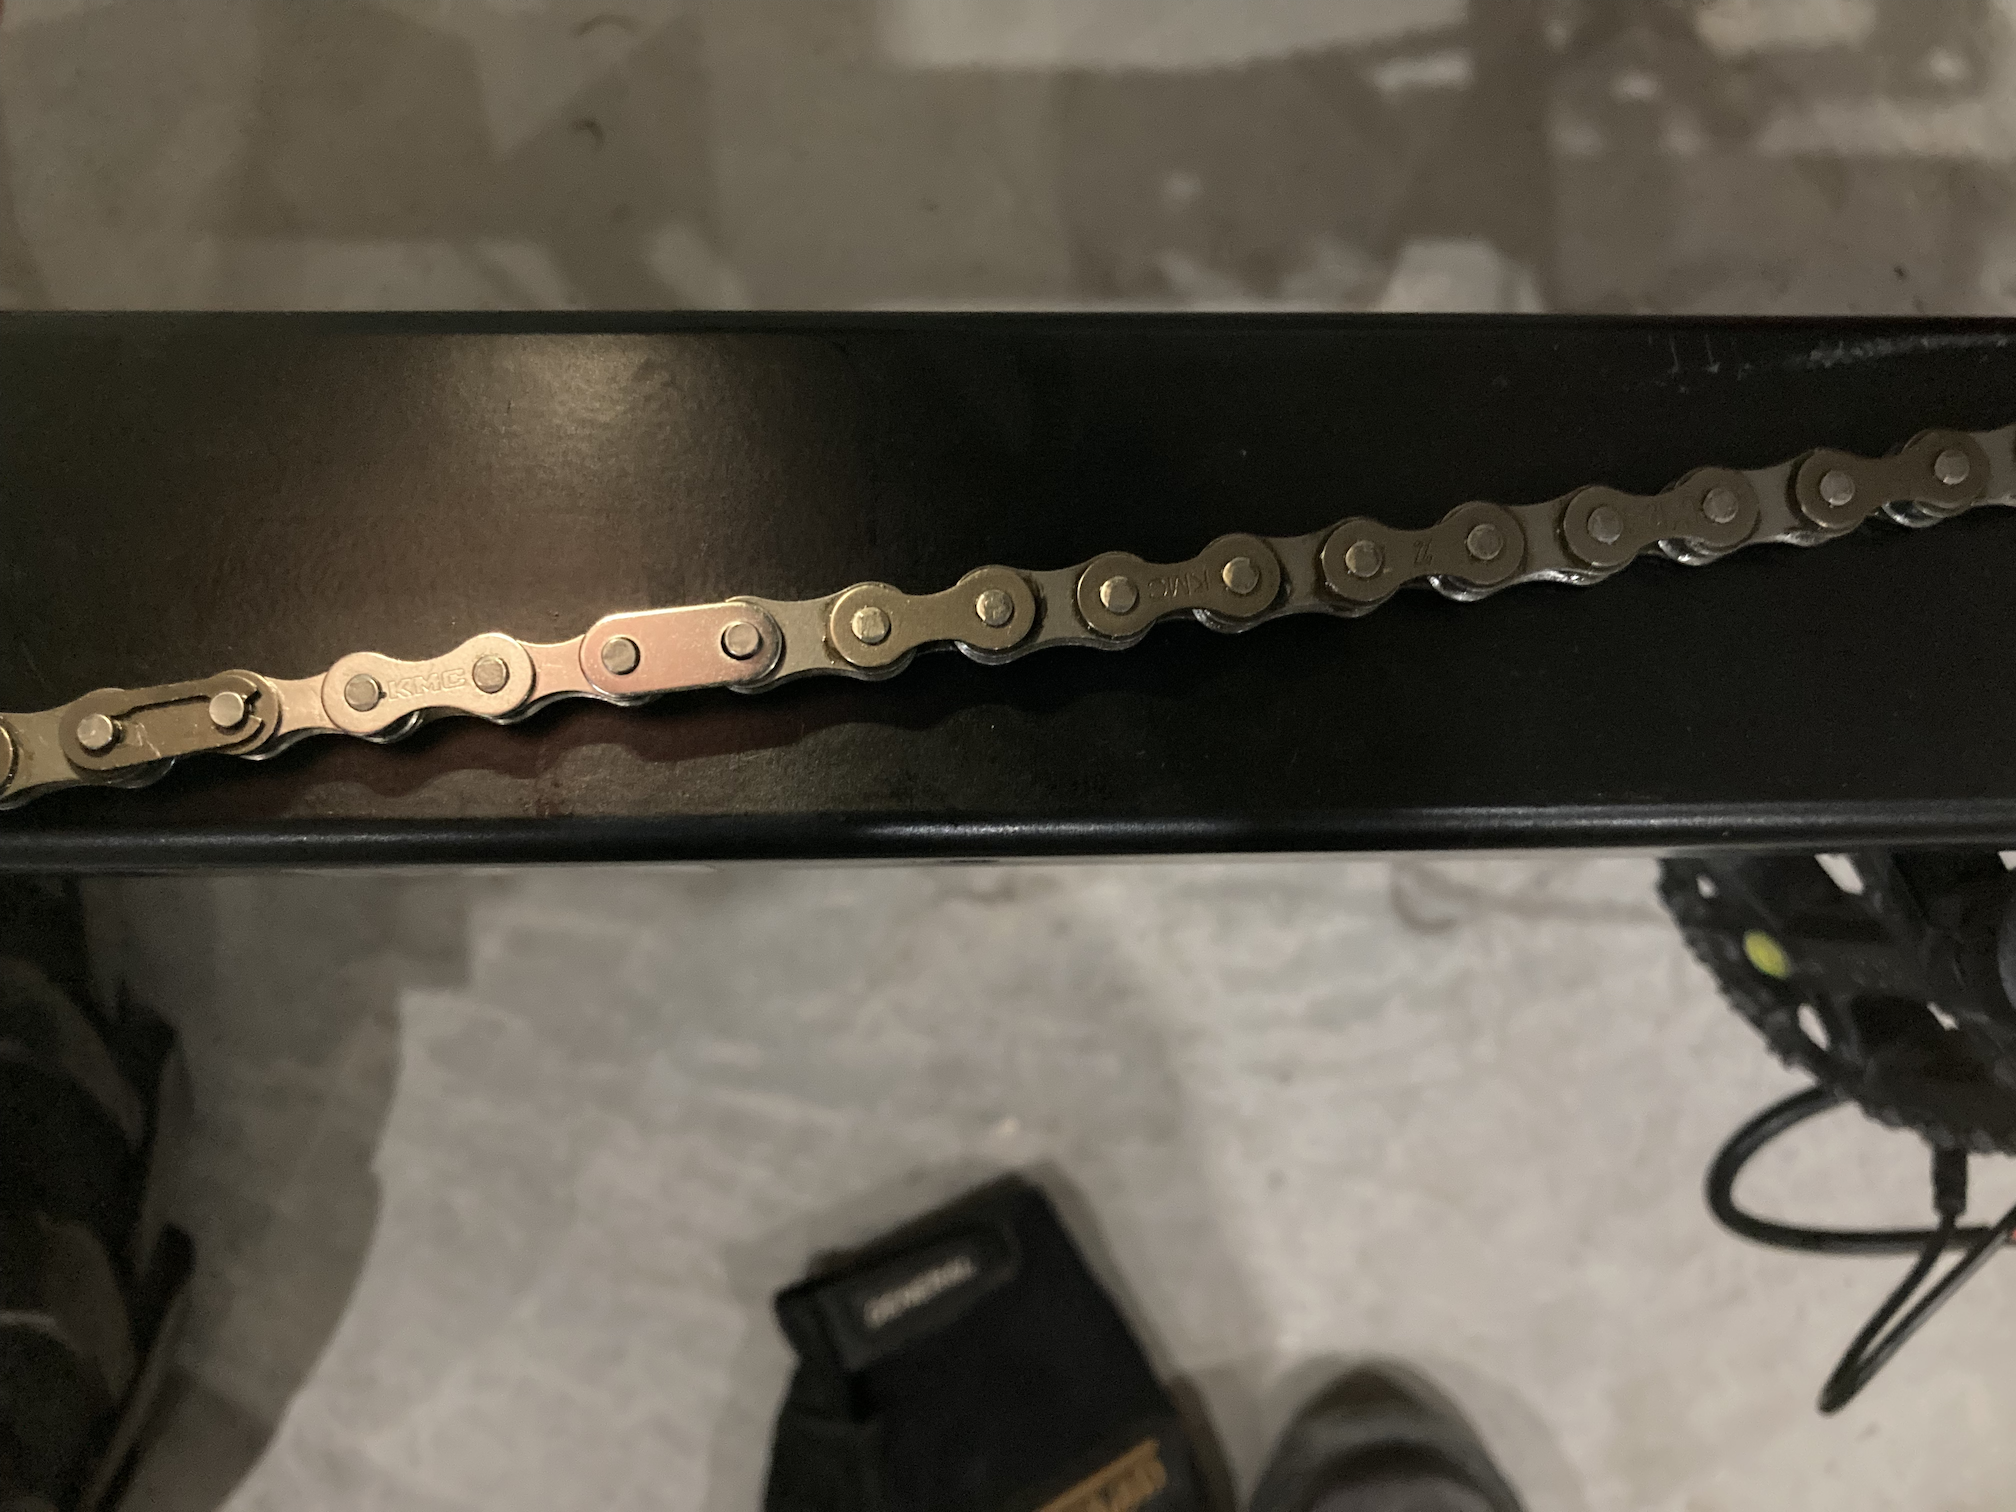
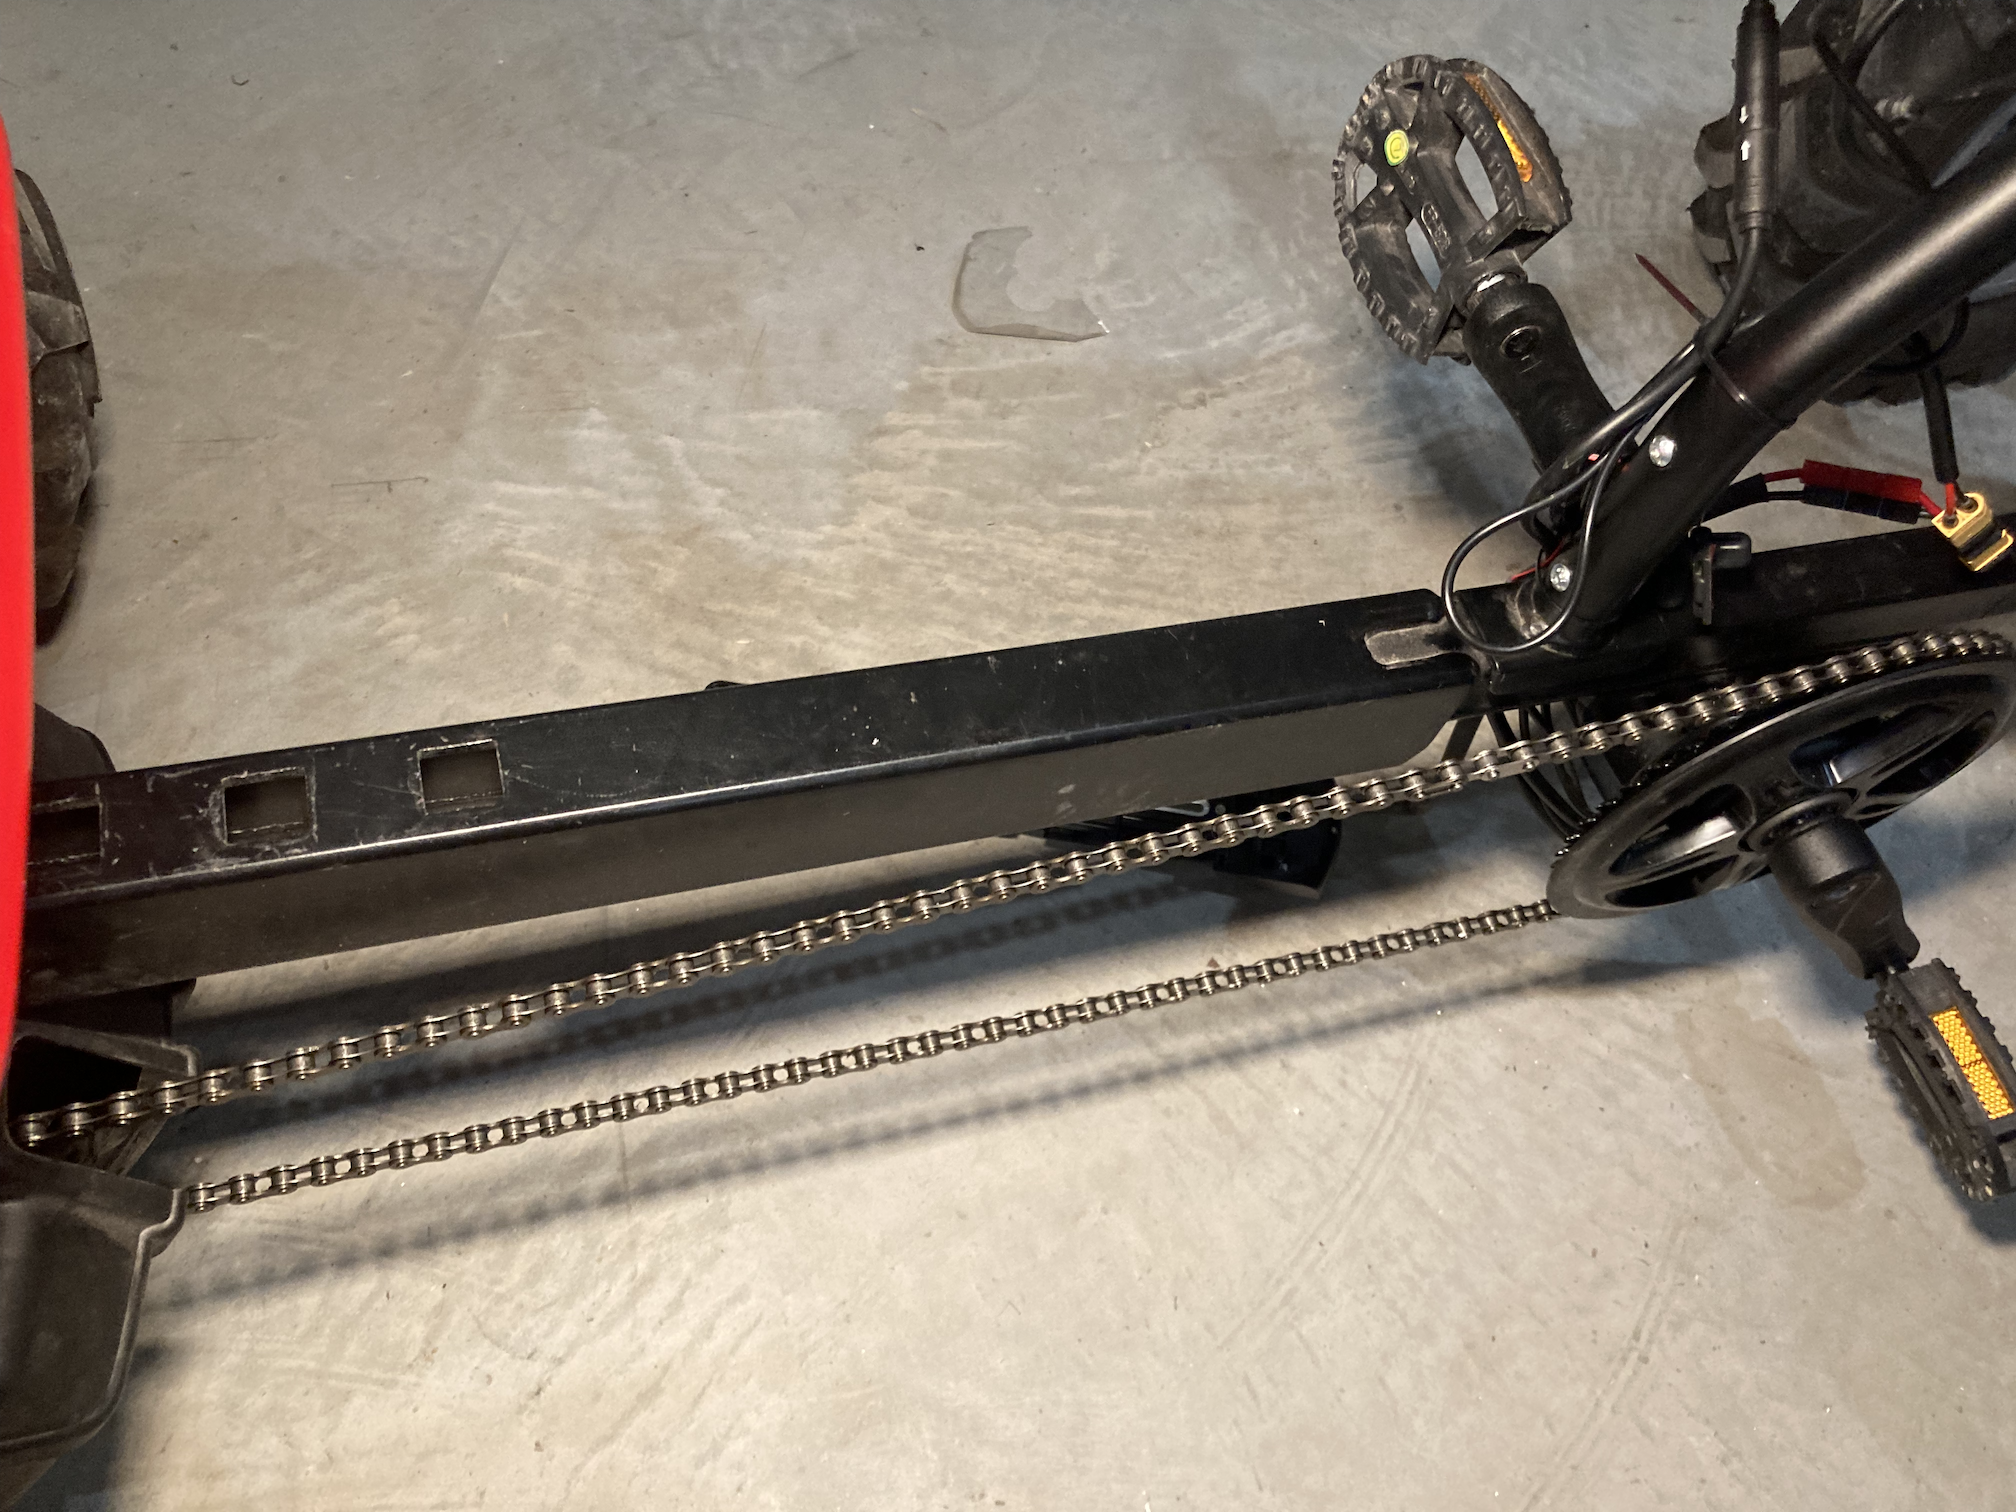
With the new mount, I was able to install the motor into the bottom bracket shell. The new chainring and position required extending the length of the chain. You can do this with a bike chain tool to add in a few new links. With the longer chain, you can install the mount loosely against the frame and the chain tensioner bolt. You can then gradually adjust the tension bolt spacing to get the chain tight with just a little slack (don’t over tighten).
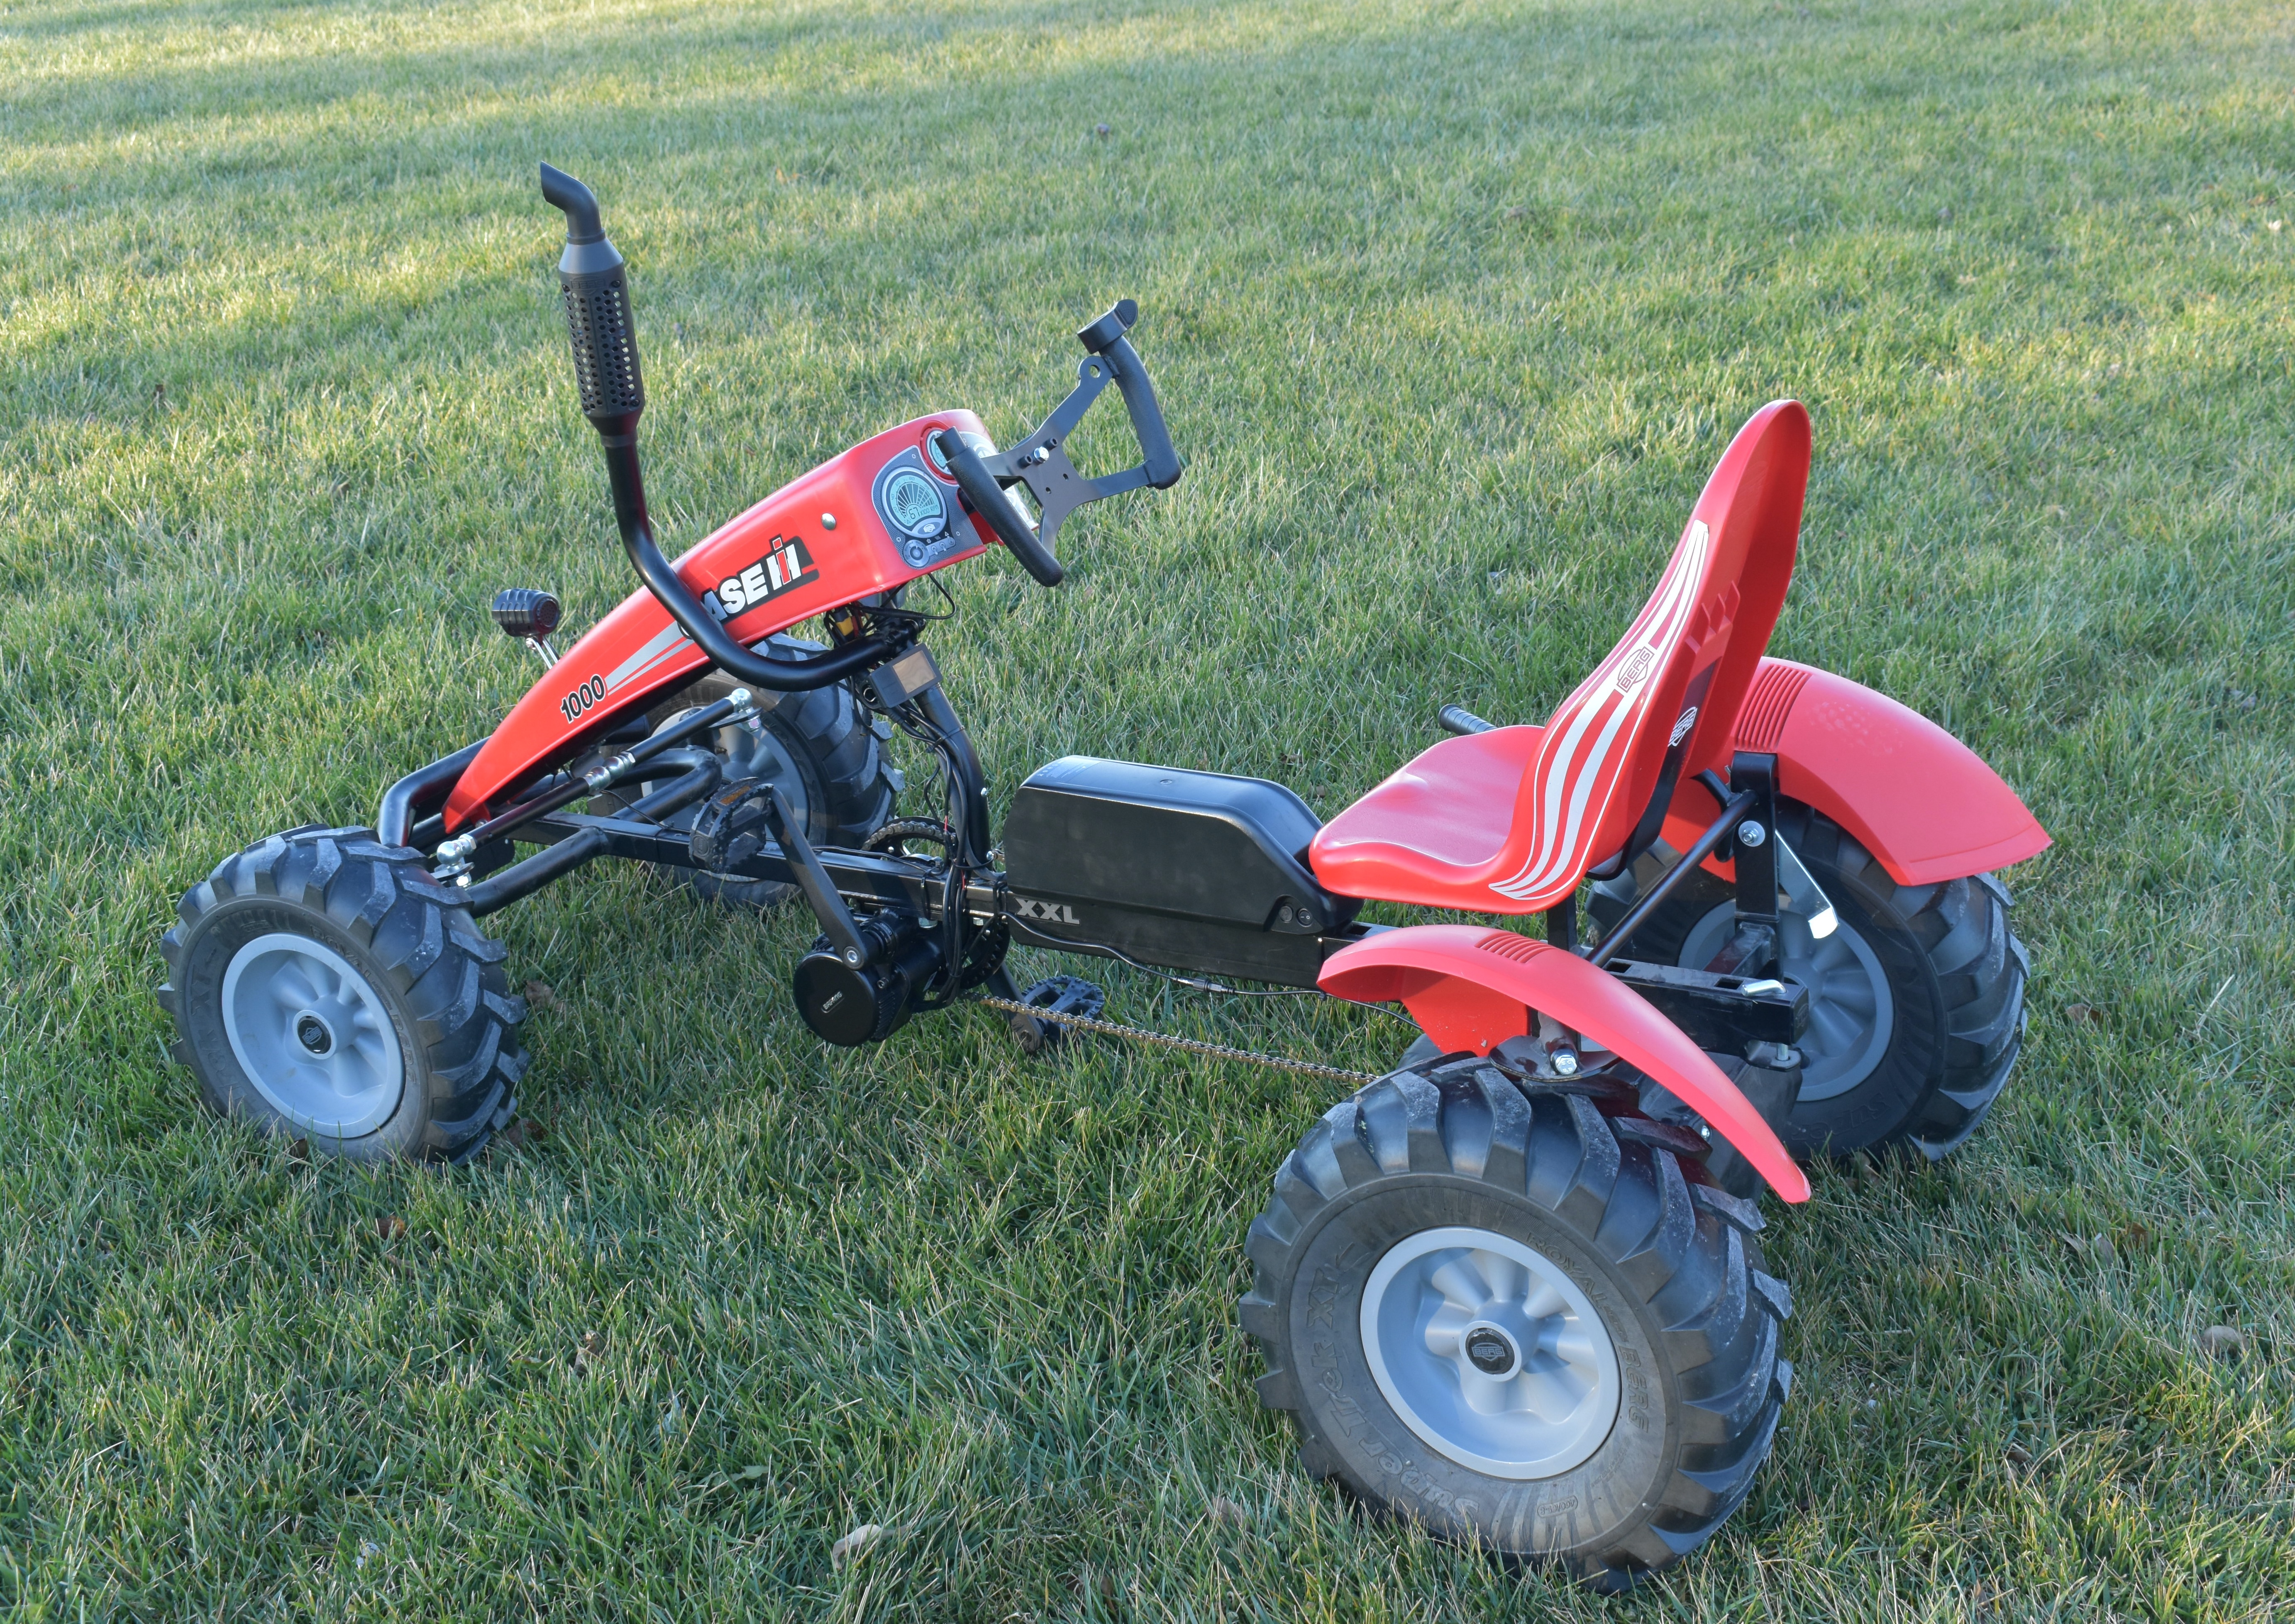
Battery Mount Install#
With the motor installed on the chain, we now need to install the battery. It comes with a bike frame mount that can easily be added to the frame by just drilling in some mounting screws, and using some longer bolts to mount through the frame. I purchased a Bafang 52V 13Ah 17.5Ah 20Ah Lithium Ion Battery ($433). When considering battery mount locations, I was hoping this would fit in the front of the frame, where it was more out of the way. When I measured it, it looked like it could work, but it would be close. However, after I tried it out, it was way too close to both the tie rod ends and the chainring.
I ended up moving this to the frame behind the motor, and this worked out much easier, and it doesn’t cause any issues with space. This also makes battery maintenance (removing/charging/installing) much easier too.
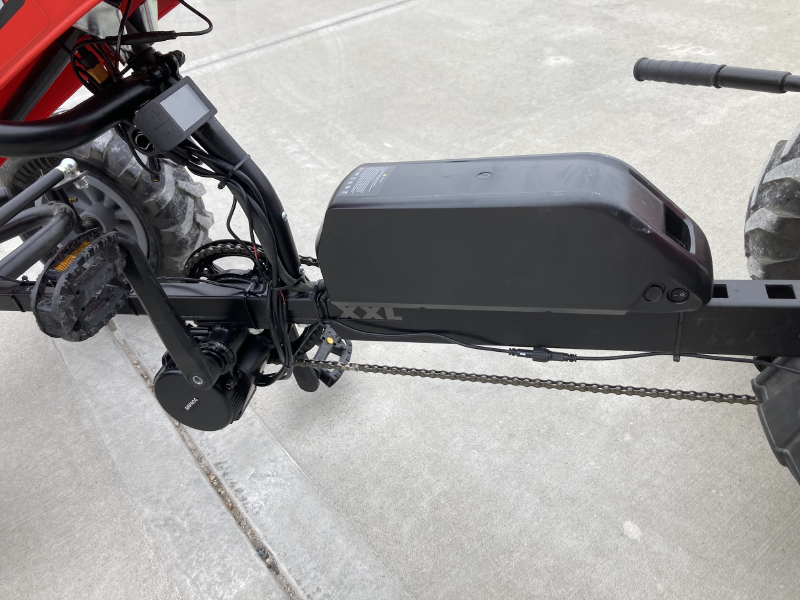
With it installed here, you also will not need to install an extension for the powercords from the battery to the motor.
Steering Wheel Modification#
The existing Berg tractor steering wheel needs to make adjustments to include a thumb operated throttle control. If you aren’t familiar with eBike motors, they have a simple computer control that allows you to adjust power ranges (like gears), and can be activated through the act of pedaling to indicate power should be applied. Since I was pursuing more of a go-kart experience, I wanted to make the thumb throttle control easily accessible, where the driver doesn’t even have to pedal to activate power. These are easy to install on typical bicycle handlebars, however with a classical round steering wheel, something needed to change. I decided to just replace it with a butterfly shaped go kart steering wheel that had options for a thumb control mount. I was able get one of these for $25. To make it work, needed to drill out holes to both mount to the existing bolt on the steering column, but also to add some additional bolts to avoid slippage.
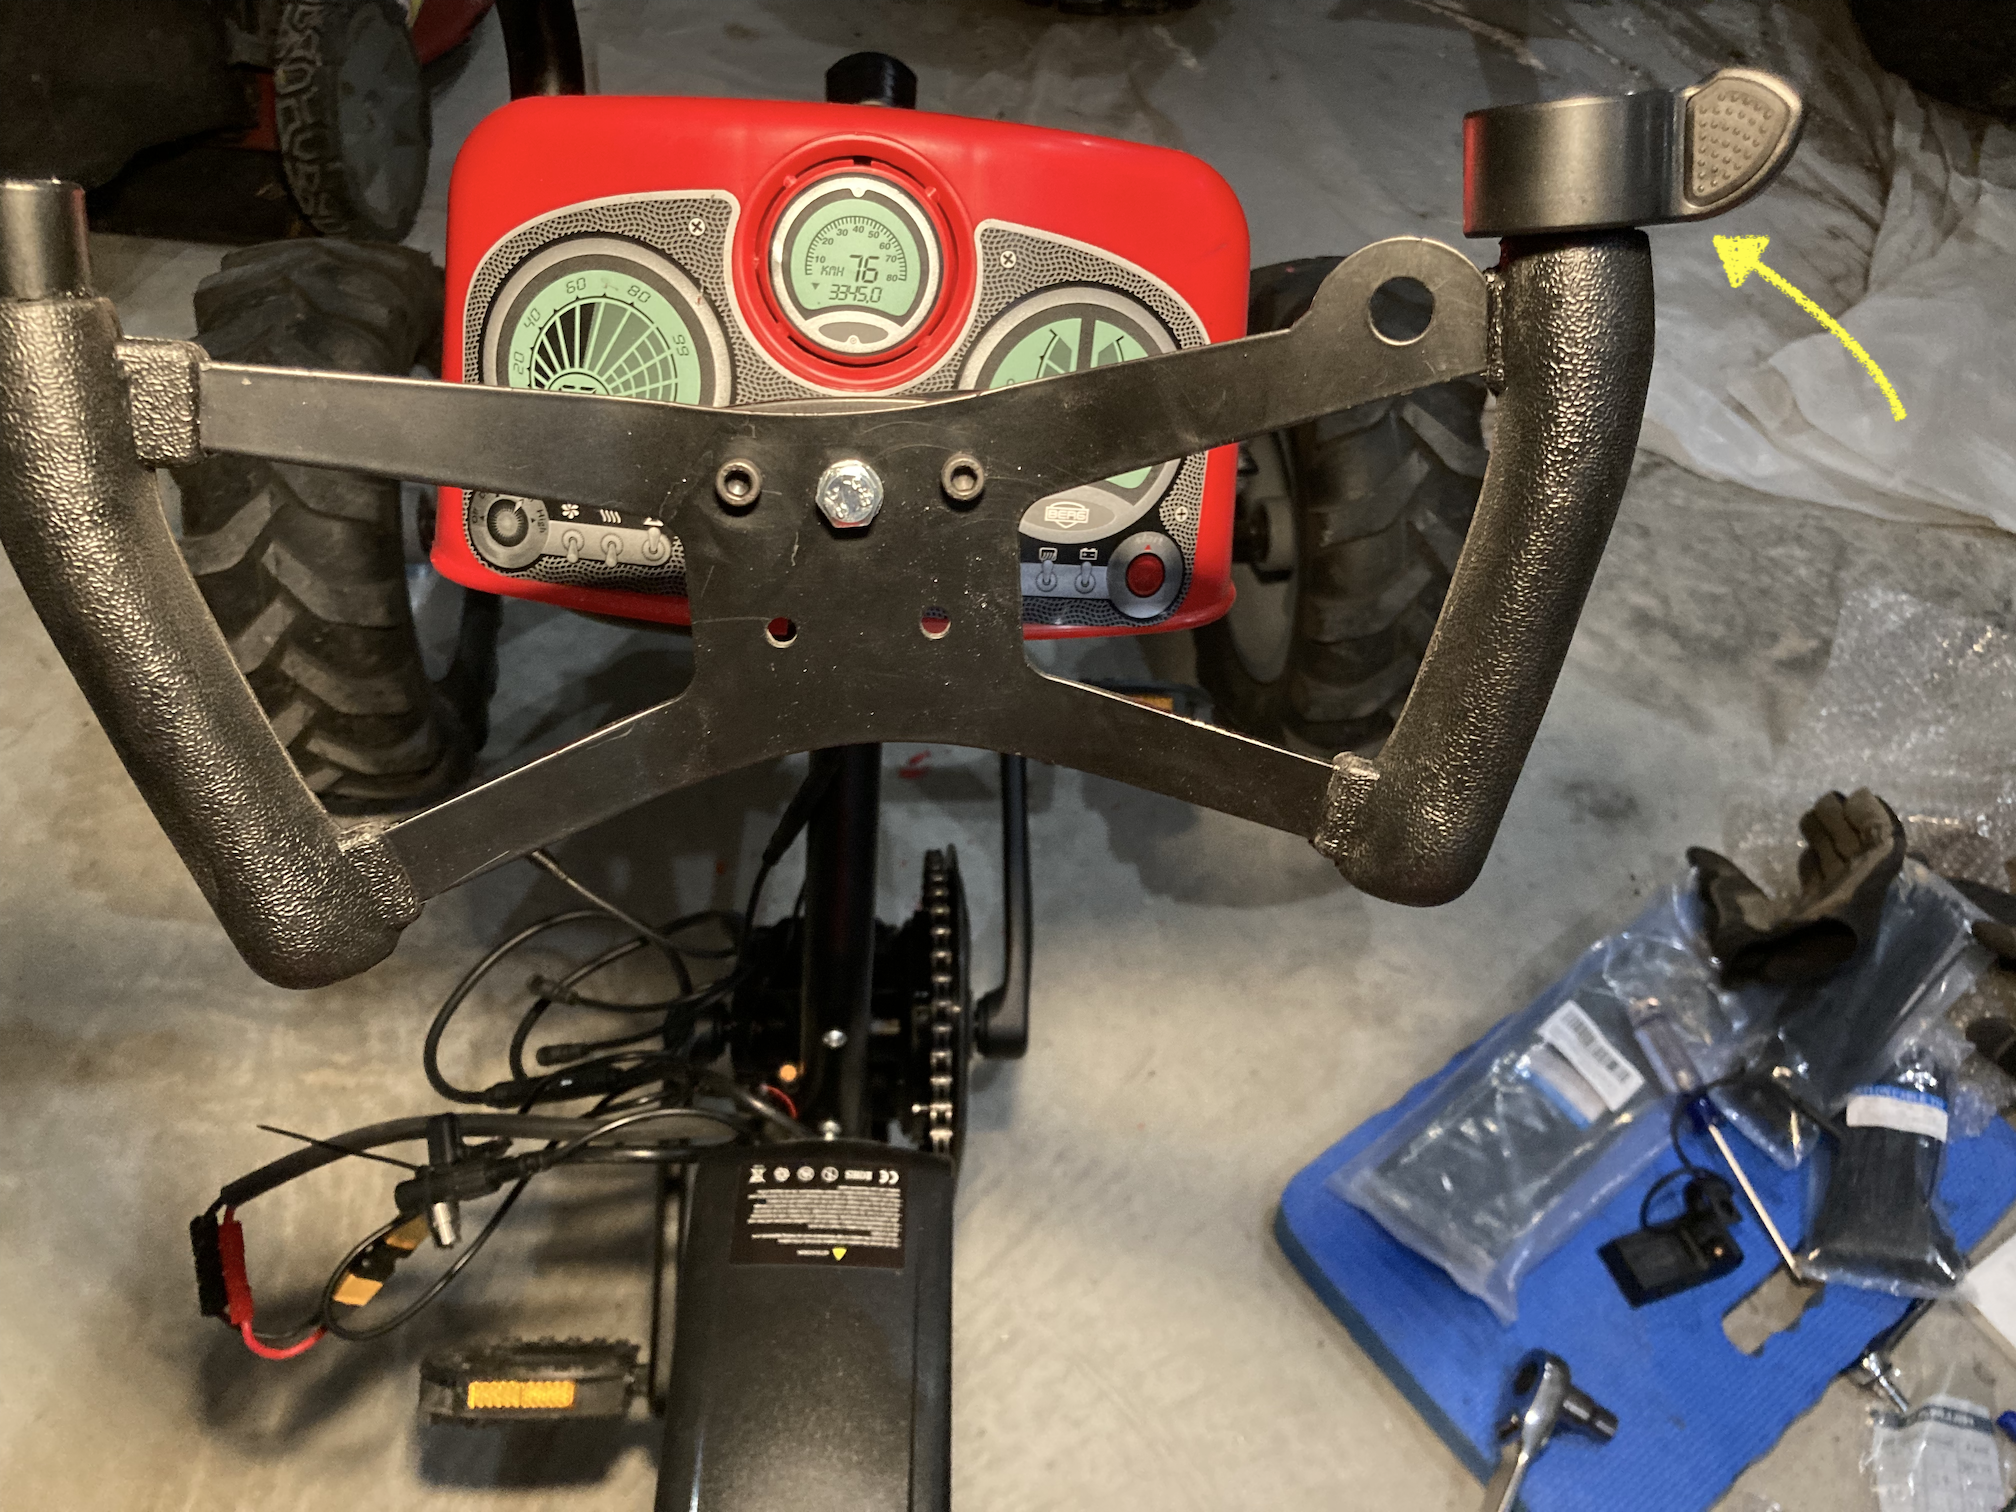
With the additional bolts added, this steering wheel is solid, and makes it easy to then install the throttle control on the right handed control.
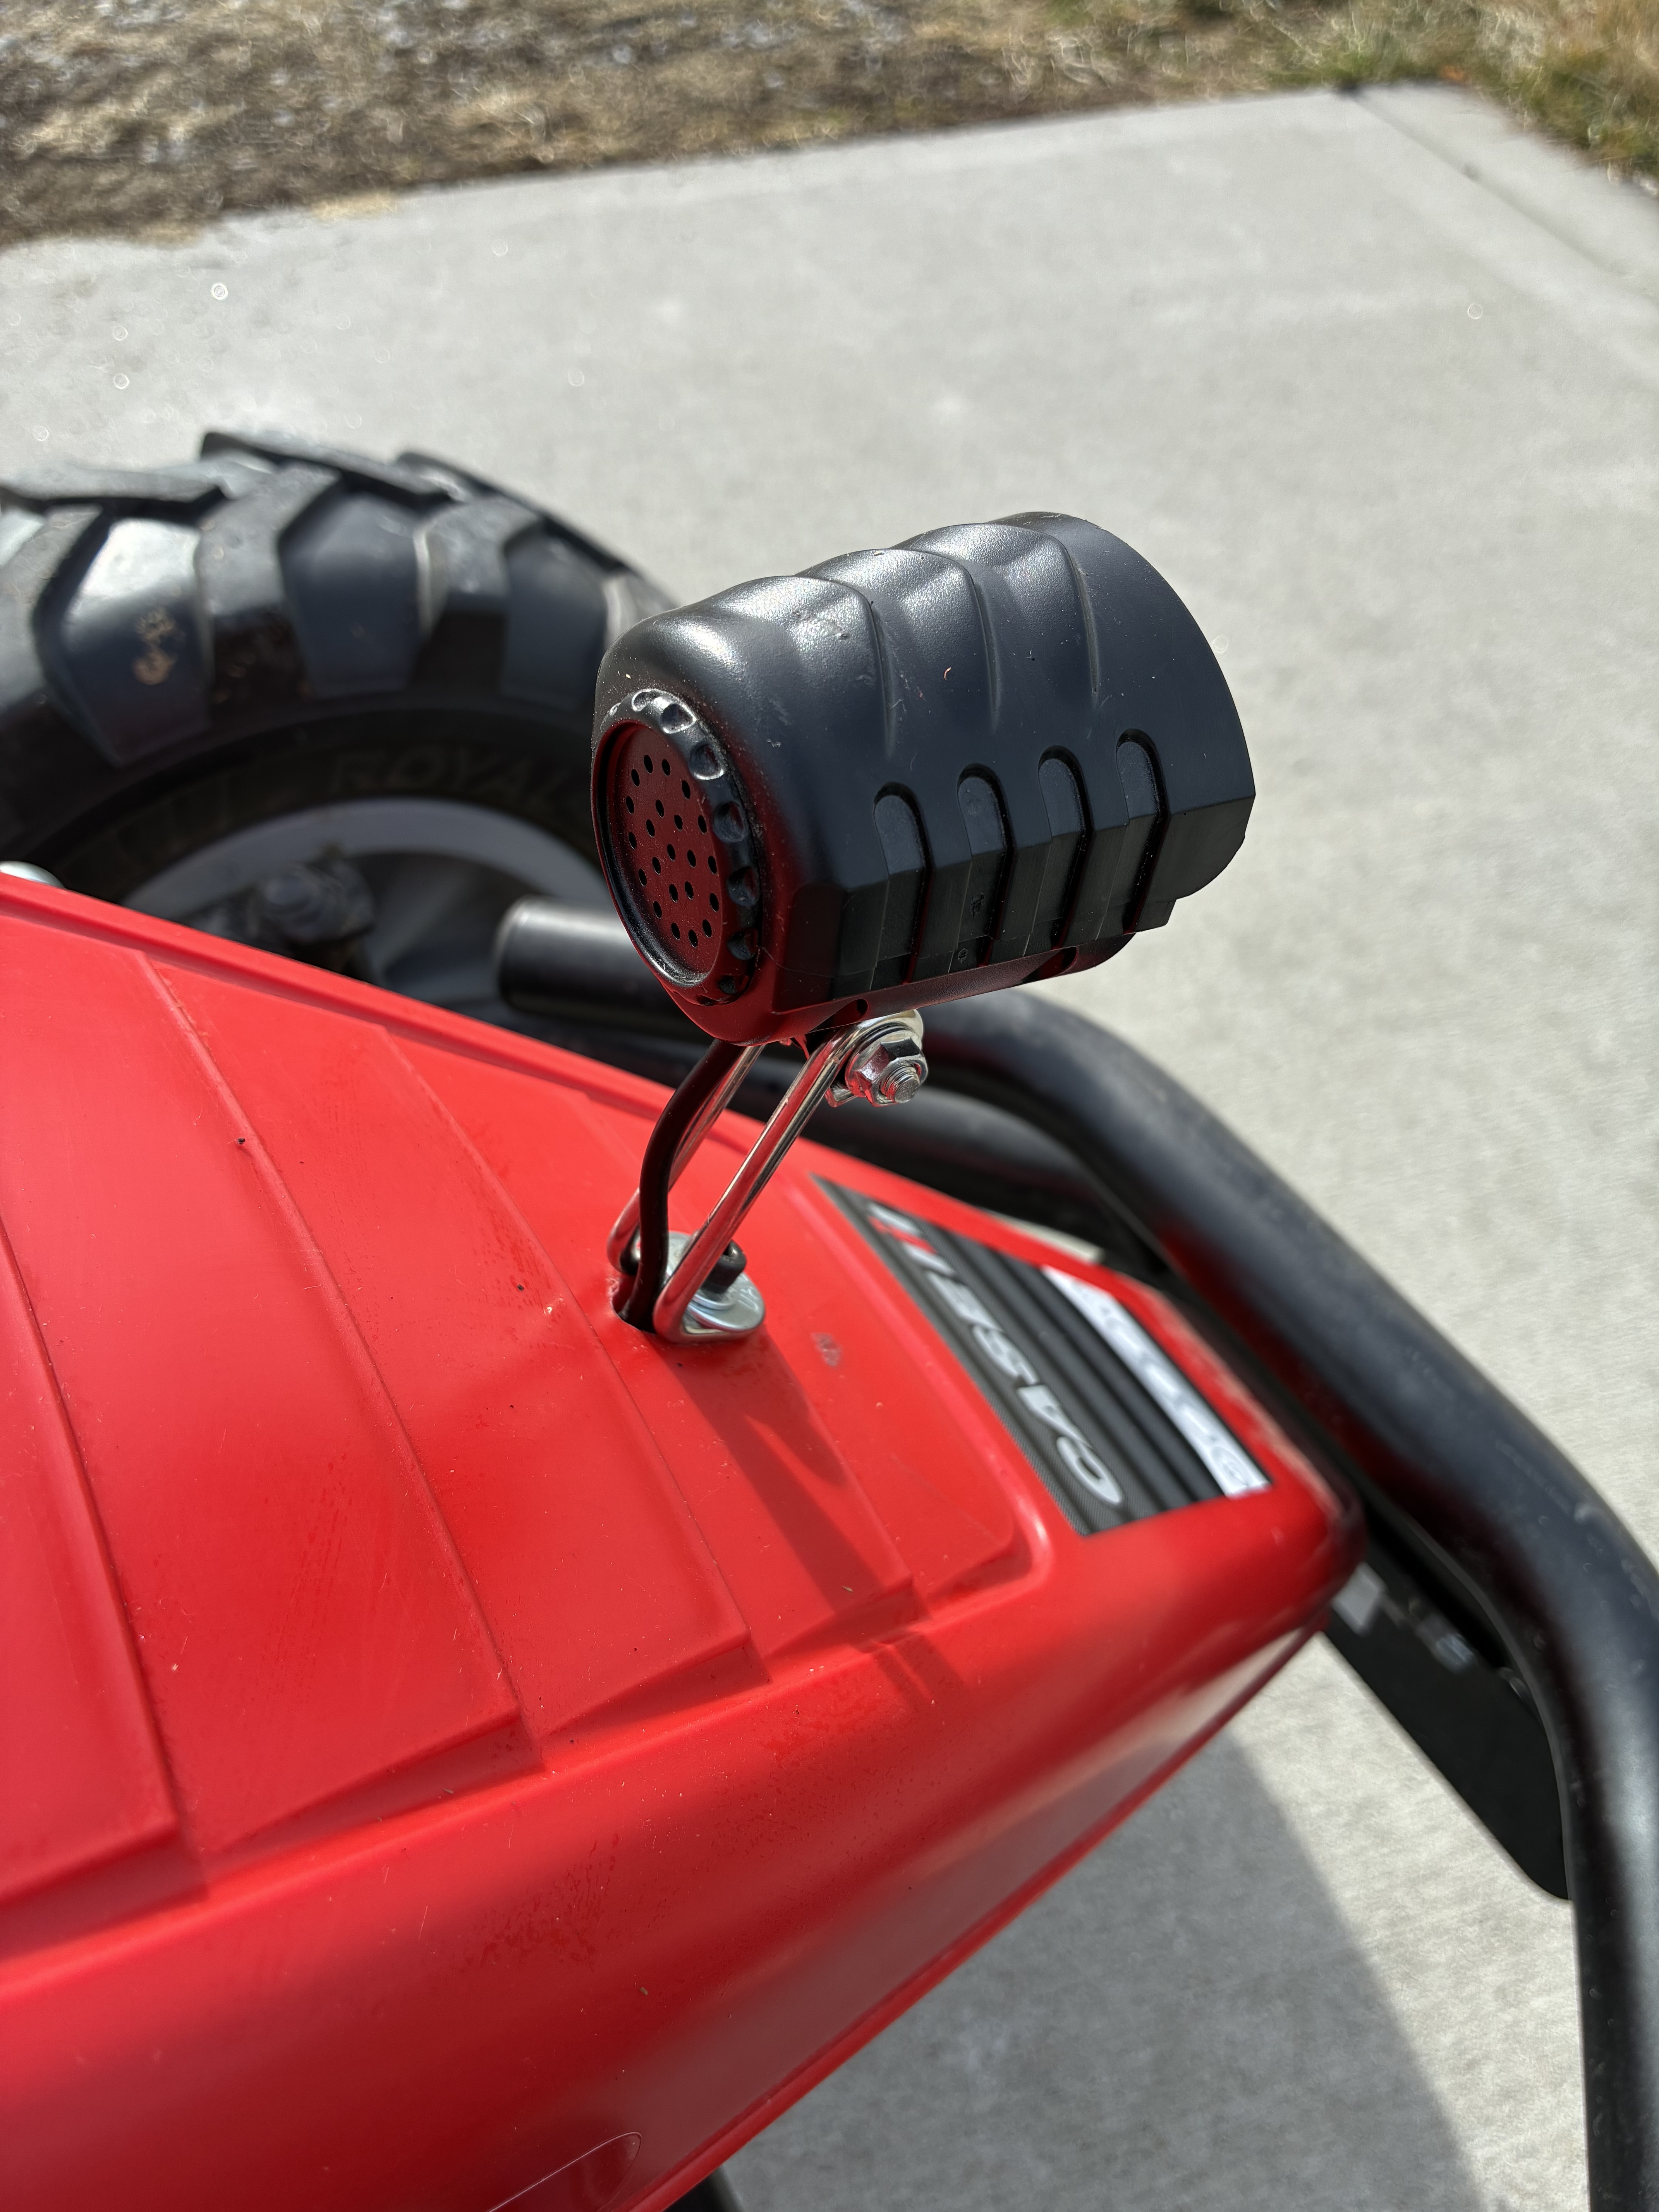
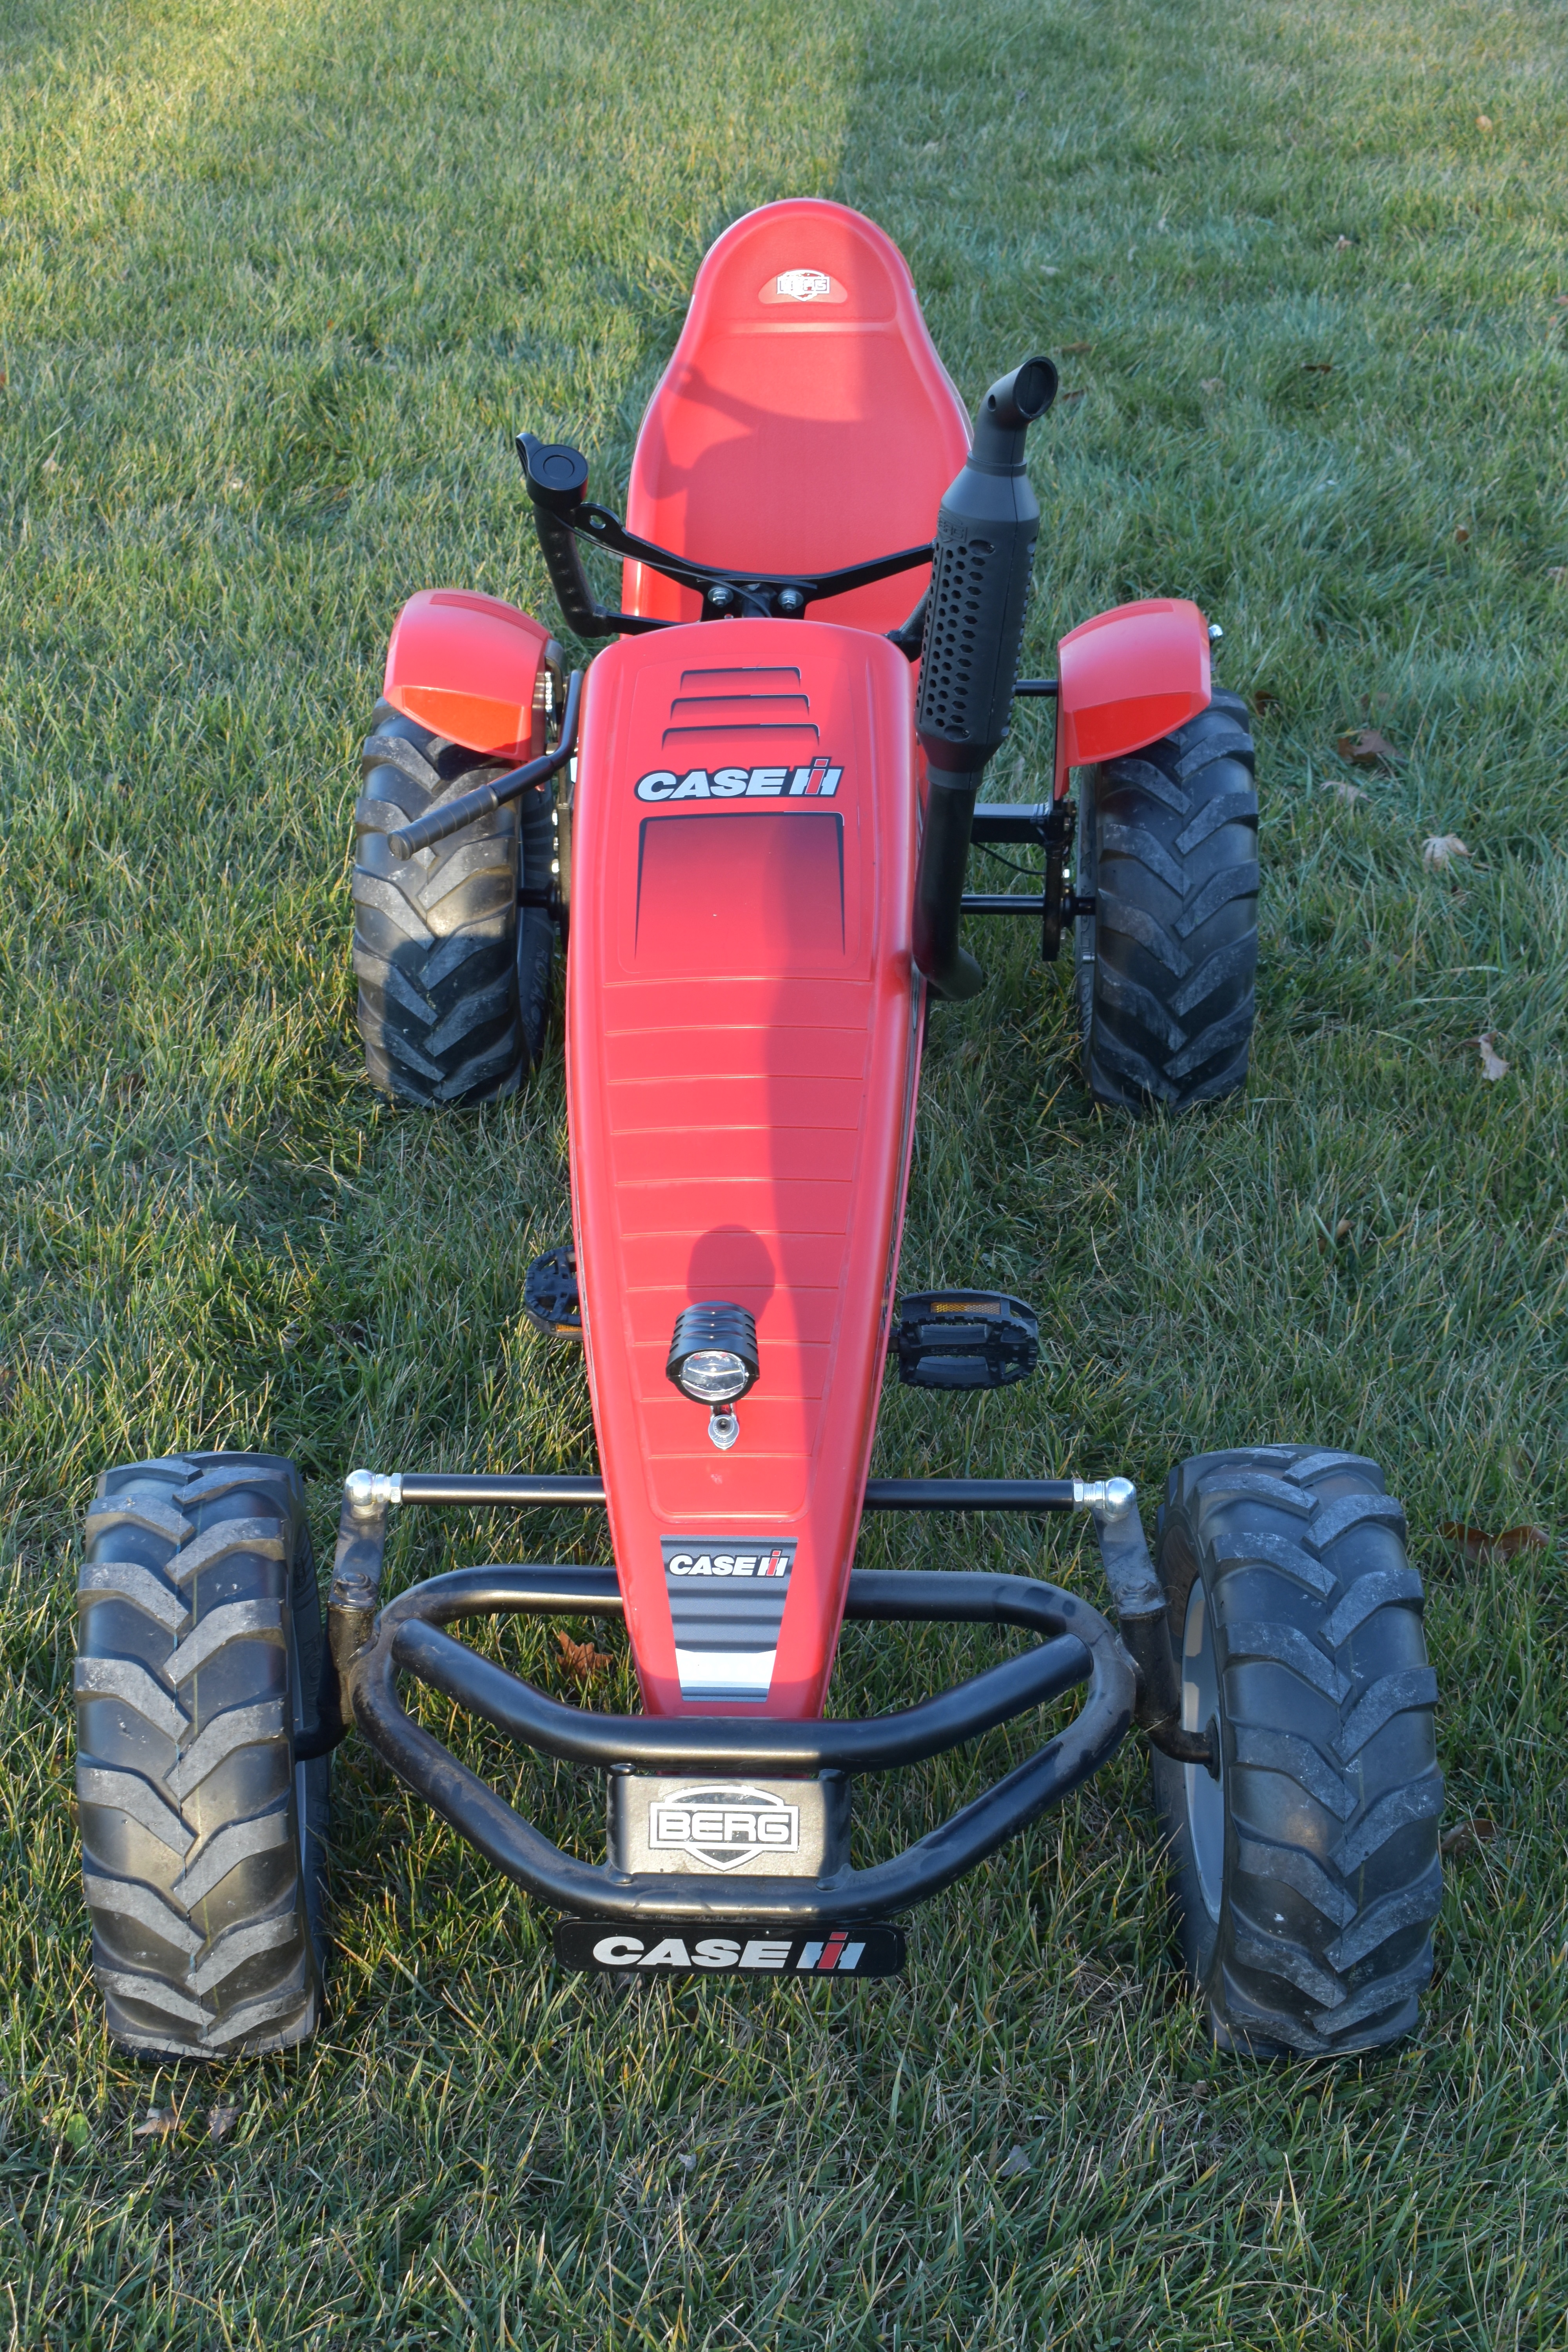
Front Headlamp Install#
With the eBike motor assembly, it comes with a front headlamp that is powered with the battery and operated with the computer control for the motor. While it is optional to install, I did want to use it since it was plenty bright for driving at night and was a fun option to include. To install, I just identified a location on the plastic body and installed it with some small bolt / washer / nut assembly.
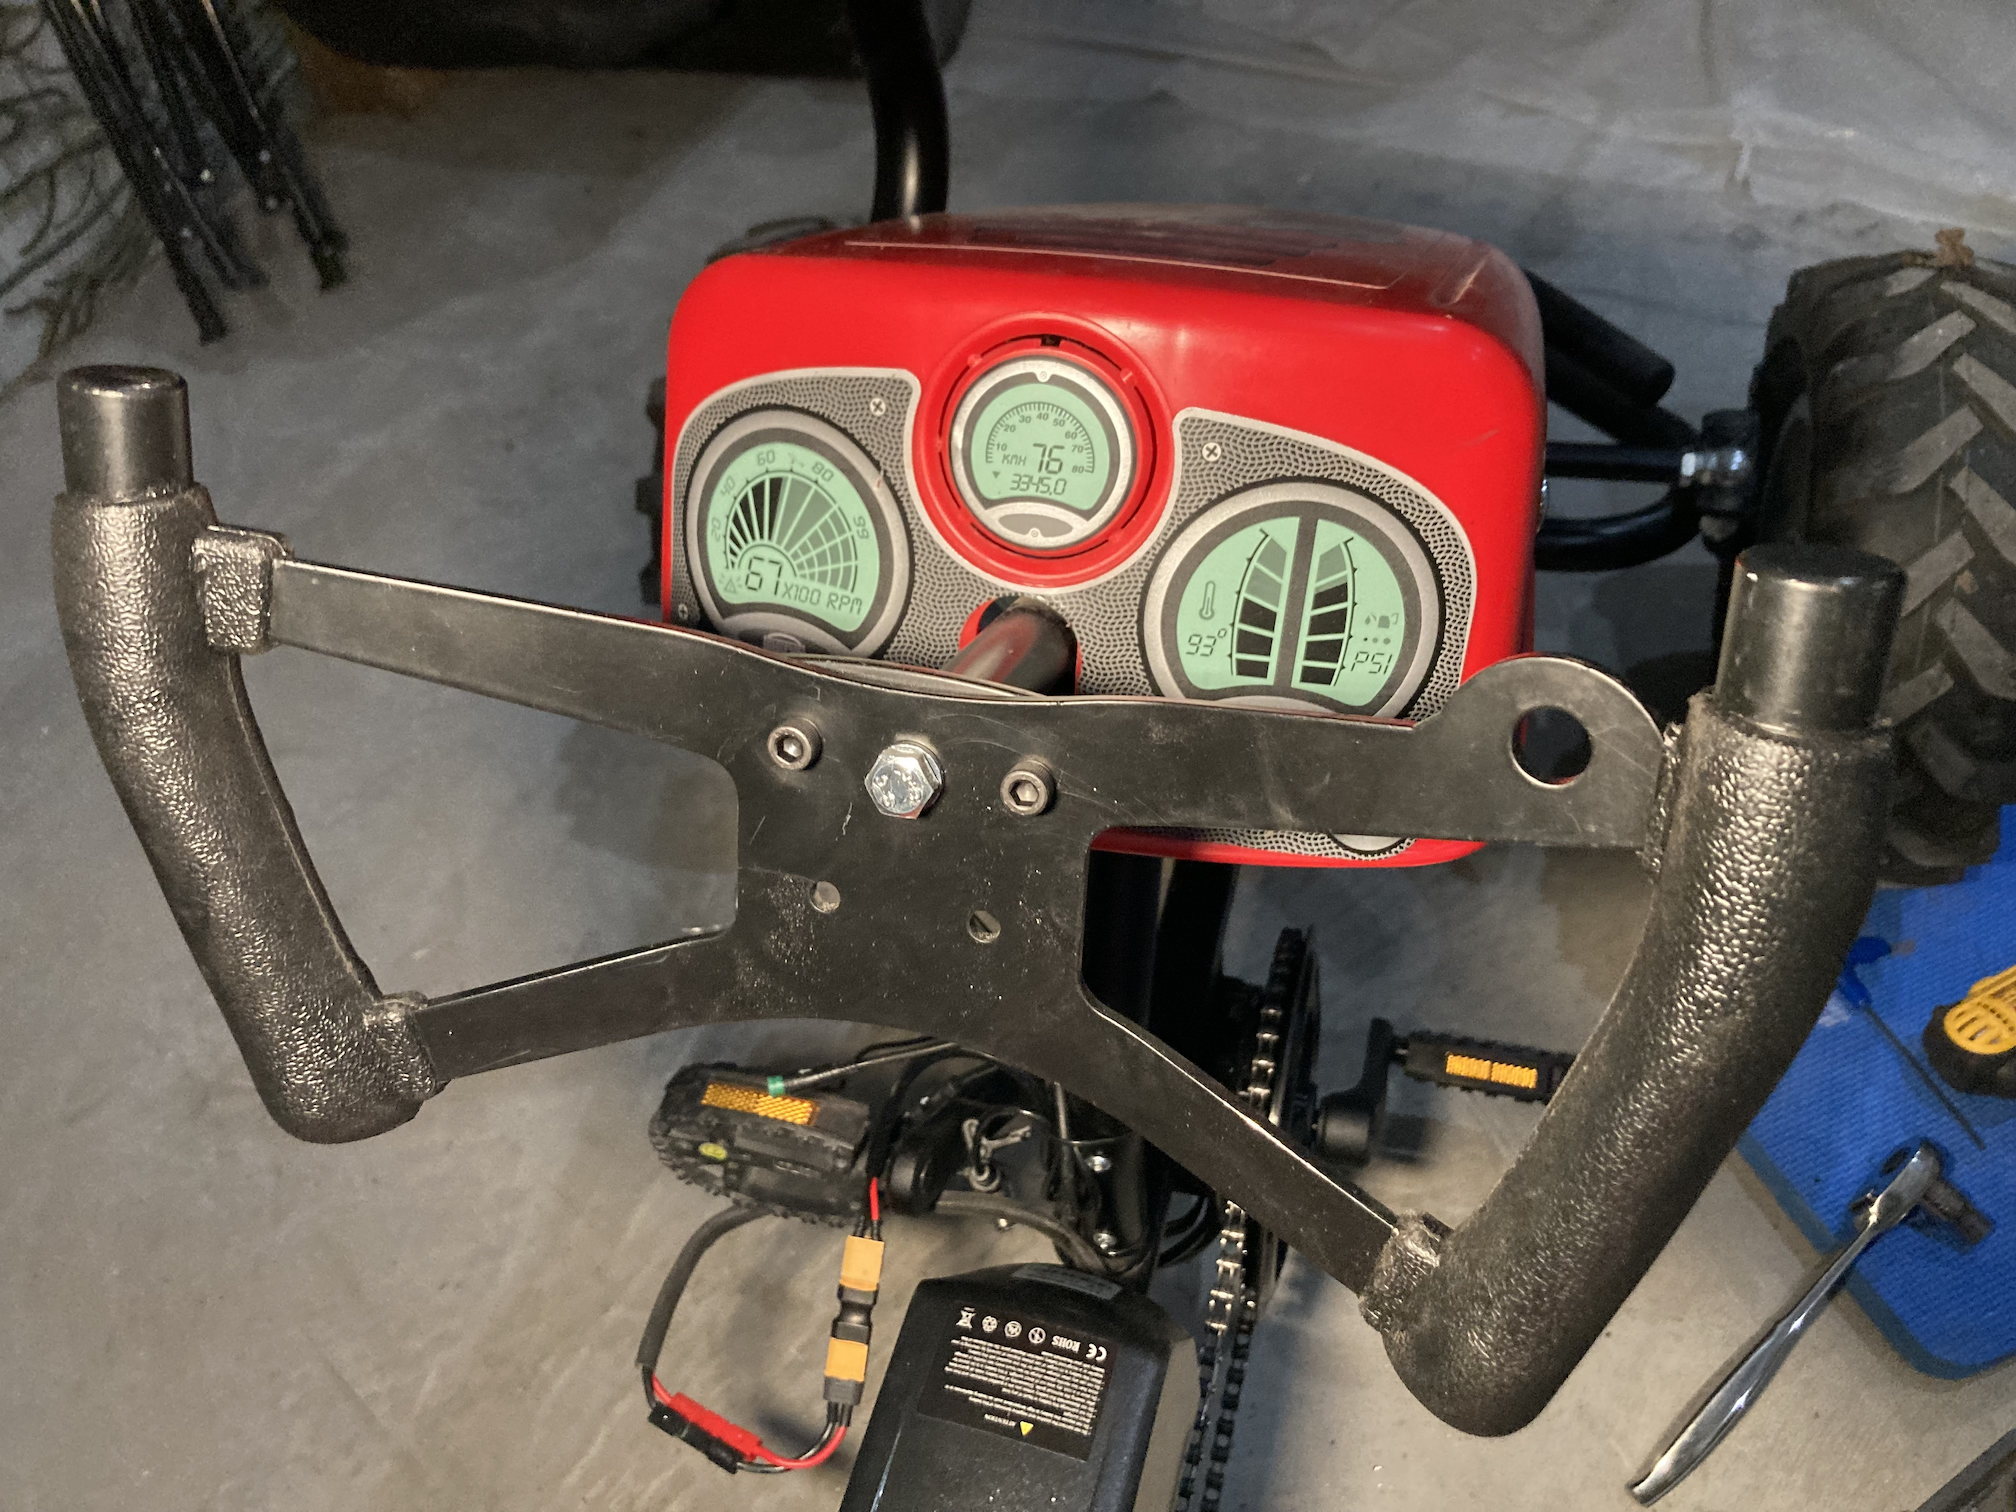
Computer Control Mount#
The eBike motor has a simple computer control for powering on, off, speeds, and lights. I decided to mount this on the drop tube that was supporting the steering column. I used a T-joint fence clamp (fit 1 ¼” OD pipe), to create a perpendicular mount to the drop tube to connect the computer. I drilled out a hole to bolt the T-joint to the frame, so it wouldn’t slip from vibration. The computer is then mounted around this extension. It is not that fancy, but it has held up over the course of a year.
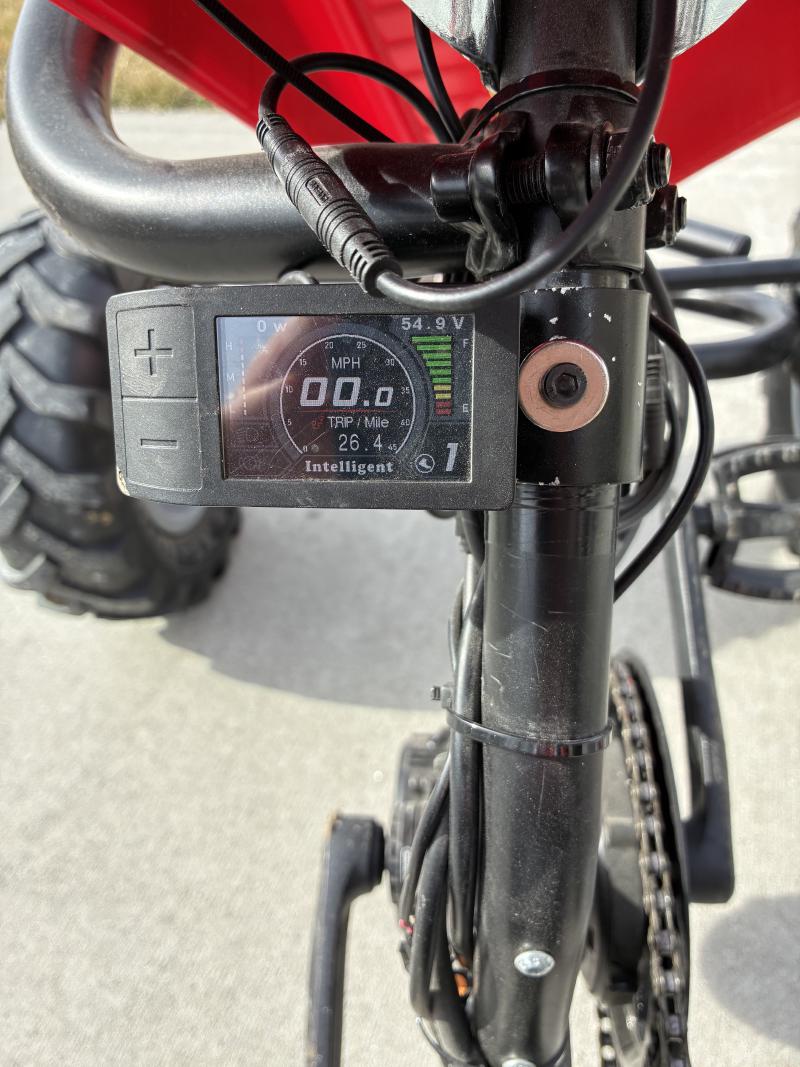
Speed Sensor Mount#
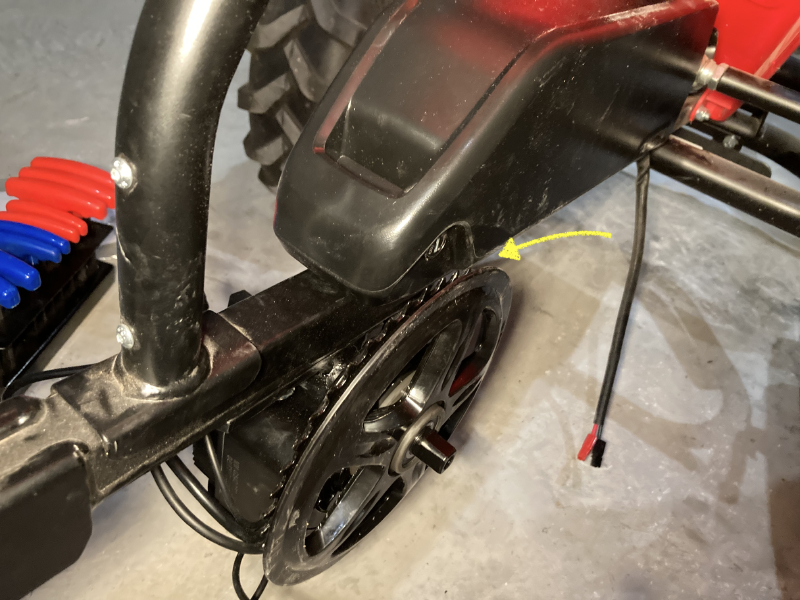
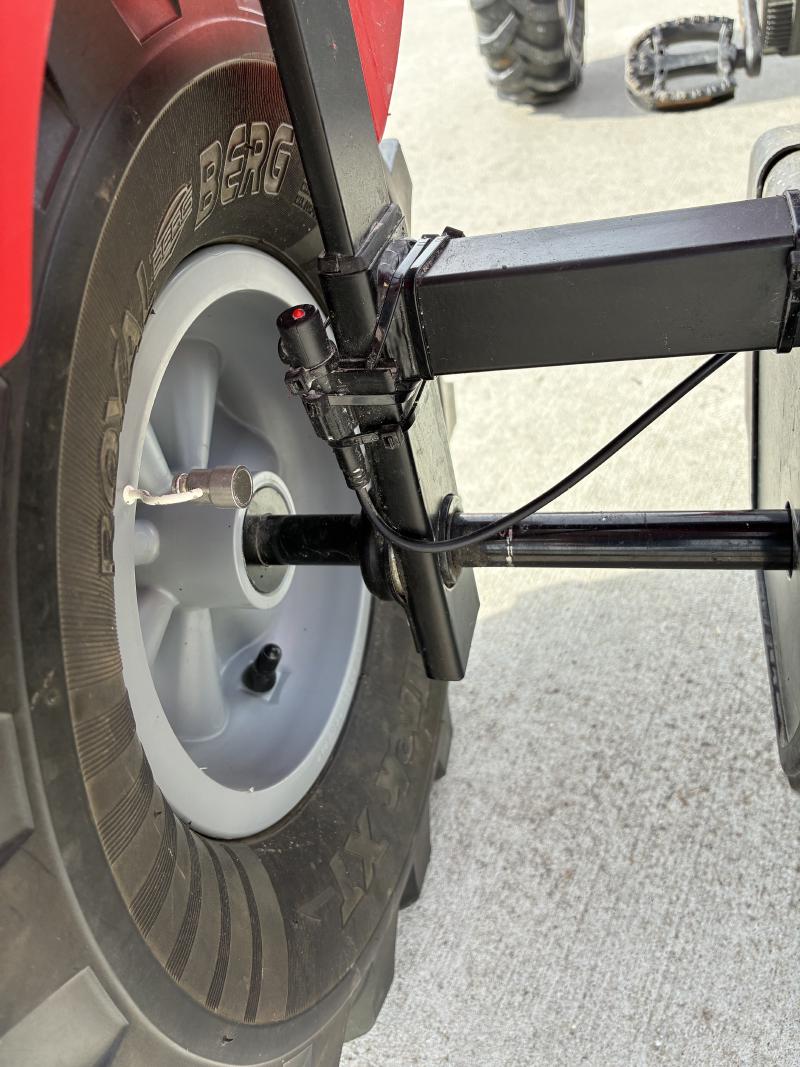
One of the final tricks in order to make this work, is to have a stable mounting location for the speed sensor. This is a magnetic sensor, where you would typically mount the sensor on the bike frame which is near the bicycle wheel, and have a magnet that mounts on the spoke. Each time the magnet passes the sensor, it triggers a pulse to the computer to calculate speed. For this to work accurately, this needs the sensor and the magnet to be pretty close (1 - 3 mm). While I don’t really care about the speed reading on the computer, if this computer isn’t measuring speed, it errors out on the computer control, disabling the electric motor. Therefore, you need a stable means that can trigger the speed.
In my setup, I zip-tied the sensor to the rear axle mount. Note, with the Berg tractor, only one wheel is getting powered with the powertrain, so I mounted the sensor on that side - but it of course doesn’t matter what wheel you use. The Berg tractor wheels are tubeless tires, with plastic rims. With the plastic rim, I realized I could actually mount in a fixture to install the magnet that gave it enough distance to be close enough to the sensor. I pre-drilled a small hole in the wall of the rim (where it wouldn’t pass through the rim), to install a simple cup hook, and then a magnet connected to this. With this setup, I was able to get the magnet to stay in a consistent location on the rim and have the sensor work consistently.
When I first did this setup, I thought it wouldn’t last. I was proven wrong. It has held up for this first year of usage well. If I were to improve this, I would probably look at making a 3d printed mount that I could fasten to the rim that would allow for more fine-tune adjustment. However, with this installed - it has just worked.
Here is a short clip of where you need to align the magnet with the sensor and ensure it is correctly signaling the movement.
With the speed sensor further from the motor, you will need to get an extension cable for the sensor. You can find extensions for the Bafang 3-pin sensor cables (found a 3’ one on Amazon for $12 that worked fine). Also, zip-ties are your friend in a project like this - as you want ot make sure all wires are well organized and secured against the frame so nothing gets snagged, especially if you are driving this through tall grass.
Costs#
Note, these costs are when I did this project back in December 2024, so I’m assuming some of these prices are slightly different. Thought it would be helpful to at least share where some of the key costs are at in a project like this. Also, some of these costs do not include shipping fees.
| Item | Cost | |
|---|---|---|
| Motor | $508.00 | |
| Battery | $433.00 | |
| Bottom bracket shell | $10.00 | |
| Welding | $50.00 | |
| T-joint fence claps (bag of 10) | $20.00 | |
| Steering wheel | $25.00 | |
| 3’ speed sensor cable: | $10.00 | |
| Total | $1,056.00 |
Final Product#
I have been really pleased with this project. Getting the eBike motor and battery can make this a bit of an expensive upgrade, but it definitely holds up for power and reliability. The tractor doesn’t get daily usage, but mostly on the weekends. As a result, it can last a couple months before a recharge. The Berg XXL pedal tractors have a good frame, and fits both kids and adults - and the motor can power it uphill, on grass, with an adult - which passed my test. These pedal tractors can be rough riding when going fast on gravel, as there is no added suspension - so you don’t typically try to go too fast. The only thing I have considered changing is installing additional breaks. The brakes on the original Berg tractor is a hand brake that goes against the rear tire. This works fine, but does take some reminding to kids who are riding it the first time - as they can get going fast in the tractor, and have to remember to use that break to stop.

Here is a short clip of driving on gravel to get a sense of the power (and vibration 😀)
Also, here are some photos of it out recently in the snow at night. Wanted to share a few shots of how good the light is with the tractor. Note, it isn’t very bright, but definitely sufficient for basic driving at night.
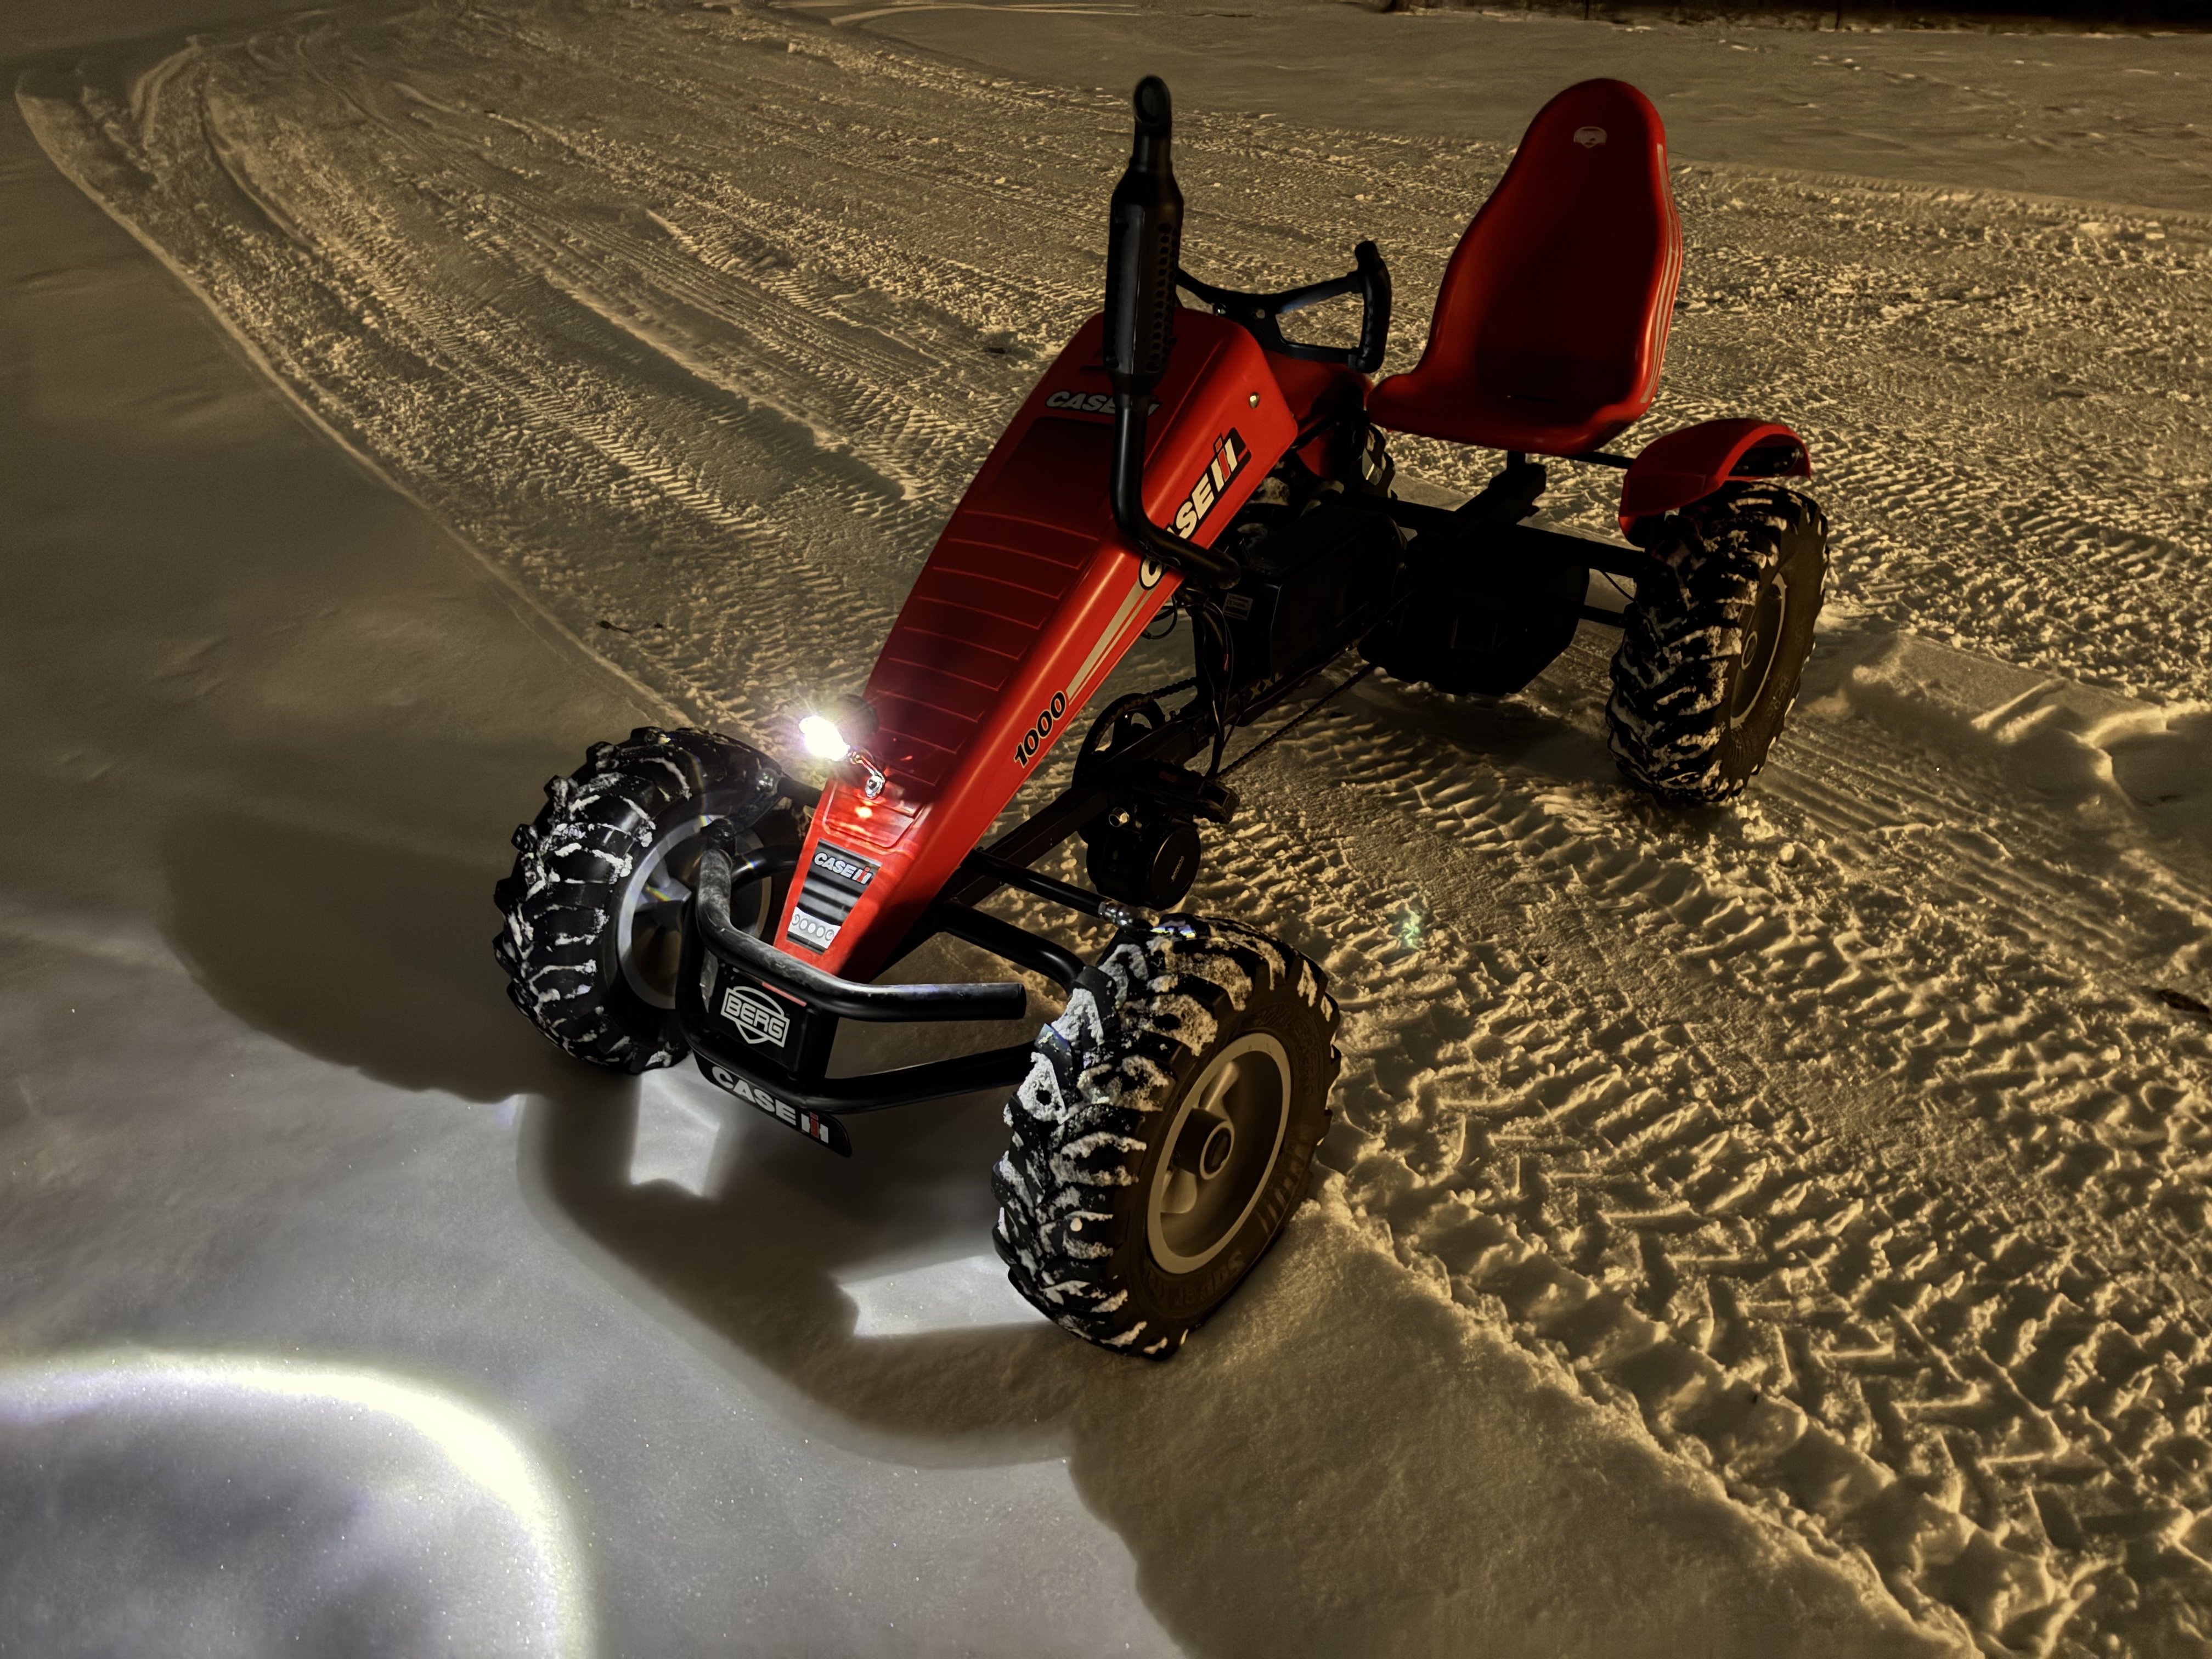
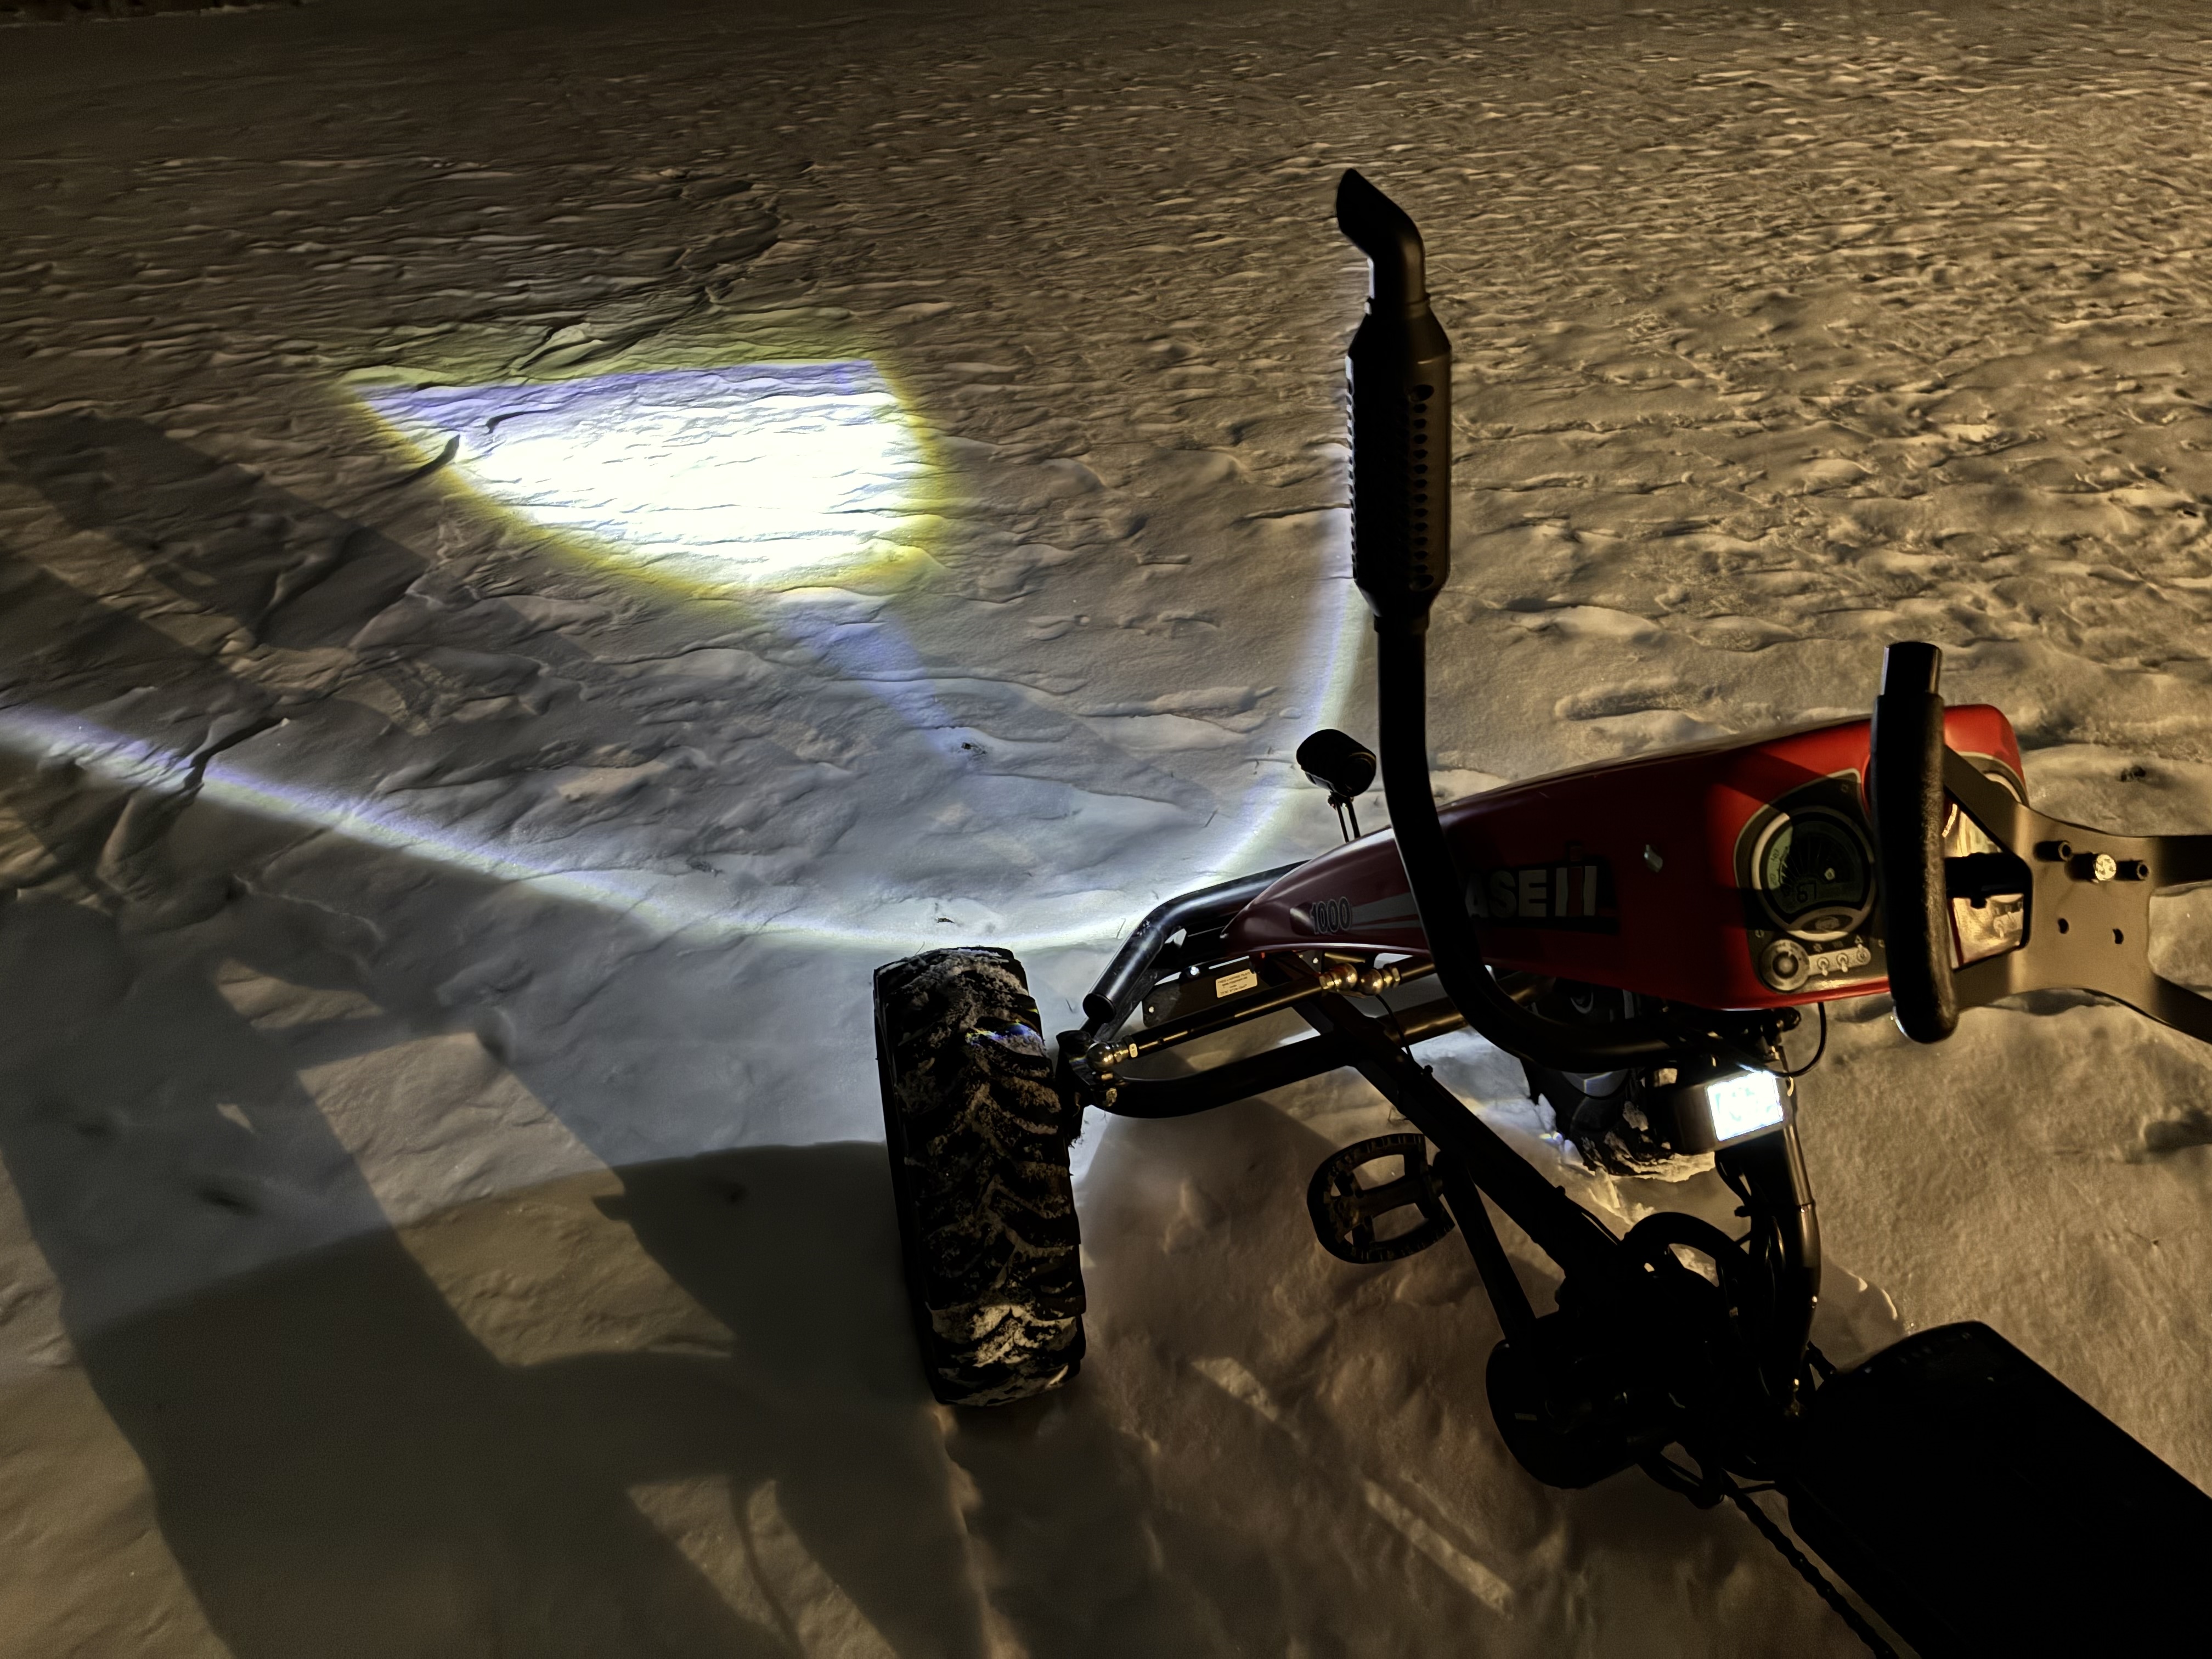
Snow driving can be a bit tricky with the single wheel drive and the ease of spinning out with all the power to the wheel. Regardless, it still is fun to drive - just a bit easier to get stuck if you aren’t careful. Here is a short clip from what you can see on the light when driving at night. Sorry, not the best angle when taking it, but gives you an idea of how much light comes off the headlamp.
I hope these notes are helpful if you are also exploring ways to electrify your Berg pedal tractors!